Rice Pudding – OTT…

Pioneer woman rice pudding

The Pioneer Woman’s Meat Loaf is a big fav here so we were really looking forward to trying her take on rice pudding

We made it as per the recipe except we substituted normal syrup for the light corn syrup (you can get light corn syrup?)

We’ll give it another go some time but it was really a bit of a disappointment – really a case of less is more – it was so sweet, it wasn’t very nice: the sweetness totally overwhelmed the taste of the raisins which are usually a nice offset to the texture and flavour of the rice mix…and not even a hint of the whisky taste survived the process…

Next time we’ll drop the condensed milk right out of it and try the topping from our dinner dates adventure…though I’m not sure that we really need such a topping with rice pudding and that by focussing more on the flavours in the rice, all the accompaniment it should need is a scoop of ice cream… might have a crack at gently reducing the raisin/whisky mix to emphasise those flavours – although 1/2 cup of whisky is a sacrifice not made easily…

Our one highlight was using the raisin infused leftover whisky to drown our sorrows afterwards…


Pizza DIY

I went through a bit of a pizza phase earlier this year using a  yeast-free recipe for the bases. It was OK but crispy crusts don’t really do it for me…

I was in Palmerston North a few weeks back and on my way home, stopped at the Milson Takeaway shop for fish’n’chips for dinner on the go…I had a wander around the butcher next door and picked up some good deal meat packs. I also grabbed one of the freebie ‘doing it with meat’ brochures off the counter…this had an attractive recipe for a ‘Turkish Lamb Pizza’, using a yeast-based base…

Next trip into civilisation and I was the proud owner of a bottle of baker’s yeast, as distinct from the yeast for the breadmaker…

As I mentioned in the other pizza post, I’ve always – for no known reason – been really wary of recipes using yeast other than the shake’n’bake ones for the breadmaker. So, I have to say, this recipe was so easy it was almost a non-event…

The Makins

The dough

1/2 teaspoon sugar

1 1/2 teaspoons dry yeast

3 cups of flour

2 tablespoons of oil

25 grams of melted butter

The topping

500 grams of mince – the recipe called for lamb: I used the beef that I had handy

1 large onion, finely chopped

1/2 teaspoon cinnamon

1/4 teaspoon allspice

1/4 teaspoon cloves

1/4 teaspoon dried chili flakes

1 can of chopped tomatoes

2 tablespoons of tomato paste

1/4 cup of parsley, finely chopped

1/4 cups of crushed pine nuts

1 tablespoon of lemon juice

The Makin’

The Dough

This was so easy!! Place the sugar and yeast in a small bowl and pour over 1/4 cup of warm water. Leave it until it froths up, after about 5 minutes.

Sift the flour and salt onto a clean warm bench top, making a well in the centre. Pour the oil, butter and 3/4 cup of warm water into this well, followed by the yeast mixture.

Knead the dough for aabout 10 minutes until it is smooth and elastic.

Place the dough in a lightly oiled warm bowl, turn it over to coat the top with oil and then cover the top with Gladwrap and a tea towel. Leave this is a draught-free warm area until the dough doubles in volume – this’ll take about an hour.
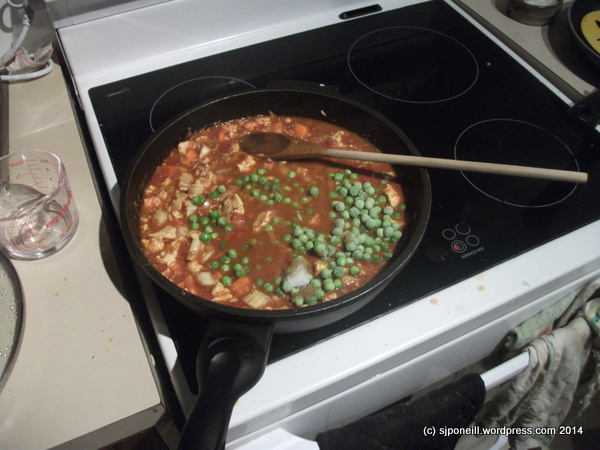
Lamb pizza-002The filling

Preheat the oven to 200 degrees C. The dough, filling oven should ideally all hit the ready mark at the same time.

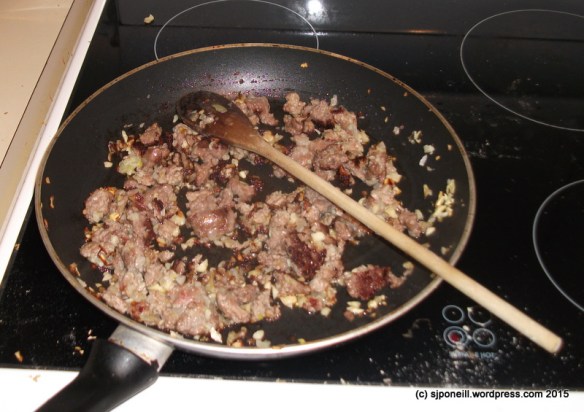
Heat a dash of oil in a frying pan and cover the onion until it is soft. I added a bulb of crushed garlic too.

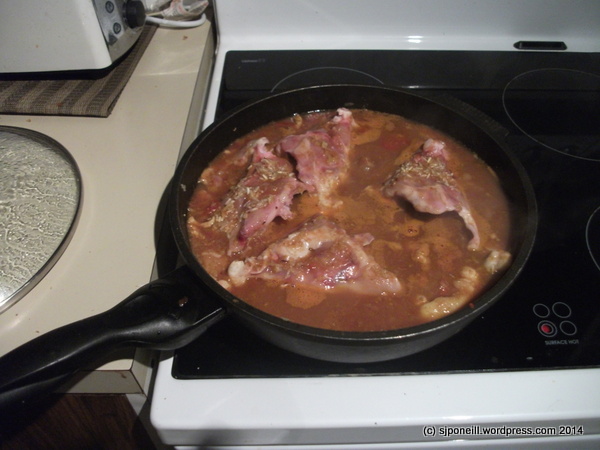
Ramp up the heat and add the mince, taking care to break up any lumps, and cook until browned.

Add the spices – I doubled the quantities of spiced and they were all still a bit too subtle – and cook for another minute or so.

Add the tomatoes, tomato paste, parsley and pine nuts. I only added two tablespoons of pine nuts – about half of what the recipe recommends – and they still dominated the flavour. Next time I would look at dropping them down to about 1 1/2 tablespoons.

Lamb pizza

Let it all cook over a low heat for another ten minutes or so, until most of the moisture has evaporated but not so much that the mince starts to dry out. Add the lemon juice and mix it in.

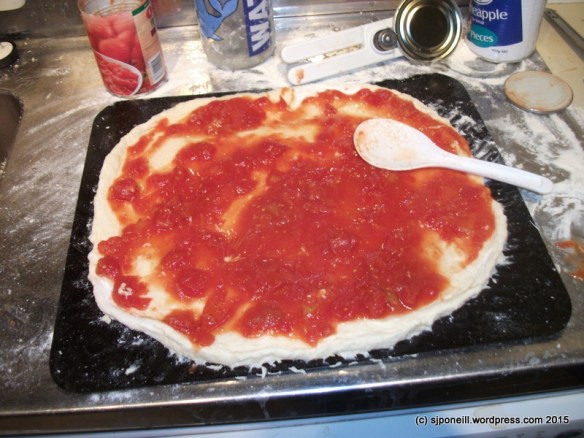
Once the dough has risen, divide it in two and flatten each piece until it is very thin – place each piece on a baking tray. Spread the mince mix evenly over each base and cover with Glad Wrap for about 10 minutes. Let the bases rise for about 10 minutes.

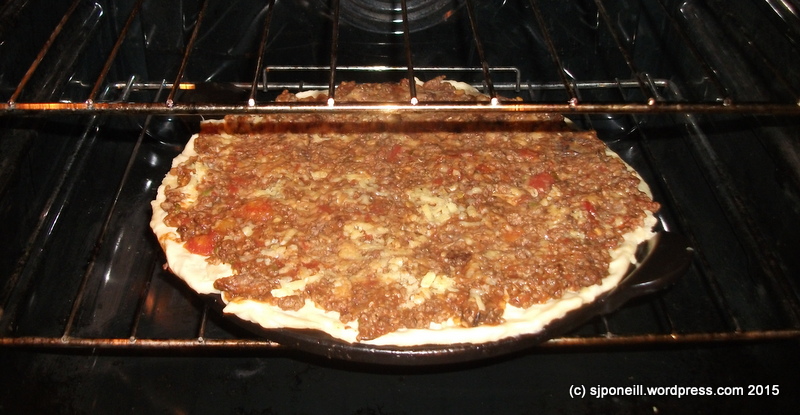
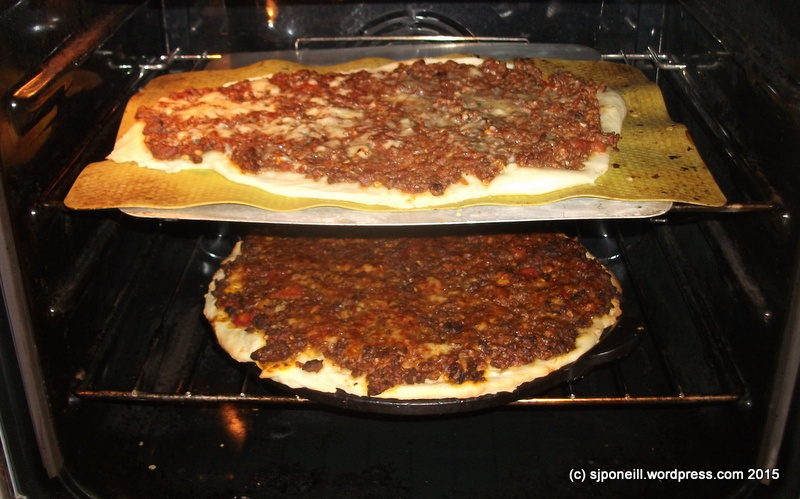
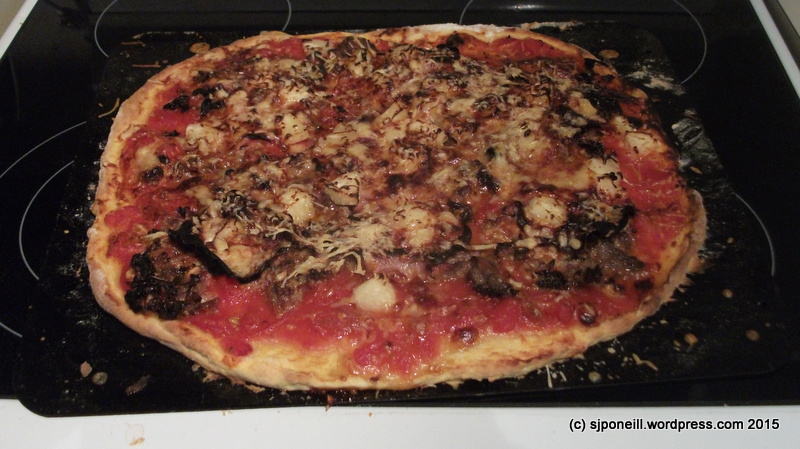
Remove the Gladwrap and place each pizza into the oven to bake for bake for 15-20 minutes until lightly golden around the edges.

Lamb pizza-001Lamb pizza-003
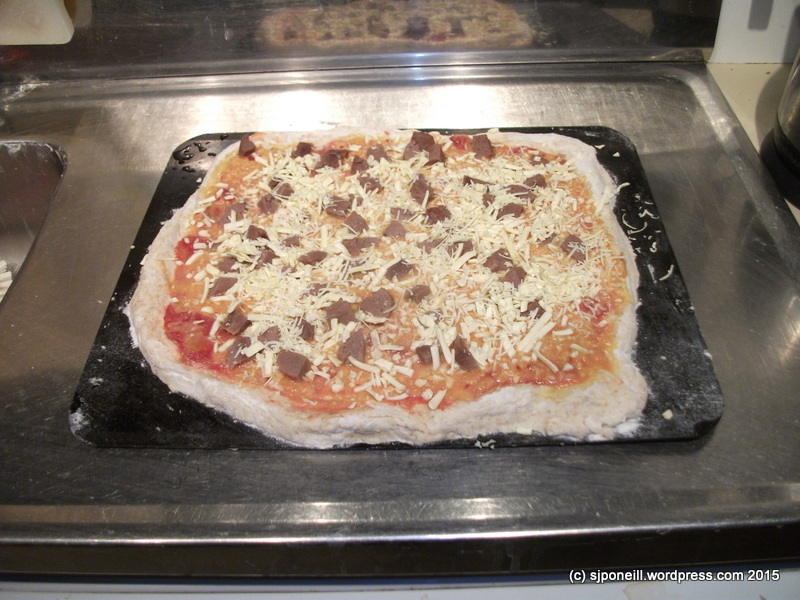
I also added a layer of cheese over the top of each pizza – what’s a pizza without cheese? The lesson from that is that if you are going to cheese a pizza, then cheese the damn pizza? No half measures and pile it on!!

I found this a tasty spin on more traditional pizzas but the topping was quite dry. Next time, I think that I will spread half a can (another one) of diced tomato over each pizza base before adding the mince mix plus, as above, adding a lot more cheese: Mozzarella if I have any or have made some, or otherwise a 50/50 mix of parmesan and cheddar…I’d also beef up the spices and back off the pine nuts…

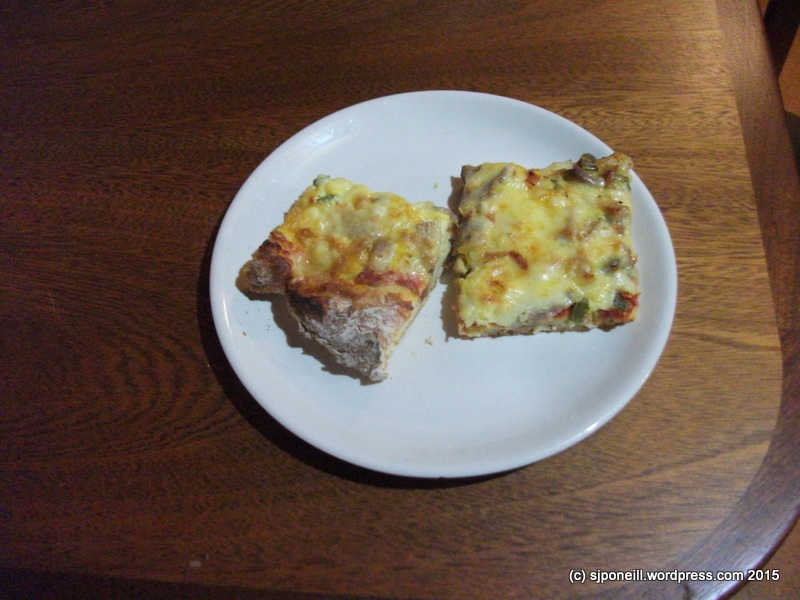
Still quite nice and enough for four meals for me…

Pizza – the first go-round

For reasons unknown, I’ve always been a bit scared of recipes that used yeast – beyond, of course, bread in the breadmaker…I stumbled across an online recipe for yeast-free pizza dough and decided to give it a go…

Normally, I record a recipe’s source but that seems to have dropped off this time so if this looks familiar, sorry…

1 cup of flour (self-raising or toss in 1 1/2 teaspoons of baking powder)

1/2 teaspoon of salt

60 grams of butter

150mls of milk

It is pretty simple and my first crack at it went pretty well with a nice bouncy crust – they way I like it – but this was probably due to my using some surplus pourable yoghurt instead of the milk and letting the mix sit for a while…subsequent ‘builds’ with milk only resulted in a crispy crust…if you like that sort of thing…

Still…none of my first attempts at pizza were especially horrible and I got a nice simple pizza-ring rhythm going…DSCF9127

Mix up and fry meat (mince, diced chicken, bacon bits, diced up boiled sausage), with finely-chopped onions, garlic, galangal if you have itDSCF9126

Roll out the dough and spread a can of diced tomato over it…OTY if you want to use plain or seasoned tomato…one pizza I spread some creamed corn in over the tomato and that came out pretty good too…DSCF9123

A pizza ready to go into the oven: yeast-free base, tomato and corn filling, with sausage, onion and cheeses (Parmesan and cheddar) topping…DSCF9128

Bubbling away nicely…I leave it on fan-bake until the cheese is melted, then switch to the grill to crispy up the top…DSCF9129

Ready to slice and eat…two meals at least here for me…sometimes I pad it out with some chunky chips in the oven or air fryer…in which the one pizza will do three meals…DSCF9119…possibly with a couple of midday snacks left over as well…

Fast and simple and only your imagination limits the fillings and toppings…still wasn’t that keen on the crispy bases though…

Wint’ring Up: Parsnip Pumpkin Soup

Raurimu weather Aug 12 15

It’s really winter up here on the Plateau and that means a couple of things: first up, for here, it’s really bloody cold; and there’s lots of cheap-as vegetables from the Chocolate Eclair shop in Ohakune (+ dangerously nice eclairs, donuts, sponges etc!!). Between juicing for breakfast and souping for later, I go through a big bag each of parsnips and carrots about every fortnight.

DSCF9237

The roasted veges about to go into the stock.

This is a nice and fast recipe from Weight Watchers that makes 4-5 double servings with a minimum of fuss or mess. I pretty much make it as directed except that I, as I do, added a three bubs of garlic to my second batch ( still needs more!!). The total cost – so long as I get the cheap veges from the eclair shop is only about $5 max including the garlic and pumpkin (only uses about 1/4 of a medium pumpkin!)

DSCF9238

Brought to the boil over a slow heat and simmering away.

DSCF9239

Good to go…

DSCF9240

Using the power-wand to mulch out the lumps – a neat piece of kit: only $17 at Harvey Normal but don’t put your finger in it to clean the blades when your other hand is still clutching the fast button…

DSCF9241

All set for consumption and freezing…

We’re on our third batch of this now with plenty stashed in the fridge for the long drought when there’s no cheap ‘Kune carrots and parsnips. It goes great with toast or scones (even better again with cheese toasties or cheesed scones) and, thick as it is, is uber-filling…Although it has a deep sweet texture and flavour, I think we’ll drop a little spice in the next batch just to add a little zip to the mix…just tossing up between upping the garlic ante or dropping in a tablespoon or two of curry…

Dinner Dates

I had an attack of the late night sweet munchies a few nights ago and wanted something quick and simple to satisfy the urge. There has also been a large jar of dates in the pantry that has not been getting much attention recently and the last thing I need is a jar of time-expired dates…

The winning contender was this recipe from The Whimsical Wife

Ingredients:

The Pudding

10-12 dates, roughly chopped

1 1/2 Tbsp Boiling Water

1/8 tsp Baking Soda

11/2 Tbsp Butter

1 1/2 Tbsp Brown Sugar

1 1/2 Tbsp Flour

1/2 tsp Baking Powder

1 Egg (originally this was one egg between two desserts but was too dry)

1 Tbsp Walnuts, roughly chopped

The Sauce:

4 Tbsp Brown Sugar

1 Tbsp Butter (originally only a teaspoon but not caramelly enough)

4 tablespoons of cream (originally this was only a teaspoon of milk or cream but this led to a sauce that was more fudge than sauce – the extra liquid makes all the difference).

Method:

Place the chopped dates and water in a large mug and microwave for 50 sec until the dates are softened.

DSCF8748
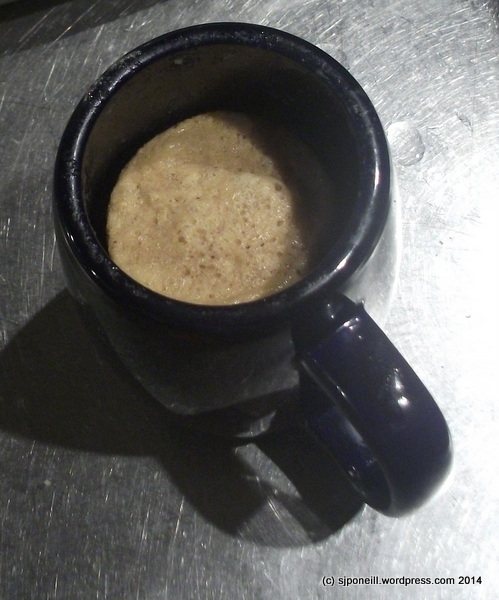
Add the Bicarb soda and let it sit for 30 seconds before mashing the dates roughly with a spoon.

DSCF8749DSCF8751Add the butter and place again in the microwave for 10-15 seconds to soften and melt.

DSCF8752DSCF8753Add the sugar, egg, walnuts and flour and mix to combine thoroughly. The original recipe called for only half the walnuts and for these to be sprinkled on top – I think I get a better result mixing more walnuts throughout the mix.

Place in the microwave on a sauce for 1 minute. It may need a further 10-20 sec to finish it off completely, depending on your microwave.

For the caramel sauce, place the the sugar, butter and cream into an ovenproof ramekin and microwave for 20 seconds.

Remove and stir and repeat another three times.

Shake the sticky date pudding from the mug into a dessert plate, and add ice cream.

DSCF8755
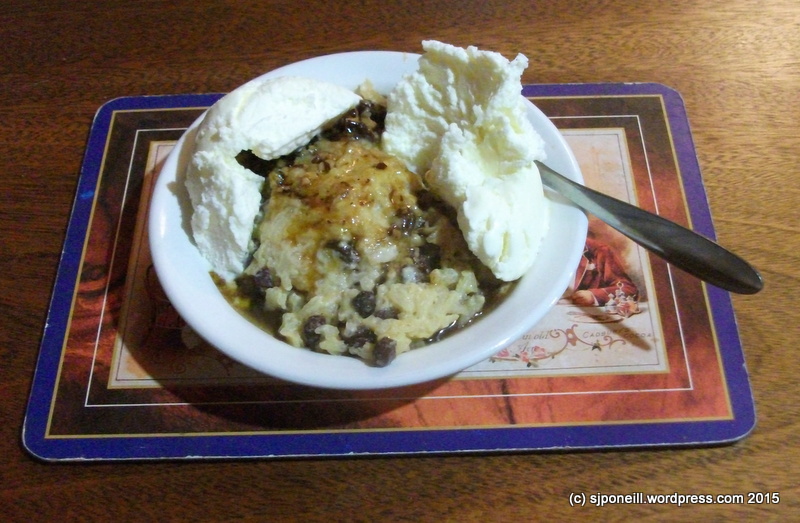
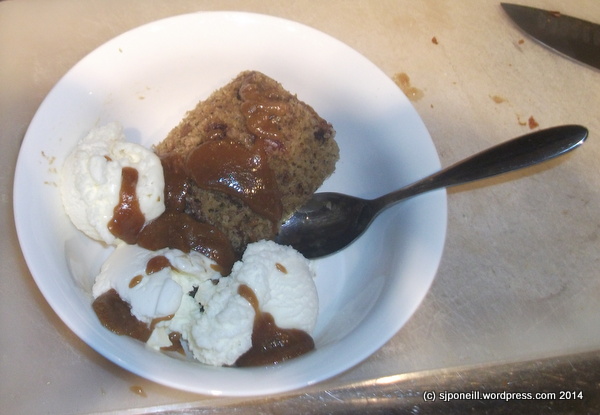
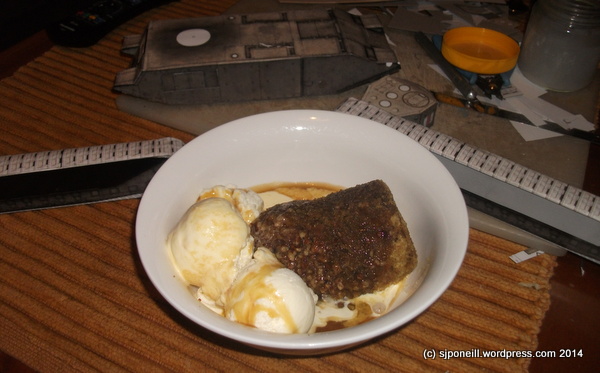
…and cream and drizzle the sauce over it all. you can see from these pics of my first attempt that there simply isn’t enough sauce to be useful…

DSCF8754

…and that it is quite fudgy…not the desired effect at all. I didn’t have any cream handy for this go-round so it was even drier…DSCF8756

…whereas my modified version has a rich caramel sauce that soaks into the sticky date pudding and mixes with the cream…DSCF8759-001

Finished!!DSCF8760-001

Definitely a keeper but very very very rich – even I could only eat this maybe once a week at most…the pudding itself is a lot less gooey than the other similar cake in a  cup desserts that I have tried so I intend experimenting with it further to see how it goes in the chocolate, banana and golden desserts in a cup that I have played with previously…

Banana bread in a cup

DSCF8630

Start with a big mug and a long spoon…

It’s been a while since I visited my 30 Cake in a Cup Challenge…I either haven’t had the late night munchies, or when I have, hadn’t had the makings…The stars aligned the other night when I found some bananas frozen in the freezer…

I found the recipe at Pass the Sushi…I couldn’t see what to do with the extra teaspoon of sugar on the original recipe so I left it off and it doesn’t seem to have hurt it at all…

The makings

3 tablespoon flour
1 tablespoon sugar
2 tablespoon brown sugar
1/8 teaspoon salt
1/8 teaspoon baking powder
1/8 teaspoon baking soda
1 egg
1/4  teaspoon vanilla extract
1 tablespoon vegetable oil
1 tablespoon milk
1 ripe banana, mashed

The making

In a bowl, or right in the mug, whisk flour, sugar, salt, baking powder, and soda.

Add egg and combine until just incorporated with dry ingredients.

DSCF8633Mix in vanilla, oil, milk and mashed banana.

Pop into the microwave for 3 minutes.

DSCF8634

It will seems to go a little crazy…

DSCF8636

…but will turn out OK…

DSCF8638

A tad plain alone…

DSCF8639

…but more social with ice cream…

DSCF8640First impressions were good, tastes much like a butterscotch pudding with banana instead of golden syrup…think it’s a keeper…


Happy Dinner

DSCF8606After quite a few weeks of rice-based dinners, I’ve gone a little conventional for a while…O also participating in a taste test for tomato sauce and, quite frankly, tomato sauce and rice are not the happiest of combos…

To provide a consistent taste testing environment for the next eight (of ten) days of testing, it’s sausages for dinner…Having forgotten that I had applied to do this testing, the cupboard was a little bare but tonight they had some chicken and tarragon sausage packs on special at the service station that also acts as out closest dairy…very nice with corn fritters and a couple of eggs…simple and tasty…


More nuts

Aside

My latest spin on the peanut chicken rice recipe ..there was some chicken cheap at the supermarket so o grabbed two packs. As normal, nothing is as good as it seems, and each pack was only 3-4 stripped skeletons…as an experiment I made up the peanut rice mix as above and then dropped the chicken into it….
DSCF8474
There wasn’t enough meat on each bird to make it worth removing before cooking but I was hoping that it would loosen up as it cooked and that I would be able to scrap some off…
DSCF8490
That worked out nicely and in addition to contributing to the stock, each contributed a bit of meat that was easy enough to scrape off the cooked skeleton…

All frozen and placed in the freezer for a lazy cooking day…

Note: this was originally written as a comment for the thread linked at the top of the post but Google decided that it didn’t like the WordPress URL so this was the alternative to save the text until Goggle got its knickers untwisted…since it became a post in its own right it might as well stay one…

Golden Cake in a Cup

Image


A couple of months back, I kicked off my 30 Cake in a Cup Challenge. The challenge I am finding is that I am not really that much of a dessert person at the moment and so have not been feeling that driven to try more cake in a cup recipes. A couple of nights ago, though, I did have an attack of the munchies quite late in the evening.

I’m not really a big chocolatey person but I do a mean butterscotch pudding when cooking the ‘normal’ way: I thought then that I would experiment with the chocolate cake on a cup by swapping out the cocoa for a tablespoon of golden syrup for a butterscotch cake in a cup dessert.

It really was that simple, and with all the ingredients mixed together, looked like this.

DSCF8376

I thought that I might have to teak the amount of syrup but a single tablespoon was just right. There was a bit of leakage but I have long since learned my lesson about using a ‘just in case’ plate to prevent messing the microwave tray. Some thing in the dynamic has changed a little as this variation does not stay risen as well as the chocolate version…I may add a smidgen of baking powder next time. Thinking on it, next time I may also reduce the syrup content just a little too…

My plan was to have a third picture showing the golden cylinder plated nicely with a curl of ice cream. I keep the ice cream in the freezer in the garage so that it is not as accessible in the event of a munchie attack but when I went out the scoop and a plate, I found that the freezer was so cold that the ice cream was frozen solid, like, rock solid and that was the end of that plan and I didn’t even have any cream to pour over instead…I’m note sure what happened with the freezer: the controller is at floor level so possibly it has been knocked when I have been working in the garage…

But not too worry…it is a nice variation of the chocolate cake in a cup theme…

Update 3 June 2014

I had an attack of the munchies later on Sunday night and made this again. This time I did a straight swap cocoa for syrup, and also added a dash of baking powder. One of these changes must have made the difference because it rose a lot better that my earlier attempts, enough that I will probably use a bigger cup next time…

DSCF8419

Spicy ricy

DSCF8363

The enhanced vegetarian version underway

This post was originally meant to be an addendum to an existing post on the Healthy Food Guide Spicy Indian Mince and Rice recipe [PDF: Spicy Indian mince and rice – Healthy Food Guide ]but it seems that I never got around to publishing (or even drafting) that post in the first place…

Every day a new recipe or two from HFG pops up in my Facebook feed and I’ll grab anything that looks doable with basic i.e. inexpensive ingredients…meals that can either be frozen and/or that will last over a couple of days are popular at the moment…

What You Need

  • 1 tablespoon canola oil
  • 1 large onion, finely diced
  • 2 cloves garlic, peeled, chopped (I’m used garlic that has been crushed and frozen for simplicity and ease of use + I’m lazy)
  • 1 tablespoon grated fresh ginger (I dice up the onion, ginger and (if fresh) the garlic using my every handy Tupperware Terminator – see below)
  • 400g lean lamb or beef mince
  • 2 teaspoons curry powder
  • 2 teaspoons garam masala
  • 1/2 teaspoon chilli powder
  • 1/2 teaspoon ground cloves (the recipe says whole cloves which I have but hate picking them out later on)
  • 1/2 teaspoon ground cinnamon
  • 2 bay leaves
  • 3-4 whole cardamoms, crushed (optional) I just used a teaspoon of cardamon powder because I have a bottle of it that will most likely not get used otherwise.
  • 1 cup long-grain or basmati rice
  • 400g can chopped tomatoes in juice
  • 2 cups liquid chicken stock
  • salt and pepper, to taste
  • toasted slivered almonds and currants
  • chopped fresh coriander (optional)
The Tupperware Terminator

The Tupperware Terminator

What you do

Heat the oil in a large non-stick frying pan. Add the onion, ginger and garlic. Cook until onion begins to brown.

Stir in the mince and break up any lumps. Cook, stirring frequently, until mince has lost its pink colour.

Add the spices and cook for 1-2 more minutes before adding the rice, tomatoes in their juice and stock. Bring the mixture to the boil and then reduce the heat to a gentle simmer. Cover and cook, stirring occasionally, until rice is tender. I find that, at a slow heat, this takes about 30-40 minutes. If it starts to dry out, just add some more water.

Season with salt and pepper then serve. Garnish with a sprinkling of almonds, currants and coriander (if using).

I’ve made this a few times since discovering the recipe in March but until last night it seems to have avoided both camera and blog. It doesn’t take a lot of time or effort to prepare and is another uber-flexible recipe that you can tweak depending on what you might have available in the fridge.

Having successfully experimented with a  vegetarian version of the Going Nutty With Rice recipe, I thought I might try the same with this one. Looking to provide dinner for the next 3-4 nights I also increased the quantities to make the same quantity as that nutty recipe. The change I made were to substitute the following from the original recipe above:

  • 400g lean lamb or beef mince became two diced carrots, a diced stick of celery, a diced up chuck of cauliflower (about a cup) and a cup of frozen peas.
  • 2 teaspoons curry powder was increased to three teaspoons.
  • 2 teaspoons garam masala was increased to three teaspoons.
  • 1/2 teaspoon chilli powder was increased to a  full teaspoon.
  • 1/2 teaspoon cloves was increased to a  full teaspoon.
  • 1/2 teaspoon ground cinnamon was increased to a  full teaspoon.
  • 1 teaspoon of cardamon powder. I kept this the same but probably should have increased it to 1 1/2 teaspoons.
  • 1 cup long-grain or basmati rice became 1 1/2 cups.
  • 2 cups liquid chicken stock became three cups. This was enough stock for flavour but I had to add two extra cups of water before the rice was cooked properly. I actually used Maggi Green Herb stock powder as I found that I was out of chicken stock.

I was very happy with the result although for dining in polite company I might look at reducing the curry and chili powder by about a third so that they match the proportional increase in the size of the recipe i.e. the 50% increase in the rice and stock.