Green Take 2

via WordPress Daily Prompt Jolly

Write a new post in response to today’s one-word prompt.

P71218-223108.jpg

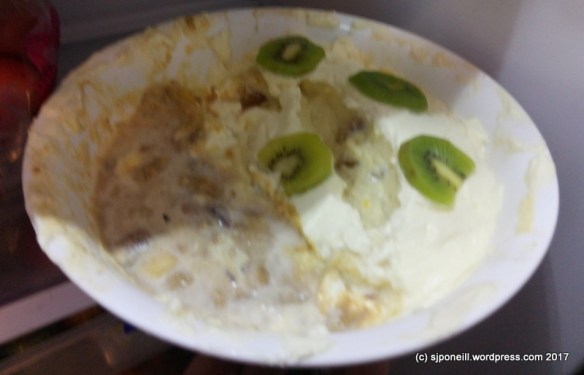
A second take on green, revisiting no-cheese cheesecake #4, Nadia Lim’s avacado, lime and coconut ‘cheese’cake

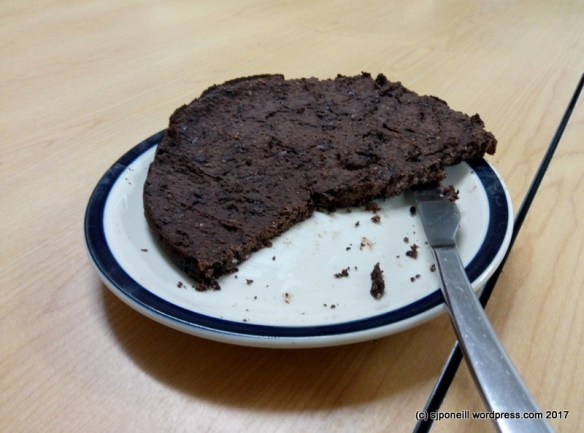
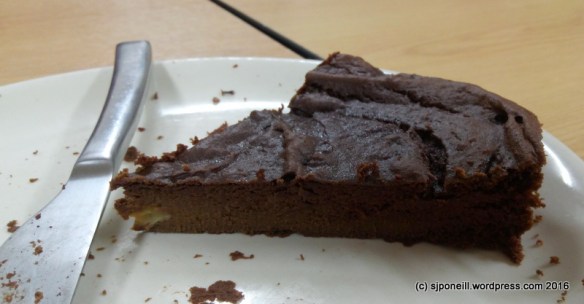
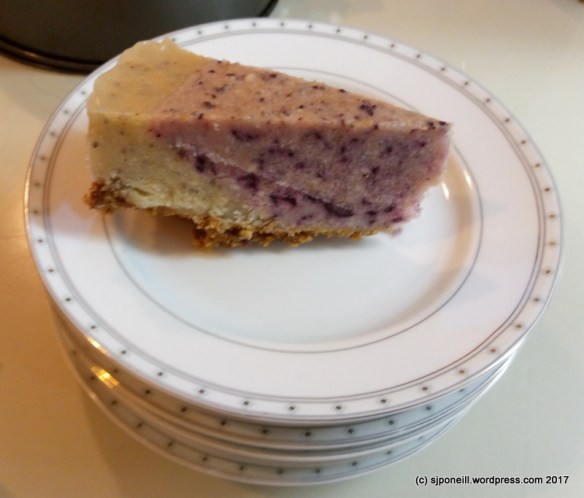
I’ve pretty perfected my no-bake cheesecake base, adapted from this blueberry and beetroot cheesecake:

1 1/2 cups of coconut almond meal leftover from homemade almond coconut ‘milk’ production. You could make the meal directly by blending a cup each of raw almond and coconut flakes.

3/4 of a cup of dates, chopped, optional to top up to a cup with raisins

1 tablespoon of coconut oil, melted to a liquid

A pinch of salt

Next:

Put the meal in the food processor and blend, slowly adding the dates until the mix turns a deeper brown as the oils mix with the meal.

Add the coconut oil and salt and blend.

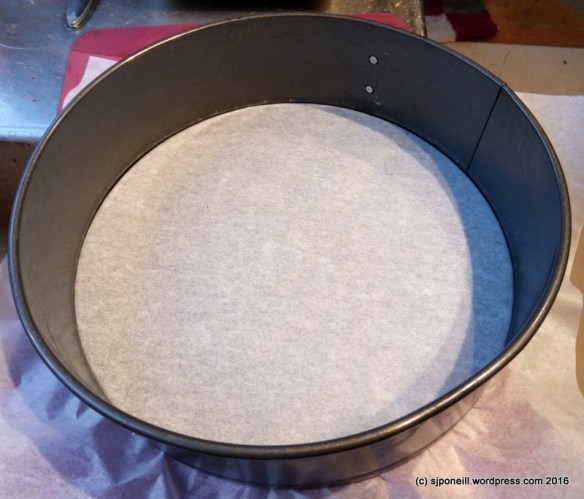
Pour the base mix into a prepared (I use a baking paper base) springform baking pan.

The topping is dead easy. You’ll need:

5 medium firm ripe avocados

1 cup of lime juice (I use the bottled stuff as the limes up here are poor dry things with hardly any juice

a pinch of salt

1 cup of coconut cream (I skimped as I only had a 150ml can)

2 teaspoons of vanilla essence

1/2 a cup of maple syrup

1/4 cup of vanilla sugar (I have this big jar of it that I Hardly use because it’s , like, y’know, sugar)

2 tablespoons of gelatin (actually used closed to 1 1/2 as the box wasn’t quite as full it it made out)

2 tablespoons of cold water

3 tablespoons of boiling water

Then:

Place all the ingredients, except the gelatin and water, in the food processor and blend until the mixture is smooth.

Mix the gelatin powder with cold water and leave it to swell for a few minutes. Add the boiling water and mix well to completely dissolve the gelatin (make sure there are no little lumps!).

Add the dissolved gelatin mixture to the food processor and blend with the avocado mixture until it’s all very smooth.

Without too much mussing around, pour the topping mix into the springform pan and spread into an even layer. If you muss around too much, the topping will strat to set in the food processor.

Place the pan in the fridge for a couple of hours until ready to serve.

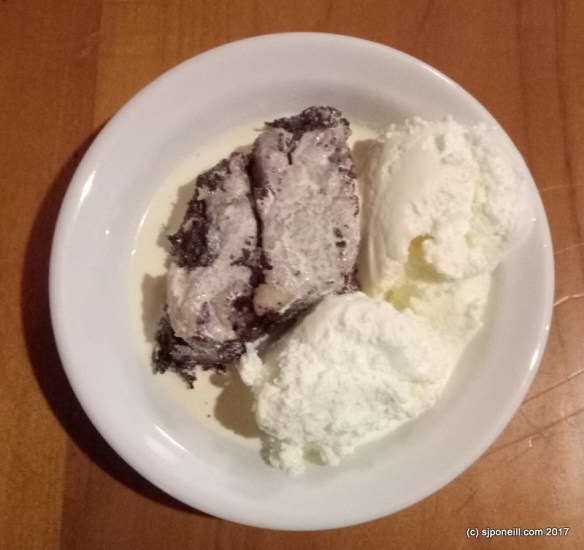
Nadia Lim recommends a berry coulis to go withe ‘cheese’cake. I made one by blending a mix of strawberries (tis the season), blueberries, blackberries and raspberries. I’m not particularly sold on this as it is a tart topping on an already quite tart ‘cheese’cake – I think cream, whipped or straight, and vanilla ice cream make for a better accompaniment for this…

This is a very simple and very fast ‘cheese’cake to knock up. Depending on the availability of avocados, it may be a bit pricey…not tested but the original recipe says it can be frozen so there is scope to knock a few up when ‘cados are cheaper and freeze them til later in the year…

Chocolate, beetroot and raspberry cake thing

P71120-225940.jpg

This didn’t turn out that well at all but went down well with the target audience…not sure what went wrong but it may be that I didn’t bake it long enough and there was not enough flour for the old skewer trick to determine whether it was done or not…I also used real cocoa powder which really upped the chocolate ante possibly past that intended by the author who only wrote cocoa powder into the original recipe from Healthy Food Guide.

I’m not normally that much of a chocolatey person and found it totally overpowering on its own but quite a pleasant treat once tempered with cream and creamy vanilla ice cream. Probably because it didn’t fully bake properly this one had a very interesting texture from the grated strands of pear and beetroot…

Next time I will back off on the cocoa content and possible add a little coconut flour for body. It would be so good to be able to get colourless cocoa so we get the flavour and the deep rich red colouring of the beetroot…

Winter solstice dinner

Still no snow this winter…we did have a bit of a teaser dump mid-May but nothing that stuck around…21 June was the shortest day. We have a largish expat community here, mainly outdoorsy types like guides and ski field staffies, who get a bit homesick for a winter Christmas dinner so we did one, bring a plate style…

19250437_10155338393603771_743030424804491918_o

My opted plate was Christmas pudding, the unhealthier the better, and who better for unhealthy culinary fun but Nigella. This is her ultimate Christmas pudding, made exactly as per the recipe except I for got on the day to make the whiskey sauce…I guess we’ll just have to do this again so we can see how that goes…

P70620-213353

It is rich as, mainly sherry-soaked fruit with about half a cup each of flour and breadcrumbs to tie it all together and steamed for a total of eight hours: five hours for the initial cook, then three hours to warm for dinner itself – in the interim, Nigella says it will store nice on a dark shelf for months…

…and yes…we did set fire to it – with four firefighters in attendance – next time I will serve it on a more dished plate so that the surplus fuel pools there and not on the table…

19264528_10155338393263771_4138062939378414774_o

It burnses, it burnses….


A second oxymoronic treat…

P70517-203128.jpg

My first go at an oxymoronic treat was nice and got good reviews but I felt it was still a bit heavy…once again the path of true serendipity took me on another path. A friend posted a different sweet potato/kumara-based chocolate cake on her Facebook page and one of her daughters responded that it wasn’t as good as her black bean chocolate cake…a challenge, for sure…

The recipe is from Chocolate Covered Katie and can be made in a flash: I left work at 4-32 (it’s a 15 minute drive, 20km, 485 vertical metre trip) home, stopped at the National Park GAS station for a can of black beans (was sorely tempted to opt for the chilli black beans but might reserve that for a colder night) and had this OUT of the oven by 5-35…it is that simple but I did modify Katie’s recipe slightly:

  • 1 1/2 cups black beans (1 400ml can or 1/3 cup dry black beans before rehydration)
  • 2 tbsp cocoa powder
  • 1/2 cup quick oats
  • 1/4 tsp salt
  • 1/3 cup pure maple syrup
  • I dropped out the stevia as it doesn’t need any extra sweetening after the maple syrup
  • 1/4 cup coconut oil It didn’t say to melt or soften it but I had a couple of lumps in the mix that were quite hard to smooth out so, yes, at least soften the coconut oil if you live someplace too cold for it to remain liquid in the bottle.
  • 2 tsp pure vanilla extract
  • 1/2 tsp baking powder
  • 1/4 cup of chocolate chips This worked for me, personally better than the 1/2 to 2/3 cup recommended in the original recipe.

Preheat the oven to 170 degrees.

Combine all the ingredients except the chocolate chips in a food processor, and blend until completely smooth.

Stir in the chips, then pour the mix into a greased pan.

Cook the black bean brownies 15-18 minutes, then let it cool at least 10 minutes before trying to cut or remove it from the pan.

This was only the first attempt but I much prefer the crispy crunchier texture and the more subtle chocolate flavour than what Katie originally intended. The fire fighters and rangers who tested the end result on Wednesday and Thursday certainly give it a thumbs-up…

Still keen to try a chilli variant next…

An oxymoronic treat…

An recipe that I didn’t, not being particularly chocolatey inclined, seek out…it appeared in one of my culinary feeds and the concept of a healthy chocolate cake begged further exploration, more so when one of the main ingredients is kumara…

I cannot find the source of the original recipe: all the links in my PDF of the recipe go to Happy and Healthy (one of my main sources of healthy raw materials) so I’m assuming that this a Kiwi recipe from a site not particularly visible to Google…

P70411-165840

Rather that try to cut a neat circle with scissors to line the base of the pan, I tried trapping the baking paper between the base and sides of the spring-form pan: perfecto!!!

Ingredients

2 medium (baked & skinless) kumara
1 tablespoon coconut flour
1 tablespoon virgin coconut oil, melted.
60g or 6 squares of 85% cacoa dark chocolate (Lindt or Green & Gold), melted
¼ cup unsweetened cacao powder
¼ cup organic rice malt syrup
3 eggs
1 teaspoon vanilla extract
1 teaspoon baking soda (sifted)
¼ teaspoon sea salt

Instructions

Preheat the oven to 165°C

Lightly grease a 20cm cake ring pan with coconut oil.

Place the baked sweet potatoes in your food processor and process until pureed.

Add the rest of the ingredients and process them until well combined.

Pour the mixture into the cake tin and bake for about 30 minutes. Bake slightly longer for a crunchy outer shell.

Let it cool. Once cool, place it in the fridge overnight.

P70412-103525

This is the first result made exactly in accordance with the recipe. I used the Lindt chocolate and, once it had cooled overnight in the fridge, had collapsed into quite a firm slice with e very strong chocolate taste. This version did rise during baking but slowly deflated into a more solid slice during its overnight sojourn in the fridge. To be honest, I think it has a better flavour and texture ‘deflated’…

P70412-204035

For my second attempt I didn’t change anything in the recipe but used the slice as the centre layer on another variation on the no cheese cheesecake theme. The effect that I was after was a strong contrast between the deep chocolate centre and a tangy orange topping.

The base is the standard mix of dates, coconut oil and meal derived from my nut milk production line. This base had a very strong baked overtone and I think this is from overheating the meal when drying it over the fire – we scraped most of this off and the slice was strong enough to still support the top layer.

The orange topping is a cup of cashews soaked overnight in the the zest and juice of a dozen navel oranges and then pureed in the blender. More zest required next time, I think, as the orange taste was quite distinct but without the tangy effect I sought.

P70425-203826

An outcome of discussions on the orange chocolate cheesecake was a curiosity regarding the necessity for the syrup in the recipe. We felt this could be safely replaced with a mashed banana. Version #3 replaced the quarter cup of syrup with a mashed ripe banana and the Lindt chocolate with an equivalent weight of Healtheries sugar-free chocolate baking bits. To compensate for the additional liquid in the banana I added two extra tablespoons of coconut flour.

The result was definitely workable and one small segment survived fire training the following night. An unexpected but not unpleasant result was the embedding of small chunks of unmashed banana – not properly mashed – spread through the slice, delivering a nice banana hit every couple of bites. I don’t think it was necessary to add the extra coconut flour so will skip that next time but keep the banana. The chocolate flavour was not so smooth or strong – but still eminently doable – as with the Lindt but I’m not sure whether that would be due to the change in source chocolate or the drier mix caused by the extra coconut flour.

P70426-205726

A surprise chunk of unmashed banana is just visible in the edge closest to the knife…

Definitely a winner recipe…very simple to make, albeit with the slight inconvenience of needing an overnight chill in the fridge and with the high kumara content, if nothing else, is at least one way to get the kids to eat their veges…

A four power tool weekend

It wasn’t that restful but it was a good weekend. An early start for an ambulance shift in Taumarunui saw an extension into the afternoon after two jobs in the morning…no more eventuated but the afternoon was a good opportunity to get some hands-on with the on-board monitors. I got home with the best intentions of starting on the lawns but my pre-mow poo patrol took us into twilight.

S70314-022506

“Never repeat”? I wish but unlikely…

That, with a 4AM alarm, saw an easy dinner of sous vide corn beef with another crack at Jen Rice’s broccoli and cranberry salad.

P70317-194038

Sous vide brings out the colour in red meat…

The original recipe on the Anova website recommended cooking for 48-72 hours (gives a whole new meaning to slow cooking!) but the follow-on comments suggested that this was over-cook and likely to result in a mushy mess. As the uncooked beef felt a little mushy, I let it run in the sous vide for ‘only’ about ten hours. I’ve mastered by sous vide technique and use clothes pegs to secure a shopping bag around the top of the cooking pot to prevent the water evaporating and then stack a few tea towels on top to keep in the heat. Comfortable that running low on water during an untended sous vide won’t be an issue, I could have left this on much longer – just would have needed to have a Plan B for dinner on Saturday night…

While nice, the corned beef was still a little gristley…I expect that a 3-4 times increase in the cook time would address this…Unlike the normal cooking method for corned beef i.e. in a pot of water, sous vide traps all the fluids and flavours in the bag. With corn beef this means that the salt taste is much more defined…not so much stronger as sharper…definitely onto something with this dish! The salty beef works so well with the sweetness of the cranberries and the bitter effect of the balsamic broccoli.

P70319-203215

Dessert was a nibble on these coconut almond cookies – sweeter than the ones I made last year – than leaven the coconut almond meal (which is quite heavy) with homeground flour and coconut flour. It also has more sugar so are a tad sweeter. These are really filling and it only takes a couple to fill any post-main gaps…They’re based on this recipe from Celebrating Sweets but modified to lighten the heavier meal left-over from my nut milk production…

I’m not sure what scales exist for measuring the satisfaction of an outdoor working day but the number of power tools used must surely be one of them. Sunday was a glorious bluebird day that boded well for getting on top of lawns and clearing the scrubby self-seeds from the lounge windows outlook. Four power tools this day…I fired up the cheap Chinese chainsaw and diced up the logs that had been sitting opposite the garage for months, then laid into the scrub in front of the lounge.

P70319-193138

The plan is to eventually open access into all the punga groves in front of the lounge…

Powertool #2 was the dropsaw mounted on an old school desk that we use for dicing up wood for the chippy, anything less than about five inches in thickness. It makes reducing logs to chippy-sized chunks a breeze and the saw dust goes into the compost bin as a dry mix to offset the wet mass waste from the kitchen.

The old reliable mulcher was #3 into the mix, converting leaves and smaller branches into four bags of mulch to fill out hollows in the ground for later landscaping. The mulcher has had a long hard life but keeps on keeping on. It’s more than paid for itself in unpaid dumping fees at the transfer station and the associated fuel costs for the round trip with the each trailer load of green waste…

It’s been a very wet not-summer – the recent break of ten days or so of sunny weather were the longest such break we have had for the better part of a year – and I have resorted to using the big ride-on to just keep on top of the lawns and prevent them totally running away. Even they were quite long and it felt good to finally be able to power up the mower and knock them down to a respectable level. Even more satisfying to be able to mow around the area when the now diced logs had been residing for so long. The many loads of grass went with the mulch to smooth out hollows in the ground for later compacting and shaping….

P70319-193213

So nice to finally clear this area…the baths will go up on blocks next…

It’s been a long time since I had such a satisfying day in the garden: I crashed with a V (a now rare sweet treat!) to start on the next series of JAG (so shoot me!) as my reward…

Pistachio, chia seeds and vanilla “icecream”…

P70203-182004.jpg

The first fire training night after I got back from my training course the Fire Services’s  National Training Centre in Rotorua was our first Brigade meeting for the year. These are every two month and are where we decided on allocation of funds and resource, develop training programmes etc. In our Brigade we always lay on a dinner.

I normally draw dessert – our dinners are all self-cooked: everyone contributes to a course. This time I wanted to play with some of the ideas I’d hoovered up off the ‘Net in the previous few weeks. I settled on three recipes to make a single disk but the way it panned out, I ended up with two separate desserts.

Plan A was for a  pistachio chia pudding layered with a plum cream topped with a dairy-free vanilla ice cream. The layered part went together OK, although my layering needs work as you can see from the image above.

I had to double both recipes as I was preparing for fourteen – that’s a lot of pistachios to shell and ideally to fill the cups I would have needed the same again. The pistachio flavour is very strong and distinctive: it went OK with the plum cream layer but both would have been better if served separately- next time I do this recipe, I’ll be thinking more along the lines of three sampler deserts with plain ice cream…

The ice cream just didn’t work and, going on many comments on the page, that’s more down to the recipe than anything that I did or didn’t do. Simply the recipe, Jamie Oliver or not, does not contain any ingredients that will set it. A more recent note on the recipe page says that the staff will have a look at it. What I ended up with was a large vanilla-flavoured ice block with not the slightest creamy characteristic.

My Plan B recovery plan was to grab a tub of TipTop vanilla ice cream from the local GAS petrol station and Four Square dairy – when they learned it was for the Brigade dinner, they kindly refused to charge me for it…thanks, team!

The ice cream was the common denominator between the pistachio and plum dessert and what was now a rich vanilla cream over ice cream dessert. The pistachio and plum dessert would have been better served as two separate option and not layered in the same cup – next I’ll serve each of the three desserts in separate corners of a dinner plate, with a scope of ice cream in the middle.

I’m quite keen to play more with pistachios as the flavour is so distinctive and strong; the plum cream I could take or leave but the vanilla ‘cream’ was to die for – seriously: rich, sweet and strong…unfortunately not enough survived for any photos…next time..

No cheese cheesecake #4

p70215-220120

If I stopped looking at Facebook, I’d stop getting these inspirations…I thought I was done with the ‘ no cheese’ cheesecake thing (#1, #2, #3) but this one just looked too good not to try…It’s another Nadia Lim creation, a bit pricier than the others only because avos area  little pricey at the moment: not a problem in season or if you are lucky enough to have your own tree…

p70215-220128

I need some more practice building a  level base as it always seems to build up unevenly around the edges, giving this untidy appearance of more base than filling: it is actually, more filling than base, just doesn’t look it…

My base was simply the meal left over from a batch of almond/coconut milk (a litre of milk gives up exactly the right amount of meal for the base). The avocado gives the filling a silky smooth texture and the lime zest and juice adds a real zing to the flavour – or it would if the only limes at New World that week weren’t nasty little dried up things with nary a drop of juice….and if my back bottle of lime juice had more than half the required cup of lime juice.

I’m tempted to try this again this week with the full charge of lime to see how much zingier it is…it was OK this time but I felt the lost zing potential…

p70215-220434

I did make the berry coulis recommended in the recipe but tossed in the last of the coconut milk just to expend it…tasted OK but the milk neutered the sharp crisp berry taste…should have just used water like last time…

Still…it went very nicely with ice cream down at the station…


Dairy-free (almost) trifle

I volunteered part of the dessert for the National Park Village Fire Brigade Christmas dinner – we opted to eat in over going out as we’re a pretty foodie brigade and there’s none of the logistic hassles…

In our family, Christmas dessert can be many things but it’s not what it is unless there’s pavlova and trifle on the table – and the trifle should be strong enough to strip paint or sedate small children at ten paces…I wanted to keep it fairly green so this is a combination of a number of recipes that kept it as natural and as free of dairy and processed ingredients as possible.

The sponge

This was nice and simple: I just used my coconut flour pumpkin muffin recipe and baked it as a sponge instead of as individual muffins. I did cheat a little and bought a back-up sponge from New World just in case that mix didn’t work or if I needed more sponge than the original mix provided.

The jelly

I’ve always found packet jellies to to be rather weak and unnatural flavour-wise and one of the themes of my Green Journey has been to reduce the amount of processed food in my diet, or at least, reduce the number of processing steps between me and the raw material.A bit of Googling found me a good recipe for real fruit jelly [PDF: 3 ingredient real fruit jelly – Kidspot ]. I opted for orange juice instead of the apple in the recipe and also used fresh-squeezed juice not stuff from a bottle.

Let me tell, you, a litre of fresh-squeezed orange juice takes a lot of squeezing!! I don’t think I have squeezed that many oranges since winning a bottle of vanilla Galliano and kicking of the great Harvey Wallbanger craze of 2012…the pithy problem with oranges and such is that you can’t just drop them in the juicer…still a good arm workout!

I don’t think that I mixed the gelatin in properly as the jelly never ‘jelled’ even after a full overnight in the fridge. It tasted awesome and very fruity though and the sponge soaked up enough of it that the trifle didn’t turn into a big slush bowl.

The custard

I wasn’t sure if a non-dairy custard would behave the same as a traditional milk-based one so I bought a litre of cows milk, just in case. I needn’t have worried as Cast Iron Cookie’s recipe for dairy-free custard How to – Dairy-Free Custard performed as advertised. When you get down to step 10, don’t wait start pouring…I hesitated and the custard almost set in the pot. Knowing this, next time, I’ll pour as soon as the first bubble appears AND have the final fruit topping layer ready to place on/in it as soon as the custard is poured.

I used a layer of whipped cream – lightened with Greek yoghurt (100 ml cream to 200 grams of yoghurt)- just to hold the Kiwifruit topping in place.

The other

As I mentioned above, trifle in my family should be able to strip paint or sedate small children at ten paces. To achieve this result, you need to add some quantity of alcohol. The recipe I consulted recommended a half-cup 50/50 mix of brandy and sherry: NOT nearly enough: this provided scarcely a hint of the desired effect and would probably need to be be doubled at least…

p61221-220734

Pretty stink photo, sorry, snapped it just coming out of the fridge for seconds…

No Cheese Cheesecake #3

Continuing my cheeseless cheesecake theme from before Christmas – yes, it has been a while since I did some writing! – this was the third (#1, #2)recipe that I wanted to try: not only cheeseless but also raw…it is from The Awesome Green and, apart from increasing the mix for a bigger dish, it is pretty much out of the box…

p61214-204134

The base is the simplest of the three: all you need is:

  • 2 cups of dry pitted dates, soaked overnight
  • 1 cup of raw almonds

Placed them in a food processor and blend them until you get a sticky mix: spread this evenly across the base of your pan – I used a 9″ spring form, lined with baking paper just in case the base needed some support when lifted out of the pan – needn’t have worried: it was sturdy as and easily popped out and on to a plate.

For the filling you need:

  • 4 cups raw cashews, soaked overnight
  • 2 lemons, juice only
  • 1 cup of coconut milk*
  • 4 tablespoons of honey
  • 1 cup blueberries, fresh or frozen

Drain the cashews and place them in the food processor  with the lemon juice,
coconut milk and raw honey.Process into a smooth cream.

Pour the cashew mixture in the pan on top of the crust, and spread evenly.

Because I doubled the mix for a larger pan, I made the filling in two batches. My plan was to add some blueberries to the second batch for a layered result but I my haste to get it done, I forgot to check whether the first batch had set before pouring in the second, hence the inner/outer effect you can see below…

p61214-204008

Done properly, it would have looked quite good but adding blueberries to both batches would have been even better.

To top off the topping – as a last minute addition to the plan – I tossed some semi-frozen strawberries, raspberries and blackberries into the blender for a berry coulis to pour over the top.

Happy with the final product but next time, I think I’ll add some vanilla ice cream…

* The recipe said “...use homemade for the raw version or full fat for the vegan one...” I used homemade coconut milk (well, 3:1 coconut/almond) and I don’t see how this could upset any vegan sensibilities as all it is is coconut, almond and water…