Pour encourager les autres

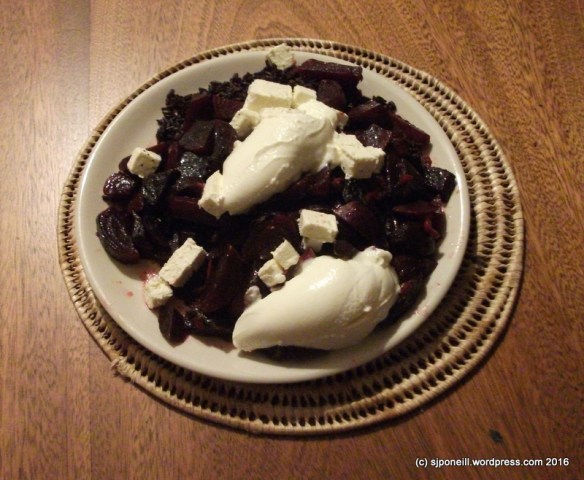
Baking cakes is not yet one of my fortes…I can do a mean beetroot chocolate cake but I’m not really a chocolatey type – note to self: try it without the chocolate or significantly reducing it – and so what’s the point…The banana peel cake was OK but fairly bland and had enough sugar in it to excite a kindergarten of pre-schoolers…

DSCF0225

Toasted

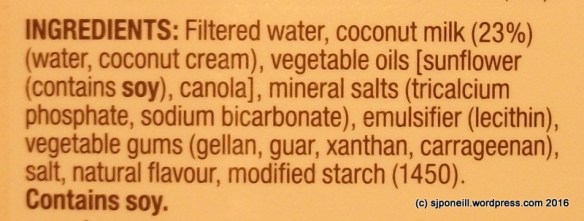
I’m getting right into coconut as a core ingredient and bought some coconut flour from Hardy’s in Taupo to try it out as an alternative to wheat flour and because I like trying new things our.

I searched for cool things to do with coconut flour and found this recipe for a coconut cake + coconut icing that was dairy- and processed sugar-free. I also liked that it was a Kiwi website as well so there was no need to translate any ingredients.

Ingredients

  • 1/3 cup coconut flour
  • 1/2 tsp baking soda
  • Pinch of salt
  • 1/2 cup virgin coconut oil
  • 1/3 cup liquid honey
  • 4 large free range eggs
  • 1 tsp vanilla
  • 1 Tbsp lemon juice
  • 1/2 cup desiccated coconut

Directions

  • Preheat oven 170C. Line and grease a 25cm springform cake tin.
  • In a small saucepan gently melt the coconut oil until liquid. Remove from the heat and whisk in the honey. Add the eggs one at a time whisking well between additions, then add the vanilla and lemon juice.
  • Combine the coconut flour, baking soda, salt and desiccated coconut in a large bowl. Pour over the egg mixture and whisk thoroughly to combine. The mixture will be quite wet but the coconut flour will absorb a lot of moisture as it bakes.
  • Pour into the tin and bake for 30-­35 minutes. Check with a skewer.
  • Remove from the tin and cool completely on a cake rack.

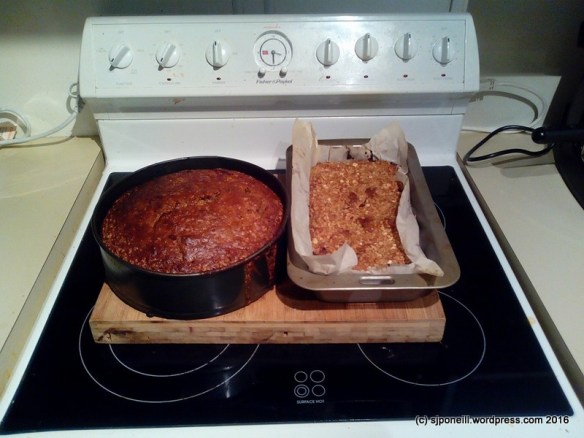
The cake itself was quite easy to make but came out a bit dry but I’ll take responsibility for that – got distracted with someone else and left it in the oven an extra five minutes or so. I also didn’t read into the comment about the coconut flour soaking up a lot of the liquid in the mix. I dallied before pouring it into the baking dish: it started to set in the bowl and didn’t lie smoothly in the dish.

It was the icing that destined this cake to be recycled. Because the top was so uneven, I caked the icing on thicker than was good, so thick that the taste and smooth texture of the icing overwhelmed the cake buried beneath. I should have delayed using this icing recipe until I had some more natural coconut i.e. other than the supermarket coconut that the recipe warned might be too dry and/or defatted. I couldn’t get it to breakdown into butter so I added more coconut oil which kinda worked – if it hadn’t been so thick.

I did try toasting the top of the iced cake to see if that lightened it up at all. It was a slight improvement and would have worked had the icing not been so damn thick.

DSCF0226

Ready to recycle

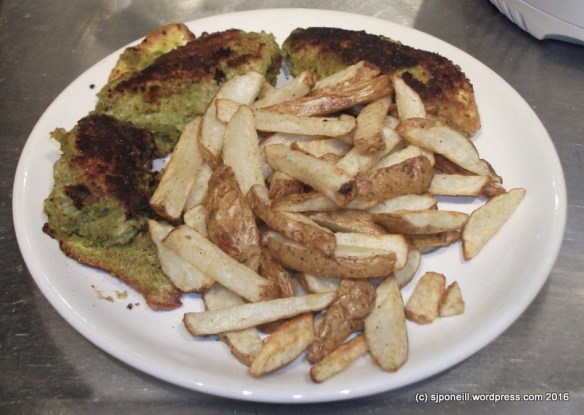
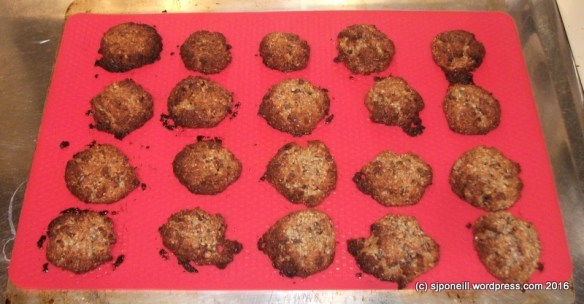
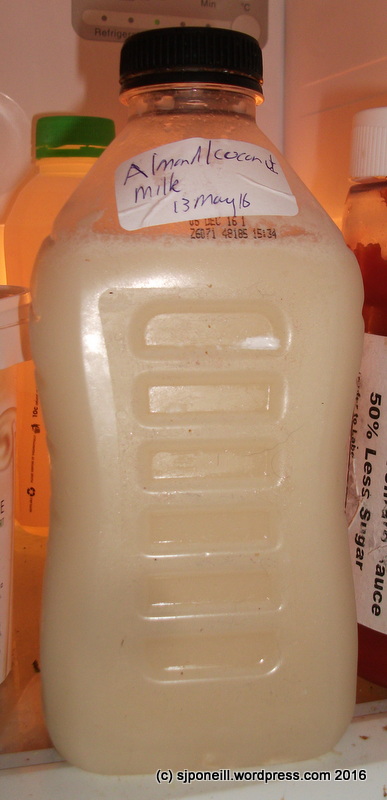
The cake and the icing are both largely coconut so, deeming this particular attempt sub-optimal, I recycled it through the blender into my growing stash of almond/coconut meal from my increasingly more frequent production of almond coconut milk. On the upside, I shared half the initial production with the taste team at the Ohakune I-Site, and catching up with them today – with some oatmeal pumpkin muffins, they were surprised that I’d thought this mix a failure.

That sub-optimal performance was largely down to me, and mainly in the icing. I bought some coconut chips today from the natural bulk shop in Taumarunui and will give this another go soon…

DSCF0241

Efficient use of energy: drying almond coconut meal (mixed with blended failed coconut cake) on top of the woodburner


Good for the Soul

Quote

So far this winter has been more wet than cold…three winter’s ago, we had already had some serious snow by now…
image

This is a time when root vegetables, carrots, potatoes, parsnip, kumara, etc, are seasonal and thus cheap at the moment. I’ve been investing heavily in freezable storage containers to store the vegetable largesse as soup…

I scored half a large bag of potatoes that survived the ‘Kune Carrot Carnival a couple of weeks ago and scored the net for a variety of tasty light things to do with potato. There are surprisingly few variations on the theme of potatoes, less than consume large quantities of the target vegetable….

Although not a big consumer, this recipe combined potato with chicken and cheese. Like most soups, it is simple and quick to make.

Ingredients

100 grams of butter (probably should have used coconut oil but didn’t think of that at the time)
1 onion diced
3 carrots diced
3 spring onions (the recipe calls for celery but I’ve gone off that for now)
1/3 cup of flour
2 potatoes diced
2 cups of coconut milk (the recipe calls for cow but I don’t have that in the fridge anymore apart from occasional small quantities for guest brews)
1 teaspoon of black sea salt (yes, you could be boring and just use normal salt but I’m trying to stay away from processed foods: if it’s white, it’s bad)
3 cups of chicken stock
1 decent size organic chicken breast (after the Hot Doc’s warning about the growth additives that go into commercial chicken, I avoid it now) diced
1 1/2 cups of grated cheddar/Colby/tasty cheese
Fresh parsley and or coriander, finely chopped

Directions

Melt the butter in the pan
Add the onions, carrots and spring online and cook for 3-4 minutes
Sprinkle the flour over the vegetables and stir it in.
Add the coconut milk, chicken stock, potatoes and chicken.
Bring to the boil and simmer for 12-15 minutes.
Slowly add and stir in the cheese until it has all blended into the soup.

Sprinkle with the parsley and coriander. Serve with stick bread sliced longways, or toasted jalapeño cornbread

image

I’ll be making this again, for sure, not only is it tasty as and filling. I’ve already had a few requests for it and one can’t ignore one’s fan base. Changes I would make apart from those listed above? Probably only to add a diced parsnip: I forgot I have a bag of them in the pantry: it’s sweetness will go well with the chicken and cheese flavours…

Let them eat cake…

Impressed with the therapeutic effects of my Wednesday night bake-athon, I lined myself up for another the following night…

I’m much more a savoury (un- some may say…) character than a sweet…so I don’t cook a great amount of sweet items, even less so now that I am withdrawing from the attractions of sugar and processed foods…however, in the interests of science, and interested to see how some of my hoovered recipes might turn out…I dallied with the sweet side of the Force…

darth sugar.jpg

…and that’s where this image came from…googling for a header image took me to I Quit Sugar and then to some very (chocolatey) dark recipes…watch this space…

So anyways…baking cakes…I had two targets in sight…one driven by a preponderance of feijoas in the fridge (’tis the season) and the other by a ‘waste not’ recipe for banana peels that flicked across my radar on Facebook…

I found a good mix of feijoa recipes at the Waikato Times and intended (and still do) to make something from here but the absence of sour cream in the pantry for the chocolate feijoa cake nudged me towards this one from Melanie Khan. It’s pretty simple  and i made it as writ, less using three-quarters of a cup of raw sugar instead of the directed full cup of white processed sugar (white is bad).

It was quite solid when it came out of the oven: cooked but it didn’t rise as well as I think it was meant to…I’m attributing this to the moist mass of feijoa being disproportionate to the quantity of flour…it had a good strong feijoa flavour so next time – if there is one: so many feijoa recipes and only so much time – I might reduce the amount of fruit and/or reduce it before adding it to the mix so that it is least moist…

Baking 2 June 16

Banana peel cake on the left, spicy feijoa on the right

The main appeal of the banana peel cake was its ‘no waste’ theme – we go through a lot of bananas here on the Green Journey and the peels go directly into the compost to nourish future generations of food – and as we make more and more of our own food, an additional benefit is the reduction in waste, especially packaging for things like pre-packaged products like not-milk milks…so in for a penny…

Although punted around on Facebook, the actual recipe lives at Love Food Hate Waste which has some other interesting recipes for food items that may be approaching their final best by date…as we hit the Central Plateau carrot season (through til October), one that has a real appeal up here is the carrot cake cookies.

kune ecalir shop

The ‘Kune Carrot Shop

Fair warning though, even though it is great that people are publishing  recipes that promote using and not dumping food, these recipes are on the Dark side of healthy with a very high sugar component. I’d be looking at reducing some of that using maybe a couple of bananas perhaps..?

You do have to peel bananas for the banana peel cake…and, if necessary, can save peels in the freezer until you have enough…making sure that you allow time for them to thaw before blending them. I forgot and waiting to the peels to go from rigid to gooey is the main reason the spicy feijoa cake hit the oven first – normally I would do the more complex recipe first: just in case it all goes horribly wrong, at least, I already have something cooking…

Again, I made the recipe as writ with no major issues once I was able to get the skins mushed in the blender…one tip for young players would be to not tutu with the tensioning clip on the cake tin once the cake mix is in: very messy trying to refit the base and close the tension clip again…

DSCF0174

The cake rose nicely but I probably left it in a little long as it was a tad dry inside…tasted OK but you’d expect with the amount of sugar in it. I don’t think that the banana peels added anything that could not have been achieved using the normal part of the banana, or even a handful of caraway seeds or something similar…

The creamy substance around the edges is my attempt at a lemon icing and possibly evidence that you can’t believe everything that you read online. My second choice for a feijoa cake recipe was this Lemon Iced Feijoa Cake from the Chelsea site (which sole purpose is the promotion of sugar!) but I had no milk, forgetting that I now have a large bag of coconut milk powder for just this contingency, nudging me towards Door #3…

I did, however, like the sound of the lemon icing as a finishing touch for the banana peel cake, and made this as writ but there is simply too much fluid for the dry content and even after three days, the icing still hadn’t set and most of it drizzled off the sides and soaked into the base – which was not unpleasant…

This chealsea icing versus  not chelsea icing

Comparing the Chelsea recipe on the left with this lemon icing one from All Recipes, you can see that  it has only a quarter the dry content of the other one…an interesting experiment and one that I will file away from when I need a super-sweet lemon effect to soak into a target dessert…

Just for the record though, if I had made the banana peel cake as writ plus the lemon icing recipe on the right, the total sugar content would be 5 1/2 cups of sugar…HOLY MALLOLY!!!! My butterscotch pudding only has a half cup (reduced from a full cup in the original recipe) plus two tablespoons of syrup for the sauce and I thought that was sweet..!!

Not being overly-sweet oriented, I kept the lemonised half of the banana peel cake (all gone now! #sugarcraving ) and gave the other half and the feijoa cake, less a couple of taste-testing slices, to my flue-ey friend to maintain energy levels until a full recovery is in effect…

Fresh bread


Bread baking 1 Jun 16

Jalapeño corn bread on the left, kumara bread on the right, each less an initial tasting slice….

Life is a little intense at the moment so I have been working quite hard to keep busy…idle hands and all that…

I tend to hoover up recipes that interest me and then have trouble find an opportunity to both cook and consume them…last week a flu-ey friend provided an excellent justification for a bake-athon…which proved unexpectedly therapeutic as well…I didn’t finish til after 1AM but was surprisingly refreshed when I emerged from under the covers into the brutal cold of Raurimu at 6AM…

I liked the concept of Jen Rice’s jalapeño cornbread and liked my first attempt at it but it didn’t rise very well. I’m not sure if that is just down to me, the use of beer as a yeast, or the specific beer that I used. It did have quite a good kick though, which is kinda the whole point of putting jalapeños into anything…

To address the rising issue, the next time, I just added the corn and jalapeños into my normal bread mix for the breadmaker. I didn’t reduce the water enough to compensate for the moisture in the corn and jalapeños but it still rose OK although the greater bulk meant that the jalapeño effect was a lot more subtle – it still got a thumbs up from the taste team though…

So, last week, I was keen to master breadmaking sans breadmaker – mechanical breadmaker, anyways – and I had this recipe from the Nadia Lim collection to try.

Ingredients

  • orange kumara (sweet potato) 300g (about 1 medium), peeled and chopped
  • active dried yeast 1 tablespoon
  • sugar 1 teaspoon
  • lukewarm water 1 cup
  • high-grade flour 1 cup + extra for kneading and dusting
  • wholemeal flour 2 cups
  • salt 1 ½ teaspoons
  • Rosemary 2 tablespoons finely chopped
  • extra-virgin olive oil 2 tablespoons

Method

  • Cook the kumara in boiling salted water until soft, about 10-15 minutes. Drain well and mash with a little salt to taste.

  • While the kumara is cooking, combine the yeast, sugar and warm water in a bowl. Leave on the bench for about 10 minutes until frothy.

  • In a large mixing bowl, combine the flours, salt and rosemary. Add the oil, mashed kumara and yeast mixture, and mix until well combined. If the dough is too wet, you may need to add a little more flour.

  • Knead the dough for about 10 minutes on a floured surface, adding a little extra flour as needed, until dough is soft and elastic.

  • Place the dough in a lightly oiled bowl, cover it with a tea towel or clingfilm, and leave it to rise in a warm place for about 30 minutes – it should have doubled in size.

  • Line a baking tray with baking paper. Cut the dough in half and shape into two loaves. Place the loaves on lined tray and cut a few 1cm-thick slashes on top of them with a knife.

  • Now would be a good time to preheat the oven to 200 degrees Celcius

  • Leave the dough to rise for a further 20 minutes or so.

  • Dust the loaves with a little flour. Bake for about 25-30 minutes or until a crust has developed and the base sounds firm and hollow when tapped. Remove from the oven and allow to cool a little before slicing.

The only changes I made to the recipe were to zap the kumara in a microwave steamer instead of cooking it in a pan; using only high-grade four with a 1/4 cup of bran flakes to add the wholemeal content – this is how I do my wholemeal bread and it seems to work out OK; and I’m using black sea salt for all my salt contributions…

I had bought some active dry yeast last year for my pizza experiments – although I had done a few pizzas since, I hadn’t checked the ‘best by’ date which was some time in February. The yeasting issue was in doubt for a while – we can’t just pop down to the supermarket here: the closest one is 40km away, the closest 24 hours one a good two hours away – but everything eventually frothed up nicely after a half hour or so…it helped, I think, putting the bowl up in the mezzanine for a while in the warmer air from the fire…night-time temperatures here have been below zero the last couple of weeks…

Once the kumara bread was safely in the oven, I made up another batch of dough, waited another 30 minutes for the yeast to do its thing and swapped out the kumara and rosemary for a can of drained corn kernels and a half cup of drained pickled jalapeños – you simply cannot buy them fresh here, it would appear – and completed the recipe as above…

As you can see above, the finished loaves look pretty good and they taste pretty good too…I have been toasting 3-4 slices each night to dip into my dinner soup and lunch today will be toasted cheese (still trying to polish off the last kilo brick that I had in the freezer) on jalapeño bread…

This recipe seems to be a keeper for bread from scratch. It is very simple and painless and makes two loaves versus one from the original recipe I was using. The loaves will freeze well and so I may do a stock-up bake in the next couple of weeks: even with the cost of the can of corn and the jalapeños, it is way less expensive than buying speciality loaves from the supermarket…

A coffee what..?

A coffee syphon…nope, I’d never heard of one before either but stumbled across the idea online when looking for something total unrelated…

The basic idea is that a syphon gives you a smoother brew because if keeps the heat source away from the coffee, thus eliminating any chance of burnt coffee…picked one up on Trademe around September last year. It has a certain decorative appeal and I never actually used it until just a few weeks ago…

DSCF0143

It’s a simple device…water goes into the spherical lower chamber, the heat from the burner forces it into the upper chamber where it mixes with the coffee grounds and then, when the heat is removed, returns through the filter back to the lower chamber as coffee…

DSCF0145

The recommended approach is to pre-heat the water in the jug so that there is no messing around warming it from cold. The spring thing you can see at the top of the chamber is the spring-loaded wire that holds the filter in place against the bottom of the upper chamber…

DSCF0146

All the water is now in the upper chamber and held there by the steady heat from below…

DSCF0147

Add the coffee and gently stir before letting it sit for a minute. The idea is that the beans should be ground only after the top chamber is full of water sot hat the fresh grounds go directly into the hot water. I’ve tried that and using pre-ground grounds and haven’t seen much of a difference so far…having said that, both my brews (yes, a whole two!) have been quite weak sot hat I may need to beef up the quantity of grounds. It may be that the limited sit time for the coffee i.e. not sitting for longer as in a plunger or being forced through the grounds as in an espresso machine, is not drawing out as much flavour as other methods..?

DSCF0150

As soon as you remove the burner, the coffee will start to filter back into the lower chamber…

DSCF0151

It takes less than a minute for all the coffee to draw back into the lower chamber. To me this looks too light in colour hence my thought that I need to beef up the quantity of grounds…

DSCF0152

I tried frothing my DIY almond coconut milk in the espresso machine…it does froth better than the commercial stuff tin a carton but not as well as I’d like.

Some Google research implies that the reason that real milk froths so well is that levels of protein. if that is the case, adding some protein to the coconut almond milk may encourage better frothing… I bought some protein from the supermarket and will try this in my next brew – I am limited to a brew a day so I don’t go completely hyper so this may take a while…I’m thinking that it’ll only need a 1/4 teaspoon if that…

The coffee complete does have a nice hint of coconut but the coffee itself leaves a bit to be desired, both in the ‘hit’ and in the flavour…it may be that I am trying too many things at once and need to separate mastering the syphon from my mastery of frothed almond coconut milk…

If the syphon doesn’t end up performing, at least it is a nice decoration for the kitchen…

Beets, feta and rice

Write a new post in response to today’s one-word prompt.

Source: Dream | The Daily Post

This is one of those kitchen experiences where everything just came together perfectly…a dream to prepare and more so to consume…

The foundation was another of Jen Rice’s cracker recipes, Roasted Beets With Goat Cheese And Honey…if you have any interest at all in spicing up your kitchen and your diet, you really must check out Jen’s site Sugar Soil: it’s chock full of great ideas and cues to try different ingredients. Living in rural New Zealand, our local shops don’t have the same range of more exotic items as larger centres: at the moment, I’m making regular purchases from Happy and Healthy for things like root tumeric, agar, black rice and bulk almonds and chia seeds.

Anyway…as I’ve discussed on a couple of occasions previously, my green journey is driven by a desire to eat and be more healthy and less by any philosophical issues – although the Hot Doc’s insights into what gets pumped into commercial chicken and cattle gives me pause – so I’ve not gone entirely vegetarian or diary-free, just adjusted my habits for more healthy outcomes…which is why I’m quite comfortable with the dairy content of this particular dish…

As you can see, it is quite simple to prepare but I did make some minor changes:

I thought that I was buying baby beets at the supermarket: I was but it was only when I opened the packets to actually use them that I realised that they were precooked. I should have and will in future just buy normal beetroot.

Jen’s cooking time for this is up to four hours in the oven – I don’t get home from work til around 6 and there is no way that I will be waiting til after 10PM for dinner. My cunning plan was to just toss it all in the slow cooker while I was at work. This sounded like a good plan until I found that the beets were precooked.

I wanted a rice base to bulk it out as a meal – as writ in the original recipe it is more a snack or an entree than a meal in its own right – so set up a cup of black rice to pre-soak through the day so that the only cooking and delay in the evening would be cooking the rice.

I couldn’t find any goat feta locally so opted for the stuff from cows…I think I’ll survive.

I used black sea salt instead of normal salt – I bought some of this just to try but then found I had run out of normal salt any way so it is going into anything calling for salt.

I warmed the honey so it would mix better with the balsamic and spread over the beets.

I was worried that the precooked beets would just turn into mush after a day in the slow cooker. I needn’t have worried as they were still nice and firm when I nervously lifted the lid off that evening.

From there it was just a matter of flicking the rice cooker to ‘cook’ and dicing up a third of the feta…and then racing up to the National Park Village just before it closed to get the Greek yogurt that I had forgotten on my way home – they had none so I had to settle for natural yogurt: not a biggie for this non yogurt connoisseur. They only had a mega container though so will be applying yogurt to the next week or so of meals just to burn it up…

DSCF0118

Yes, my plating still needs work but OM-bloody-G!!! Did this taste good or what??? The best meal I have eaten in a long time – if I do say so myself – even better than the coriander tacos from Eat in Ohakune or my meal at Kokako the last time I was in Auckland and I COOKED IT!!!!

The challenge now is to be able to recreate this success next time. yes, it is possible that the sugars in the beets and the honey contributed to some extent to my sky-rocket level of satisfaction and enjoyment but then my serving also filled me up…

Whether by accident, chance or skill (most likely one of the first two!), this meal offers a great combination of texture and flavour:

The soft smooth beet, yoghurt and cheese is offset by the texture of the black rice.

The sweetness of the beets and rice is balanced by the more tart cheese and yoghurt.

Even the colours work well with the dark red of the beets and the black of the rice contrasted nicely by the lighter cheese and yoghurt.

There’s not really anything that I would change about my ingredients or preparation of this dish – if it ain’t broke… – other than use raw beets next time and see if I can find some Greek yoghurt…This was the first time that I had used the black sea salt and the black rice but both performed well: many recipes mention the need to soak the black rice overnight but it came out well after soaking through the day and also came out of the rice cooker, even after presoaking, better and cleaner than normal white rice…

15 out of 10 on the yummilicious scale!!!!

My Green Journey so far…the next bit…

I must have made more progress than I thought as I need to flow over into a new post…my previous post talked about the results of reducing caffeine and dairy from my diet…

Smoothing out the rough edges

DSCF9624
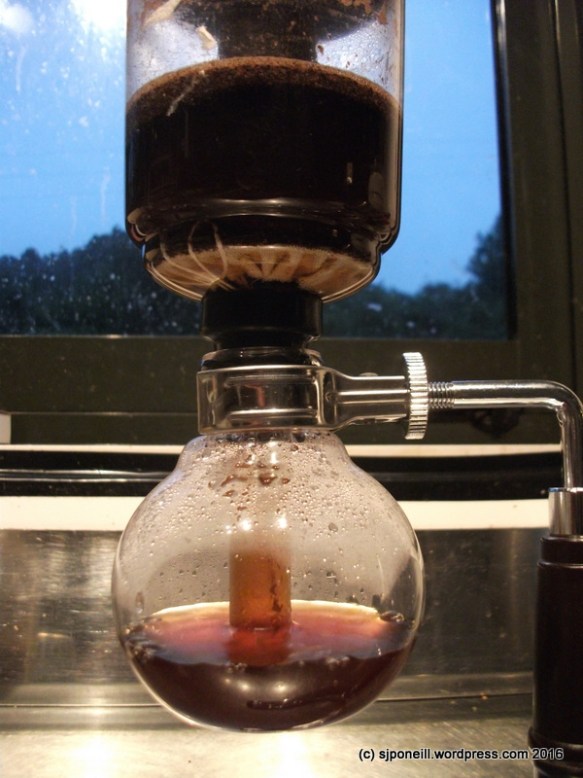
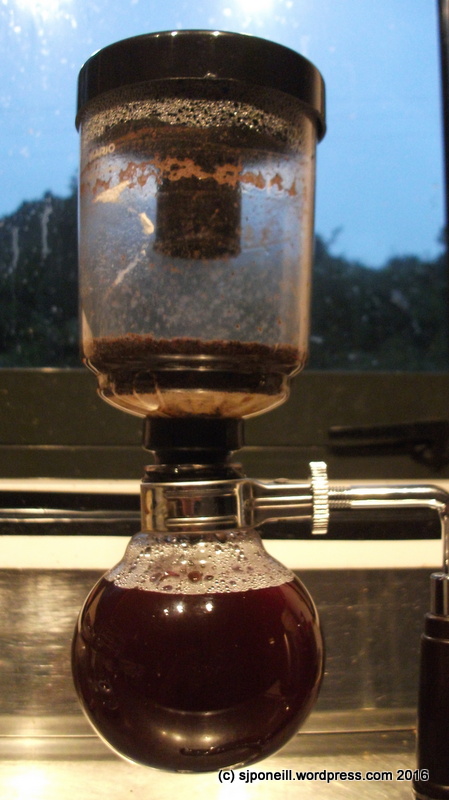
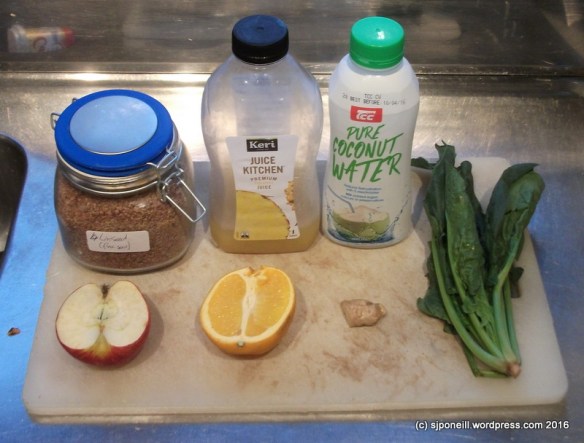
I usually drink 2-3 smoothies a day now, almost certainly two, and three perhaps if it has been a long day…I’m learning what makes a good smoothie and how to keep it affordable. Part of affordability is keeping on top of what fruit and veges are in season and steering away from more expensive out of season items. Coconut water is less bland than the plain rainwater that comes out of our taps but @$5/litre kinda pricey so it’ll become an occassional. Rather than using storebought juice (if it is really juice!), I’m going back to making my own from whatever fruit and veges are cheap…it’s only a week or so before the ‘Kune Eclair shop re-opens with its cheapest bags of carrots and parsnips, heralding a mega juicing and freezing effort…

kune ecalir shop

Being clever with meat

I’d already been reducing my meat intake over the last couple of years, a step partially driven by simple economics: it doesn’t take too much in the way of smarts to be able to stretch half a kg of mince from 1-2 meals to 4-5 without feeling that something’s missing…

Lighten up

I used to rely heavily on potato in my old diet, mainly mashed or fried, i.e. chips but now that all feels just way too heavy…Living rurally, I tend to buy a lot in bulk and so this year I have slowly consuming those stocks down to zero and either not replacing them or substituting a healthier alternative.

A lot of the time now, rice is the new spud and the Irish in me is comfortable with that. The chips, potato, fried, chunky that used to be a staple of my diet are now an occasional treat, usually with fish…

DSCF9922

It does mean, however, that I will need to experiment with some new roles for the air fryer beyond healthy(er) means of making chips…

Turn to the dark side

As much as possible I am moving away from processed food and ingredients, getting as close to the raw material as possible…I’m not sure whether “if it’s white, it’s bad” is a solid rule (maybe just not as good), but white food like bread, sugar, flour, salt has generally been uber-processed….is the white just what’s left after all the good stuff is taken out?

For the most part, a healthier alternative is easily sourced and at not much additional cost, if any…

Yes, I do still mainly buy white flour, but offset this by adding bran flakes when I’m baking…summa-summa for baking bread;

Raw sugar instead of white sugar (+ banana is often a good sub-in),

Sea salt instead of common kitchen salt,

Brown or black rice instead of white rice: if you use white rice, rinse it first: all the sediment that comes off after the first rinse may be a good argument in favour of darker rices…

Spice up your life

A little spice goes a long way…spices and herbs make for tasty meals without the need for sugar to taste…it is now so easy to use spices and herbs to spice up what might otherwise be quite mundane…adding a chunk of ginger totally vitalised my juices last winter…and jalapeño in bread adds a whole new dimension of flavour…

DSCF0072


Butter…? From Apples..? Really..?

For the last couple of weeks, I have been having apple butter on my breakfast toast…

It all started when I collected up a bag of windfall unripe apples…before following what had been my standard previous practice and just dumping them in the compost, I did a quick Google for any recipe that might use unripe apple.I found many references to apple butter, which I had never heard of but which my American taste testers assured me was a ‘good thing’.

FB_IMG_1461142341400

Primary processing…peeling and dicing in front of TV…

It wasn’t hard to make: the greater challenge was finding a recipe that wasn’t laden with sugar; after a lot of research, I settled for this one from Allrecipes although I did replace the brown sugar with a banana and accidentally maxed out the cloves: looking into the box there didn’t appear to be much left so I just upended it into the pan – to find that there had been at least a tablespoon concealed in a  fold in the internal bag…Too late and I’ve always been keen on cloves so there was nothing for it except to see how it came out…

DSCF0015-001

All spiced up in the slow cooker…just apples, spices and a banana…

I left the skins and cores as there seemed to be some agreement that, in unripe apples, there is more goodness trapped there…apart from one lady online who was very concerned about the cyanide content of the pips!!

I left the mix to slow cook overnight and by breakfast it was like this:

DSCF0016-001

Looks icky, smells awesome…

Some of the recipes I had researched had used a food mill to separate the apple from skin, pips etc…another Google session provided education on the what, why and how of a food mill and I was able to score one off Trademe for $40, Tupperware no less!

DSCF0017-001

It didn’t come with any instructions and even with the assistance of Youtube, it took me a while to master the ‘milling’ process…once done though, I had a thick slurry of pureed apple which was bottled (probably around 600 mls total) as distributed to my taste testing team – none have died so far so I think we can put the apple pip cyanide theory safely to bed….

DSCF0132.jpg

First slice from a new loaf is always eaten fresh…

The apple and cloves flavour combination is pretty strong and I only apply a thin layer to my toast but I know that at least one of the taste team team cakes it on, thick as…

Simple, spicy, and using apples that would otherwise have been composted…

Almond Coconut Chocolate Chip Cookies

After successfully making my first batch of almond coconut milk,  I was left with about two cups of moist almond and coconut meal…what to do with it? Apparently there are many things that can be done with this by-product of DIY almond milk so I opted for the almond coconut chocolate chip cookies from Minimalist Baker and originally from Sprouted Kitchen’s book The Sprouted Kitchen: A Tastier Take on Whole Foods. I took a quick peek at the online recipe list at Sprouted Kitchen and I think that I will be paying them a few more visits…

So about 10-30 on Saturday night, between movies, I decided to have a crack at these cookies, not so much because I had the munchies – certainly nothing that an apple didn’t take care of – but just to see how they came out…I did modify the recipe around the meal that I had to hand but you can see the original on the link above…

What you need:

Two cups of ground almond coconut meal

A quarter cup of dark chocolate chips

Three tablespoons of coconut oil

One egg

A third of a cup of brown sugar

Half a teaspoon of baking powder

A quarter teaspoon of salt

Half a teaspoon of vanilla extract

I left out the half cup of coconut because I already had this blended in with the almond. One of the attractions of this recipe was that it called for the expenditure of dark chocolate chips: I have some that I bought for a chocolate bread puddings but found I much much preferred this with white chocolate so the Minimalist Baker recipe offered an opportunity to expend an item that had been sitting around the pantry for some time, unused…

What you do:

In a large mixing bowl, stir together almond meal, dark chocolate chips, baking powder, salt and sugar.

In a separate bowl, beat egg until uniform in colour and doubled in volume.

Whisk in the coconut oil and vanilla, then add to dry ingredients and mix until just combined.

Chill in the fridge for at least 30 minutes or even overnight.

Preheat oven to 190 C.

Shape dough into 1-inch balls, place on baking sheet with 1-1/2 inch space in between each. Press down slightly to flatten a bit.

DSCF0101

Ready to bake…

Bake until edges begin to brown, 7-10 minutes.

Remove from oven and let cool before serving.

Insights

Less some scorching around the edges where excess oil leaked from the cookies and didn’t like direct exposure to the heat of the oven, these first time cookies came out really well. They are firm although soft in the middle and very chewy due to the high content of almonds and coconut, undiluted by flour as in a ‘normal’ cookie.

These would be a great snack for a days walk in the Park.

Next time I will:

Warm the coconut oil so that it will, in its liquid form, blend better with the egg. I don’t think that chunky oil affects the outcome but it looks better and ensures an more even spread across the individual cookies on the tray.

Only use two spoons of coconut oil: the original recipe may be based on an assumption that the meal is dry however mine was still moist from the wringing process. As a result the cookies were quite moist and ‘bleed’ oil on to the baking tray in the oven where it scorched under the heat of the elements.

Reduce the heat by about 20 degrees to reduce any incidence of the coconut oil scorching and also to allow the cookies to bake through.

Plan on baking the cookies longer. The stated baking time in the recipe was only 7-10 minutes: 20-30 minutes was my experience. Aggravating this is the fact that, being of the male persuasion and not advantaged for multi-tasking, when they weren’t ready in the advertised 7-10 minutes, I started doing something else and kinda forgot about them for a while.

Dispense with the chocolate chips: the taste is lost between the flavour of the almonds and coconut. I may use them one time more just to expend them and then that’s it.

Leave the mix overnight in the fridge to gel. I’m not sure that it will make any difference and the recommended minimum 30 minutes worked out OK this time, but it may allow for a firmer cookie.

DSCF0102

Voila, albeit a little crispied around the edges

.

DIY Almond Coconut Milk

DSCF0098

As I’ve progressed along my green journey, I have started to become more discerning about my healthy alternatives.

One of the themes in Damon Gameau’s That Sugar Story/Movie (depending on whether you are reading the book or watching the movie) is that much of what is pitched at us as ‘healthy’ isn’t really. There are the obvious villains like sugars concealed in health bars and even in meats as I found with my little adventures with the pre-crumbed chicken cutlets from New World.

One learns to become quite discerning even amongst the apparently acceptable healthy alternatives. I’ve been quite happy with my change from dairy milk to almond or coconut milk (from the supermarket) but when I looked at the label recently (see above), it has just a few too many big words on the ingredients label for my liking…an alternative milk is not naturally the same colour or texture (something I know a lot about because optimum consistency for airbrush paints is that close to milk!) as real milk: that it is when poured from the carton is a marketing decision, not a natural process.

Something I like about opting for a more healthy lifestyle, apart from the obvious benefits, is that most alternatives are quite easy to prepare…yes, making your own almond milk will never attain the same level of convenience as dropping a few containers of milk into the shopping trolley and, yes, you do need to be just a little more organised in terms of ingredients and preparation…but neither the decision, its sustainment or the work are that difficult…

Locating a suitable recipe for DIY almond coconut milk – I’ve always been a sucker for coconut – Google is your friend and, after sifting through a dozen or so variations of the theme, I came back to this one from Ethical Foods. My driver for this journey is one of health more than philosophy and when I look at a recipe, I consider it more from a practical perspective. However, I did like that the author lists some pretty good reasons for having a crack at making your own alternate milk, especially the one about the packaging.

There’s not much waste here from the foil-lined cardboard containers that these products come in from the supermarket: the plastic cap gets cut out and goes into the rubbish and the container gets sliced up and goes into the landfill on the back lawn (just filling holes). Even the foil lining breaks down and any plastic liner that might survives works its way to the surface for collection and disposal (there’s not much of it). But why deal with the waste products at all if you don’t have to…?

I’m not so sure about the ‘advantage’ of DIY almond milk being “…beautifully creamy white…” because almond milk is not naturally white: look at the inside of an almond: at best, it’s an off-white…

This is so simple to make:

Place a cup of almonds and a cup of shredded coconut in the blender and run it up to the maximum speed for a couple of minutes.

Empty the ground product into a bowl and add a litre of water.

Cover the bowl and let it sit overnight.

The next day, pour the content of the bowl in some double layered cheesecloth and wring the heck out of it into a clean bowl, ideally one with a pouring lip.

Once you have wrung all the liquid from the meal, pour it into a sealable bottle and store it in the fridge for  use.

DSCF0100

Easy!

The jury seems to still be out on the shelf life for this ‘milk’ so just keep an eye on it…anything over a week is probably pushing it…

The only down side to DIYing your own almond milk is that it does cost more: probably about twice as much compared to the store-bought stuff in the cardboard cartons.A cup of almonds is about 200 grams (@around $4 per 100 grams at the supermarket) plus about $1.50 for the coconut. The water here is free, coming directly off the roof, through a filter system and then being filtered again in the kitchen: this last step is probably unnecessary but the filter is right there so why not use it?

Buying almonds, especially sliced almonds, in bulk will close the cost gap and I will also experiment with using less almonds: some recipes only call for 100 grams but I’m not sure how strong they would be. I am also going to try blending the almond and coconut with the water to see if that strengthens the flavour…

The finished product has both an aroma and a flavour that blend the almond and coconut together so taste-wise this is a winner…give it a go…

Edit 24 May 2016

I’m not so sure about the ‘advantage’ of DIY almond milk being “…beautifully creamy white…” because almond milk is not naturally white: look at the inside of an almond: at best, it’s an off-white…

I got this wrong because I didn’t read the instructions properly. On my second go round making my own almond coconut milk, I blended the almonds and coconut with the water before letting it sit for the day.

DSCF0133 DSCF0134

Not only did I get a fraction more milk, maybe another 100 mls but what I did get had a very (cow) milk-like texture and colour.Like the commercial variety it also separates in the fridge but reconstitutes with a quick shake. My version version deposited a lot of sediment at the bottom of the bottle and needed vigorous shaking to mix in and didn’t separates into layers like this. teh flavours are also a lot stronger on this second attempt.

So the secret to good homemade almond coconut milk is to blend the solids with the water…I’ve identified a good source of less expensive almonds so will be making this every few nights from now on. Savings in the kitchen budget to offset the cost of DIYing will come drop dropping rice milk and reducing coconut water to an occasional.