Mad Millie Nut-milk Bag


Anyone who knows me will know that I am a big fan of reducing dairy content in our diets. I caught up with my sister and her family in Waitomo late last year when they were visiting the NI: we exchanged a few foodie tips and then this arrived a few months later for my birthday.

Previous on this green journey, I’ve tried nut-milk bags and dumped them in favour using simple squares of voile that I bought from Spotlight. I was happy using the voile but squeezing the milk out was kinda messy. Using the Mad Millie bag works best if the milk mix is left to drip through overnight so adding an overhead of coordination and organisation to ensure a continuous supply of milk: in short, the full process of soaking and filtering takes 24 hours so ideally needs to start as soon as the current bottle runs out.

I usually only use the milk at breakfast time on my muesli and in my cuppa tea and only in my cuppa if it’s in my take to work thermal cup. The reason for this is that something in the milk reacts with some teas (haven’t worked out a pattern yet) and causes a mild congealing reaction. It doesn’t affect the taste but doesn’t look so sharp: a friend recently re-introduced me to straight black tea and I’m more likely to have this for an open cup cuppa. Unless it’s bake fest night and I need to use some milk, I don’t usually use any milk in the evening.

My daily coffee fix, I now usually get via a bannofee smoothie using coconut milk powder for the milk content so no need for milk there anymore ‘specially since switching to this drink has dropped my coffee consumption to a cup a day (from 7-8!)

So..the Mad Millie Nut Milk Bag

P70411-091520

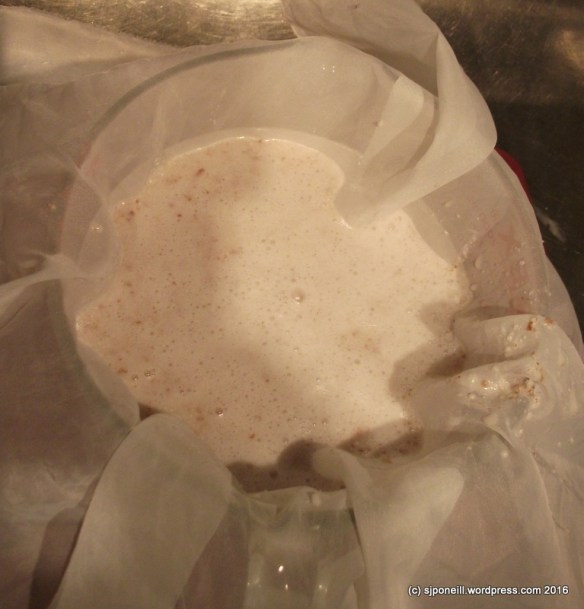
It’s quite simple really: extend the legs, hook the bag into the frame and pour in the milk and meal mix. The legs aren’t quite long enough to rest on the counter and hold the bag clear of the accumulating milk. One day I might get round to making a base frame to hold it slightly higher…

P70411-091530

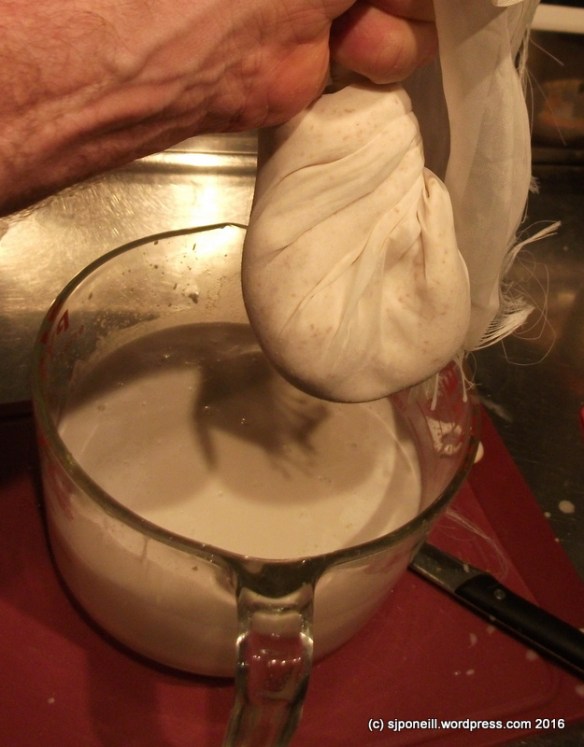
After that, just let it sit overnight. By morning most of the liquid will have filtered through and the last vestiges can be gently squeezed out before consigning the remaining meal to the dryer.

P70411-091544

You do need to take care that the stand is set up squarely or life may become messy. My meal mix is about 1.25 litres; although the bag would hold more, I would start to worry about its stability if it was filled much more.

P70411-101149

I used this bread bag that Mum made, especially in summer, to prevent any ‘floaters’ or ‘swimmers’ getting into the milk.

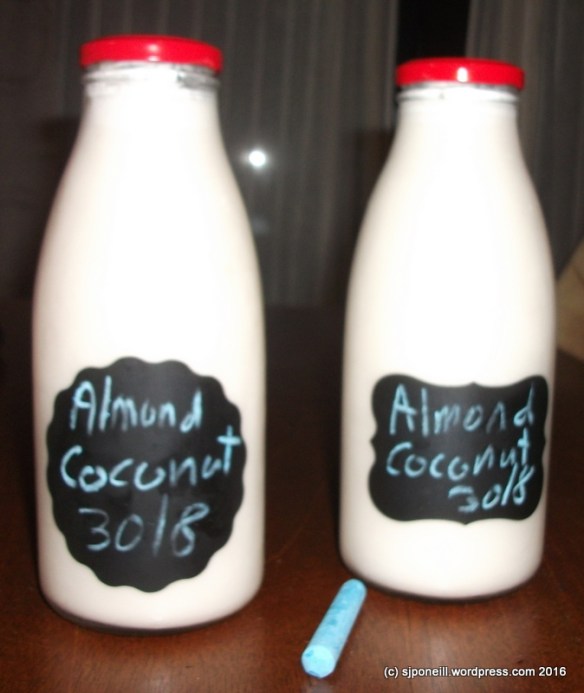
The meal mix I’m using at the moment is a 25/25/50 mix of almonds, sunflower seeds and coconut chips. The sunflower seeds help spread the life of the more expensive almonds and add a slightly less sweet edge to the flavour but this could be easily counteracted by dropping a vanilla pod or some dates into the blender during the first part of the soaking phase.

Verdict? Certainly a handy device and now my tool of choice for making non-dairy milk. Yes, the filtering time means I have to be a little more organised but that’s not a bad thing. It would be nice if it came with a second bag so that I could still ‘milk’ when the other bag is in the wash but I guess that I can get another made up if I really feel the need…

DIY Almond Coconut Milk

My green journey began after the reducing dairy conversation with Bubble…my initial resistance was based on the impossibility of life without cheese, yogurt or ice cream, all of which quickly found dairy-free alternatives for…”Plus think I have mastered the bannoffee breakfast drink now and must have milk for that!!” The comeback “Sometimes milk is needed (e.g. nice cafe latte) other times vanilla almond milk is great (smoothies, cereal and instant coffee!)” set me on the path of alternative milks.

Until this point, I had only associated alternative milks with soy which I never much liked: that there might be other options out there was total news to me…I always pushed obliviously past those shelves at the supermarket. I started out with prepacked almond and coconut from the supermarket but was never that comfortable with all the big words in the ingredients panel on each package plus each empty package = waste…

It didn’t take much Googling to learn that making my own almond, coconut or almond coconut is actually quite easy, actually so easy that I wonder why anyone would bother with the store-bought packs..? I’ve expounded the benefits to a lot of people online and in real life and I thought that it’s probably past time for a bit of a tutorial…

DSCF0447

I have a dedicated blender for milk making…it was only $24, heavily discounted at Briscoes…the advantages it brings to the game is that it has the capacity to hold the nut and 1.2 litres of water, and I can pulse the mix every ‘while’ as it sits.I used to use my bullet blender but had to amalgamate the mix in a separate bowl.

DSCF0448

The raw materials: I buy the chopped almonds in 3kg lots from Happy and Healthy, and the coconut chips in 1kg lots from Bin Inn or similar bulk stockists. I add a cup (approx 100 grams) of each to the blender and cover it with boiling filtered water – our water here is all rain water, but we’re well into the filtering habit and it doesn’t do any harm…

DSCF0450

Pulse the mix of nuts and boiling water for a minute or so…I think that the boiling water helps bring out the oils and flavours from the nuts…

DSCF0451

It’ll look something like this..DSCF0453

Top it up to the Max mark with cold filtered water – you could use more boiling water but I don’t thing it adds anything and you would need to be a lot more careful pulsing the mix until it cools down…

DSCF0456

Let the mix sit for a few hours or preferably overnight, giving it a quick pulse stir up every time you walk by or get bored…

DSCF0501

After sitting overnight, the milk has separated into the meal at the bottom and the oils and good stuff has risen to the top…the same happens in the bottle hence the good shake before use…

DSCF0458

Spread your filter cloth over the target bowl. My filter cloth is polyester voile I bought as a bulk end lot from Spotlight ($12 for 5+ metres)…I just sliced off a half metre square and find this much easier to use than nut milk bags which are also more expensive and harder to clean.

DSCF0459

Pour the mix into the centre of the cloth…

DSCF0460

Draw in the edges and let the bulk of the liquid drain through into the bowl…

DSCF0461

Hold the top of the filter cloth and twist the ball of meal so that the tightening cloth squeezes the remaining liquid into the bowl…

DSCF0508

Voila! one litre of almond coconut milk, fresh as with no big words or other additives. This will last in the fridge for a week. It will settle and will need a shake before you use it. I use this any place I would previously have used milk except for cheesemaking where it probably will not work (haven’t actually tried that) but may still be doable for dairy-free cheese (also not tried yet – with this milk)

I save the leftover almond coconut meal to use in baking. I generate a lot of it and so dry it over the fire or in the oven after baking (I switch the oven off and let the residual heat do the drying) and store it in a sealed container until I need it.

I use the meal in bread (1/2 a cup into every mix), almond coconut cookies, as a substitute for flour-heavy recipes and also recently used it to absorb the additional fluid when I put too much milk in the mix for my roast baby armadillo recipe

DSCF0509


A coffee what..?

A coffee syphon…nope, I’d never heard of one before either but stumbled across the idea online when looking for something total unrelated…

The basic idea is that a syphon gives you a smoother brew because if keeps the heat source away from the coffee, thus eliminating any chance of burnt coffee…picked one up on Trademe around September last year. It has a certain decorative appeal and I never actually used it until just a few weeks ago…

DSCF0143

It’s a simple device…water goes into the spherical lower chamber, the heat from the burner forces it into the upper chamber where it mixes with the coffee grounds and then, when the heat is removed, returns through the filter back to the lower chamber as coffee…

DSCF0145

The recommended approach is to pre-heat the water in the jug so that there is no messing around warming it from cold. The spring thing you can see at the top of the chamber is the spring-loaded wire that holds the filter in place against the bottom of the upper chamber…

DSCF0146

All the water is now in the upper chamber and held there by the steady heat from below…

DSCF0147

Add the coffee and gently stir before letting it sit for a minute. The idea is that the beans should be ground only after the top chamber is full of water sot hat the fresh grounds go directly into the hot water. I’ve tried that and using pre-ground grounds and haven’t seen much of a difference so far…having said that, both my brews (yes, a whole two!) have been quite weak sot hat I may need to beef up the quantity of grounds. It may be that the limited sit time for the coffee i.e. not sitting for longer as in a plunger or being forced through the grounds as in an espresso machine, is not drawing out as much flavour as other methods..?

DSCF0150

As soon as you remove the burner, the coffee will start to filter back into the lower chamber…

DSCF0151

It takes less than a minute for all the coffee to draw back into the lower chamber. To me this looks too light in colour hence my thought that I need to beef up the quantity of grounds…

DSCF0152

I tried frothing my DIY almond coconut milk in the espresso machine…it does froth better than the commercial stuff tin a carton but not as well as I’d like.

Some Google research implies that the reason that real milk froths so well is that levels of protein. if that is the case, adding some protein to the coconut almond milk may encourage better frothing… I bought some protein from the supermarket and will try this in my next brew – I am limited to a brew a day so I don’t go completely hyper so this may take a while…I’m thinking that it’ll only need a 1/4 teaspoon if that…

The coffee complete does have a nice hint of coconut but the coffee itself leaves a bit to be desired, both in the ‘hit’ and in the flavour…it may be that I am trying too many things at once and need to separate mastering the syphon from my mastery of frothed almond coconut milk…

If the syphon doesn’t end up performing, at least it is a nice decoration for the kitchen…