Coconut Flour Muffins

dscf0732

I had a pumpkin that was rapidly approaching its ‘best by’ date so I pureed it through the food mill and then looked for recipes to consume the product (being – allegedly – summer, I wasn’t leaning towards soups) I also had a bag of coconut that was had yet to contribute meaningfully to my Green Journey. This recipe from Small Footprint Family helped solve part of my problem…

The Makin’s

  • 6 eggs, room temperature
  • 4 tablespoons of coconut oil or butter, melted
  • 1/2 cup of pumpkin puree
  • 1 cup of honey
  • 1 teaspoon of ground cinnamon
  • 1/4 teaspoon of ground mace or pumpkin spice
  • 1/2 teaspoon of sea salt
  • 1 teaspoon of vanilla
  • 1/2 cup of sifted coconut flour
  • 1/2 teaspoon of baking powder

The Making

Blend together the eggs, coconut oil, pumpkin puree, sweetener, cinnamon, mace, salt and vanilla.

Add the coconut flour and baking powder and blend into a batter until there are no lumps.

Pour the batter into greased muffin cups.

Decorate the muffin tops with a pecan or shredded coconut. I skipped this because I was in a hurry.

Bake at 400 degrees F for 18 minutes, or until a skewer comes out clean.

Insights

dscf0736

Tasted OK.

Would have tasted better with a topping.

A bit heavy for my liking but my last exploration with coconut flour had a similar effect – I’m not sure if that is inherent in that sort of flour of if it’s just me..

No Cheese Cheese Cake #2

p61207-195438

My original intention for the ‘welcome back, firefighter‘ dessert had been to create two different ones but the logistics of that just didn’t pan out that Tuesday bake night…The filling had left me with quite an amount of greek yogurt and condensed milk _ which I don’t normally use that often – still to consume…

My selection for my second no cheese cheesecake was the New World Raw Blueberry Cheesecake slice but it didn’t use any of the greek yogurt of condensed milk that I still needed to burn up. I thought that this mousse from La Cocina Mexicana de Pily woulld make a good topping.

The base

  • ¾ cup (100 g) raw cashews
  • 1 cup (100 g) ground almonds
  • ½ cup (70 g) raisins
  • 2 cups (160 g) desiccated coconut
  • 3 tbsp coconut oil, melted

Grease a 20 cm x 30 cm slice tin and line with non-stick baking paper.I couldn’t find a slice tin and hand to make do with this:

p61207-195431

I worried all day that the base would disintegrate into a crumbly disaster when we served it up but it set hard and strong.

Place the cashews in a food processor and pulse in bursts until they turn into a fine, sandy, flour-like consistency, scraping the sides and bottom of the bowl often.

When ready, add the ground almonds and pulse to combine. Add the raisins and pulse until lightly blended. Add the desiccated coconut and pulse again. In the future, I’ll just sub in the meal leftover from nut milks for the almond and coconut.

Lastly, add the coconut oil, blending until well combined.

Press the mixture into the prepared tin in an even layer.

Place in the refrigerator for 10 minutes to firm up.

The filling

  • ¼ cup (35 g) raw cashews
  • 6 tbsp (90 ml) lemon juice
  • 2 tbsp almond butter
  • 2 tbsp coconut cream
  • ½ cup maple syrup
  • ½ cup (70 g) frozen blueberries, defrosted
  • ½ tsp vanilla extract
  • ½ cup coconut oil, melted


Place the cashews in the food processor. Pulse in bursts until the nuts turn into a fine, sandy, flour-like consistency.

Add all the remaining ingredients except the coconut oil, and pulse again until combined.

Add the coconut oil and blend until well combined. Pour the mixture over the base.

The topping

  • 2 tablespoons unflavored gelatin
  • 1/2 cups hot water
  • 300mls of greek yoghurt
  • 100 grams condensed milk
  • 1/4 teaspoon vanilla extract
Puree the yogurt, condensed milk, and vanilla extract in a blender until smooth. I reduced the quantities of these items proportion to the amount of yogurt that was leftover.
Dissolve the gelatin in the hot water. I forgot to reduce these ingredients as I did the others so the amount of gelatin was about four times what it should have been. The topping was thus a tab rubbery but still tasted alright.
Add this to the blender and puree again.

Place in the refrigerator overnight to set. Once set, it will keep for 4–5 days in the refrigerator in an airtight container. Cut into slices when ready to serve.

The topping not used

The mousse recipe included a berry topping to be poured over the top but I was a bit rushed on Wednesday afternoon before fire training and didn’t get it done…next time…

  • 300 grams mixed berries
  • teaspoons sugar
  • water (as needed)

Puree the berries, sugar, and water in the blender until smooth.

Pour over the top just before serving…

‘No Cheese’ Cheese Cake #1

p61130-221053

Our brigade is a foodie brigade. A couple of weeks ago one of our firefighters returned from her (successful) recruit firefighter course.  Dessert was my contribution to her welcome back .

I’m more savoury that sweet and while I like traditional cheesecake, only in small amounts: the overall cream cheese effect is too heavy and cloying for my taste…I also like the idea of a base that is a little closer to the raw materials  than ground up biscuits…that’s just like a bit of a Green Journey principle…

Googling provide a range of opportunities for a less cheesy cheesecake but nothing quite what I was after in a single recipe so this is a combination from two sources: the base is the coconut macaroon crust from Two Peas and Their Pod, and the filling is from A Baking Girl.

The base

  • 2/3 cup sweetened condensed milk
  • 1 large egg white
  • 1 1/2 teaspoons vanilla
  • 1/8 teaspoon salt
  • 3 1/2 cups sweetened coconut

Preheat the oven to 170 degrees C.

Spray a 10 inch springform pan with non-stick cooking spray. I heavily greased the tray, especially the base and still the base stuck quite a bit. Next I will line it with oven paper.

Stir together the sweetened condensed milk, egg white, vanilla extract, and salt until combined.

Add in the coconut and mix well. I bought a single bag of desiccated coconut – don’t normally have this in the pantry as I tend towards threaded and chunked coconut – but didn’t quite get the maths right and had to top this up with the meal leftover from my almond coconut milk.

Press coconut mixture into prepared pie pan. I was aiming for about a 5mm thickness and this left about a cup of base mix leftover – I knocked this into the sink and that was the end of that but next time I would press any leftover base into cookies and bake alongside the cheesecake.

One of the recipes I looked at during my research phase recommended prebaking the base for 5 minutes before adding the filling so I did this.

The filling

  • 2 cups fat free plain Greek yogurt
  • 1/2 cup sugar (I used ‘bad’ white sugar to eat into the remaining stock in the pantry)
  • pinch of salt
  • 2 eggs
  • 1 vanilla bean (seeds scraped out) or 2 tsp vanilla extract
  • 1 tablespoon of cornstarch

Combine the eggs, sugar, yogurt and vanilla in a food processor. I think that this is where the leftover yolk from the base went as well.

Blend until smooth, then add the cornstarch and salt and blend again.

Pour the filling over the base and bake for 35 minutes.

When the cheesecake is done, it will still be jiggly in the centre but will have a “done” look to it. The edges of the cake will start to pull away from the sides of the pan. Make sure you don’t over-bake.

Let it cool then chill for 2-3 hours in the fridge before releasing the springform.

The topping

  • 1/2 cup of cream, beaten
  • 1 tablespoon of vanilla sugar (this worked to edge the edge off the cream taste but next time I would probably double it and/or add half a vanilla bean to add more of a flavour counterpoint to the filling and the base.

The filling set to a degree that the sliced strawberry topping would not stick to it. The sole purpose of the cream was to provide a layer for the strawberries to sink into slightly.

I’m keen to try this again with non-dairy yogurt to further de-dairy-ise it; it is wheat-free for those who have a genuine gluten issue; and, of course, to use an alternate sugar source once the last of the white is gone…

DIY Butter

dscf0738

Part of my Green Journey has been working to reduce the number of processing steps between me and the raw materials of my diet…In many on my experiments, I have been using alternatives to staples like butter but, sometimes, nothing butters like butter…

Growing up, strawberries and cream was a Sunday dinner treat but the risk always was that we would be a little too enthusiastic with the beating and the cream would become butter. This was the first time that I set out deliberately to take cream as far as it would go…like many such ventures, the doing was a lot easier than the thinking about the doing prior…

The recipe I used I found, like most, via Google, this one on Stuff, it is so simple. I bought a litre of cream because I thought that there would be more loss than there was – that litre made me a good 250 grams of butter and, if I hadn’t accidentally spilled it all, an easy 250mls of buttermilk (know you know where that comes from)  .

As you can see from the Stuff article, the process is dead easy: beat the cream with an electric mixer – a hand one won’t cut it once it starts to thicken up – until it is thick and lumpy, then beat it some more. Drain off the buttermilk – without spilling it! – and, using your hands knead some fresh chilled water through the butter to rinse out the rest of the buttermilk. Strain the water out through some cheese cloth or voile et voila, your own homemade butter…

I actually made way too much for my needs, I just wanted to try it in my stock [insert your vege here] cake recipe but had made so much that I had to keep using it before it went off…next time I’ll probably only use a quarter litre of cream and just make enough for a the menu at hand…

Looks like butter, tastes butter, butters like butter, can’t beat it, it is butter…


Banana Peel Cake Take #2

DSCF0505.JPG

It was so good, it was all gone before I thought to take a photo…

A couple of months back, I experimented with cake from banana peel. It didn’t come out as well as I would have liked…a little solid and quite dry…Challenged to feed the troops at work, I had another crack at it.

I’ve done some learning since that first attempt and have two knew tricks to keep my cakes nice and moist: the first is to remove the cake from the oven when it is still a little underdone. The normal wisdom is that the cake is done when a skewer comes out clean: the truth is that it is already well done by this stage: the time to remove it from the oven is when just a few crumbs still stick to the skewer. The second trick is to store your cakes in a proper sealable cake tin i.e. not just on a plate on a shelf or in the fridge where it will quickly dry out.

My experiment with blending banana whole i.e. not skinned has been going well: the only hiccup has been that fresh banana skins are a little too fibrous to blend smoothly. Ripe and frozen bananas go through the blades no problem. If in doubt, I place any under-ripe peels in a container in the freezer where they start to break down. They only seem to semi-freeze which is probably why they still ripen while ‘frozen’ and only need 30 minutes if that, before they are soft enough to puree. the thawing process can be hastened by soaking the skins in water.

Unimpressed with the original banana peel recipe that was hideously over-sugared, I decided to use Nadia Lim’s base recipe for kumara cake and just sub out the three cups of kumara with three cups of pureed banana peel.I added some water – maybe a half cup – to the peels when pureeing them and this made that task and lot simpler and easier. I ‘greened’ up the recipe a tad by using 50/50 raw sugar and coconut sugar, and a 25/75 mix of home-ground wholemeal flour and store-bought high grade flour.

What came out of the oven was a lush rich uber-tasty cake that everybody thinks is ‘normal’ banana cake. They are amazed at the actual key ingredient. I like this recipe because a. it taste good and b. it reduces waste in the kitchen – sure, I’d only be composting the peels anyway but using banana peels in baking reduces the waste from a banana to just the very ends.

But wait!! It gets better. I reprised the healthy coffee icing I used on my colourful beetroot cake. To stretch the cashews I subbed in one third walnuts, soaked these overnight and followed the same recipe. I upped the coffee by half a teaspoon and it really kicks butt – an even healthier coffee hit. I can’t do too much about the sugar but will reduce it by half next time as the coffee flavour dominates and the base cake is pretty sweet anyway…

DIY Almond Coconut Milk

My green journey began after the reducing dairy conversation with Bubble…my initial resistance was based on the impossibility of life without cheese, yogurt or ice cream, all of which quickly found dairy-free alternatives for…”Plus think I have mastered the bannoffee breakfast drink now and must have milk for that!!” The comeback “Sometimes milk is needed (e.g. nice cafe latte) other times vanilla almond milk is great (smoothies, cereal and instant coffee!)” set me on the path of alternative milks.

Until this point, I had only associated alternative milks with soy which I never much liked: that there might be other options out there was total news to me…I always pushed obliviously past those shelves at the supermarket. I started out with prepacked almond and coconut from the supermarket but was never that comfortable with all the big words in the ingredients panel on each package plus each empty package = waste…

It didn’t take much Googling to learn that making my own almond, coconut or almond coconut is actually quite easy, actually so easy that I wonder why anyone would bother with the store-bought packs..? I’ve expounded the benefits to a lot of people online and in real life and I thought that it’s probably past time for a bit of a tutorial…

DSCF0447

I have a dedicated blender for milk making…it was only $24, heavily discounted at Briscoes…the advantages it brings to the game is that it has the capacity to hold the nut and 1.2 litres of water, and I can pulse the mix every ‘while’ as it sits.I used to use my bullet blender but had to amalgamate the mix in a separate bowl.

DSCF0448

The raw materials: I buy the chopped almonds in 3kg lots from Happy and Healthy, and the coconut chips in 1kg lots from Bin Inn or similar bulk stockists. I add a cup (approx 100 grams) of each to the blender and cover it with boiling filtered water – our water here is all rain water, but we’re well into the filtering habit and it doesn’t do any harm…

DSCF0450

Pulse the mix of nuts and boiling water for a minute or so…I think that the boiling water helps bring out the oils and flavours from the nuts…

DSCF0451

It’ll look something like this..DSCF0453

Top it up to the Max mark with cold filtered water – you could use more boiling water but I don’t thing it adds anything and you would need to be a lot more careful pulsing the mix until it cools down…

DSCF0456

Let the mix sit for a few hours or preferably overnight, giving it a quick pulse stir up every time you walk by or get bored…

DSCF0501

After sitting overnight, the milk has separated into the meal at the bottom and the oils and good stuff has risen to the top…the same happens in the bottle hence the good shake before use…

DSCF0458

Spread your filter cloth over the target bowl. My filter cloth is polyester voile I bought as a bulk end lot from Spotlight ($12 for 5+ metres)…I just sliced off a half metre square and find this much easier to use than nut milk bags which are also more expensive and harder to clean.

DSCF0459

Pour the mix into the centre of the cloth…

DSCF0460

Draw in the edges and let the bulk of the liquid drain through into the bowl…

DSCF0461

Hold the top of the filter cloth and twist the ball of meal so that the tightening cloth squeezes the remaining liquid into the bowl…

DSCF0508

Voila! one litre of almond coconut milk, fresh as with no big words or other additives. This will last in the fridge for a week. It will settle and will need a shake before you use it. I use this any place I would previously have used milk except for cheesemaking where it probably will not work (haven’t actually tried that) but may still be doable for dairy-free cheese (also not tried yet – with this milk)

I save the leftover almond coconut meal to use in baking. I generate a lot of it and so dry it over the fire or in the oven after baking (I switch the oven off and let the residual heat do the drying) and store it in a sealed container until I need it.

I use the meal in bread (1/2 a cup into every mix), almond coconut cookies, as a substitute for flour-heavy recipes and also recently used it to absorb the additional fluid when I put too much milk in the mix for my roast baby armadillo recipe

DSCF0509


Orange Walnut Cake

DSCF0498-001.JPG

I forgot to photograph the process and this little bit was the last remaining piece by the time I remembered…good texture, just a little overcooked…

I’m always looking for new ways to reduce waste and to make the most use of each ingredient. After the success of my lemon icing experiment last month, I thought I’d try the same with orange zest. I looked at a lot of recipes but I liked this one for orange walnut cake from Don’t Forget Delicious as it wasn’t too sugar heavy…

I changed the recipe slightly using half and half combinations of raw sugar and coconut sugar, high-grade flour and home-milled whole flour, and manuka honey and coconut syrup.I didn’t read the instructions properly and baked it in a loaf dish which was too deep to allow the centre to cook at the same rate as the outside: it needs to be baked in a flat pan (I realised this just now as I was checking the recipe). It took three small oranges to around a tablespoon of orange zest…I might aim for a little more next time

Because I used the wrong baking dish, I had to leave it in the oven longer to bake the whole way through and so the final result was a little scorched on top and generally dry inside. Lesson learned for next time.

I wanted a Greek yogurt icing recipe as I had a lot leftover after our beets, feta and rice dinner the other night  and found this one:

Ingredients

  • 1 cup plain Greek yogurt
  • 1 teaspoon of vanilla extract
  • 1/2 cup of icing, sifted
  • 1 teaspoon of orange zest – maybe a little more next time for a stronger orange flavour – I only had quite small oranges (took one to contribute about a teaspoon of zest) so using bigger ones next time should sort this

Instructions

  • Whisk all ingredients until they become a bit thick.
  • Place in the fridge to thicken even more (at least 30 minutes).
  • Spread on cupcakes.

This tasted really good but the recipe calls for way too much yogurt: even after a night in the fridge to thicken it as per the instructions it was still really fluid, too much so to effectively spread…next time I will drop the yogurt down to half a cup and see how that goes…

I was only able to smear a little of the icing over the top without it running off the sides but it did it help conceal the slightly scorched crust. I took it into work and it still disappeared pretty quickly so it wasn’t a total flop…

Orange zest is now a proven ingredient and I am keen to see if I can make a workable orange curd spread in the same way you can with lemons…

We can make and enjoy nice treat and stay true to our green journey…

‘Cado, pineapple and ‘mato salad

Last night, I mentioned that, I was still searching for a suitable side to go with my Kumara curry and salmon hash browns…after five years, can you believe it? I’ve been getting by with rocket salads but I kinda hate rocket…if I’m absolutely honest about it…

DSCF0479

So, on Wednesday afternoon, I sat down with a lot of coffee and considered the problem. What textures and flavours would complement but not compete with the textures and flavours of the hash browns and salmon. There is just a hint of curry in the hashes, mixed with the salt of the salmon and smooth cheesiness of the sour cream that holds the stack together. Overall it’s quite sweet and smooth.

It all came together quickly after I thought of an avocado base….smooth and sweet…with pineapple, sweet with a fibrous texture…with diced tomato…more tart and something else to bite into. Originally I was going to warm this mix in the microwave – it is winter after all – but opted for a natural heat from a sauce derived from the fried avocado tacos at The Guardian by blending all these together:

1 cup of sour cream

2 small chillies

2 gloves of garlic

1 tablespoon of lime juice

1 bunch of coriander

a smidgen of salt and pepper

The black rice was an afterthought left over from the previous night’s beets, feta and rice…I wasn’t really sure what to do with it otherwise but it worked well in our salad.

The first night I only used a teaspoon-sized dollop of the sauce on the salad – wasn’t enough to appreciate all the flavours. I had one hash stack left over plus about a cup and a half of the salad and other stuff in the fridge from a  week of cooking that I needed to consume to free up fridge space.

DSCF0490

So this is Take Two: one curry kumara salmon stack reheated in the microwave (it was already cooked: normally, I would keep the hash mix uncooked), with a goodly amount of greek yogurt on top, with the salad accompanied by a decent-sized dollop of the coriander and chili sauce, topped with feta from the beets and rice dinner…

Mmmm…primo!!!! A great blend of flavours and textures, with bonus points for good use of left-overs…less points for unused salmon which I just remembered is still sitting in the fridge…

…so tomorrow’s challenge may involve smoked salmon, streaky bacon, feta, sour cream, greek yoghurt, a tomato and an avocado. The rest of the pineapple – all fresh here no canned stuff – is destined for smoothies with banana, chia seed, coconut milk and tumeric…

DSCF9913


Cowspiracy

cowspiracy cover

My green journey started when Bubble asked me if I had seen Cowspiracy…seen it? I had only vaguely heard of it…but in the spirit of learning and breaking down preconceptions (of which, I may or may not have a few), I tracked down a copy, put my feet up one night with a cold root beer and watched…

…and watched…

…and watched…

…but this guy really just didn’t do it for me…nor did his story…

Cowspiracy presents like a ‘real crime’ expose…but the producer is so sure that everything is part of some great but unstated conspiracy but all his smoking guns are wet bus tickets. I think the point is is trying to make – bit never does – is that any sort of dairy farming is unsustainable.

That may or may not be true but his logic never gets to the point and the narrative wonders from one conspiratorial form of commercial agriculture to the next. He accuses Greenpeace and other organisations of being complicit in the conspiracy and then wonders why they don’t want to speak to him – which he then presents as further evidence of the conspiracy.

From my own research I get that feeding cattle wheat-based products has an effect on the environment. I get that this may lead to a profit-motivated clearing of forest for cropland. I get that extensive marketing drives over-consumption of meat products. But Cowspiracy didn’t tell me that. The only things I got from Cowspiracy was the clever title and an unpleasant sensation that ‘antis‘ like the producer of Cowspiracy do more harm than good to their cause and that crossing the road to avoid them is probably a good idea…

But I’m glad that Bubble recommended that I watch it. It made me think and so my own research and develop my own opinion. I love a good steak, dripping with garlic; I love my homemade burgers and nothing beats a good roast on a winter weekend. But, like most things, in moderation. the thing that really discouraged me from commercial meat products was the Hot Doc’s comments about the amount of hormones and other additives in the commercial food chain. So now, I aim for free range or organic chicken and when I do buy meat, it is an unprocessed as possible, no marinades, crumbing, etc…

So good things come from pseudo X-Files exposes like Cowspiracy…and from Cowspiracy, Bubble led me on to That Sugar Movie which is well-produced, logical and inspired me to think about me and sugar…


Eat Healthy With These 6 Rules – Sugar Soil

Eat Healthy With These 6 Rules

Source: Eat Healthy With These 6 Rules – Sugar Soil

I’m not normally one for lists. This one thought ticks off pretty closely against my green journey – now into its ninth month…

Eat when hungry

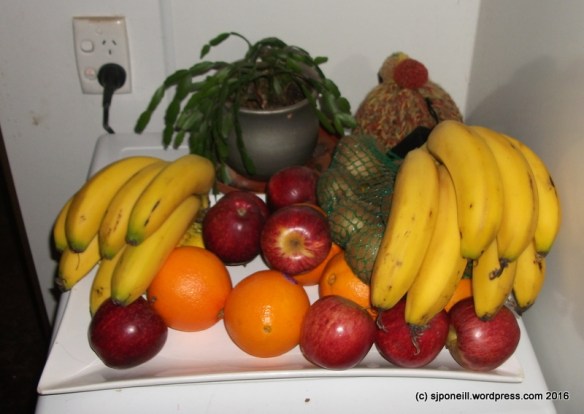
Absolutely!! I take two big smoothies to work with me each and work on these through the day; at home I keep a big bowl of fruit for snack attacks…

DSCF0438

Choose water over any other beverage

This goes hand in hand with ‘eat when hungry’…often a good slurp of good water, maybe with some infused raw fruit and/or herbs or spices is as good as something to eat. Taking a good slurp is still hard after many years conserving each and every sip of water that we had to carry but I’m working on it…

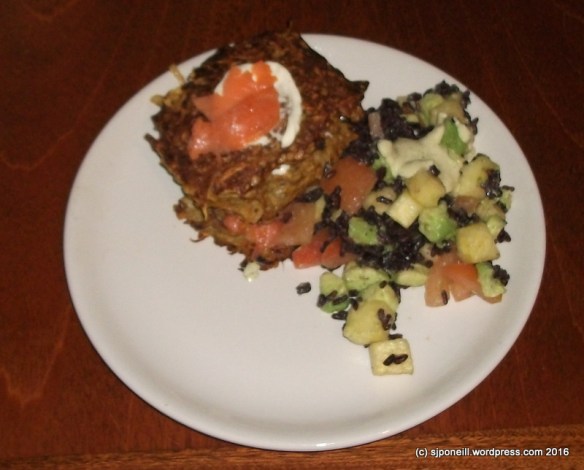
Let veges play the lead role

What is the key noun in your recipe title? If it’s a vegetable, or to a lesser degree, a fruit (fruity recipes are often desserts and so carry more temptative risk) then you are probably on the right track: I’m not anti-meat…you just don’t need it for a good meal…still a nice treat..

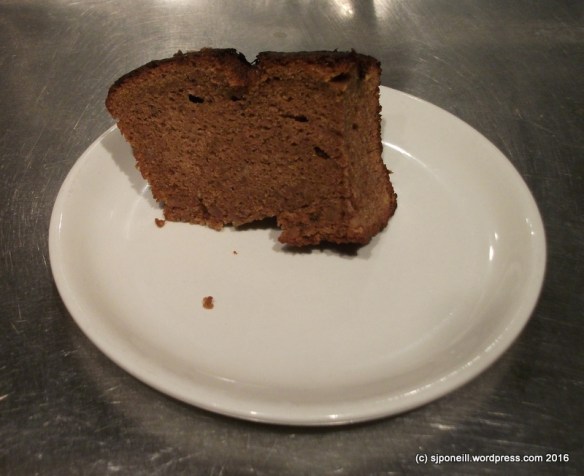
I’d just socked up on veges when the big fridge decided to time out and so I have had to focus on consuming a lot of my reserve stock as the big freezer is maxed out with the contents of the fridge’s freezer. To dispose of a pumpkin, I pureed the flesh, cleaned and dried the seeds for other projects, and fed the roasted skins to the Cujos…I’ve been using the puree in a range of dishes to reduce the quantity to something that will fit int he freezer…yes, I have been making the pumpkin and oatmeal muffins again, and will try pumpkin porridge in the morning. A particular success has been pumpkin chai latte (i’ll write the recipe up in a couple of days): no dairy, and only a half teaspoon of honey for sweetening…veges lead…

DSCF0239

Choose foods closest to their natural form

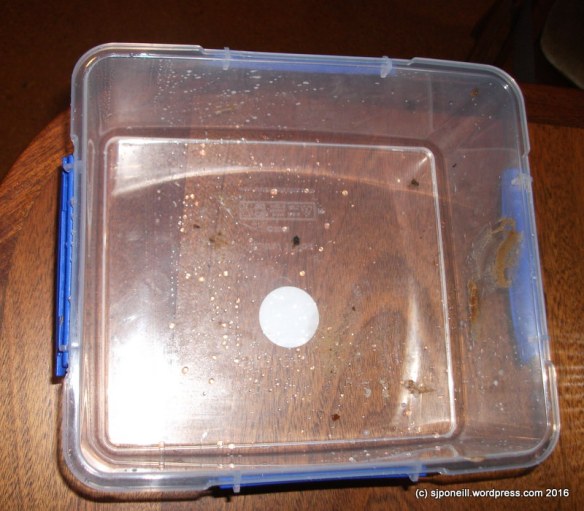
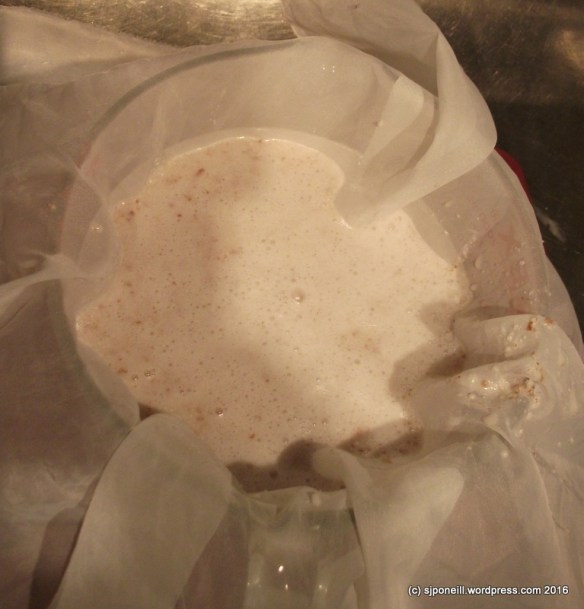
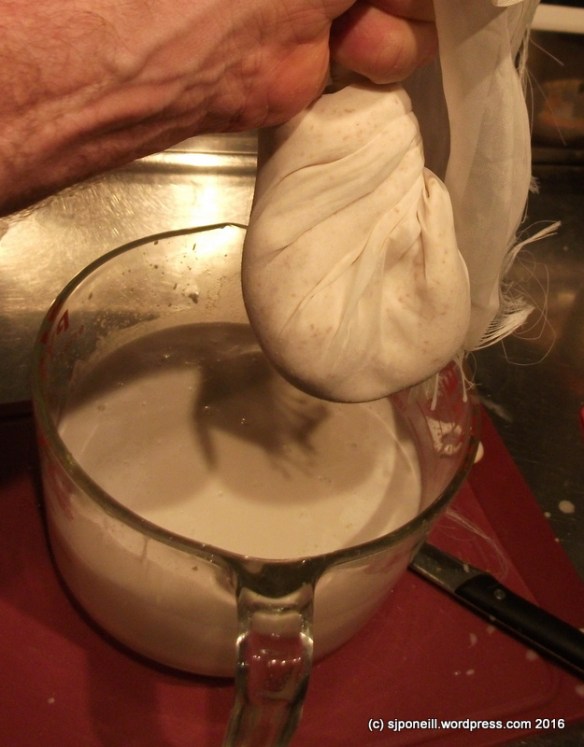
Eliminate the middle man. As much as possible work with the original raw material, avoid as many processing stages as you can, like, before it gets to you…be the master of your food’s destiny…it doesn’t take a big investment in money or time to be able to make yourself many of the items you buy prepackaged from the supermarket…almond and coconut milk would be one of the easiest and cheapest…DSCF0271.JPG…a bread maker will pay for itself in less than a year as well as giving you the flexibility of making what you want when you want it…buy the raw materials and see where the journey takes you…why buy a lemon/ginger/honey mix for winter coughs and colds when you can make a better one yourself…?

Portion Control

Lots of little, not just a few big is the way to think. In 1999, I was attached to a Malay Ranger unit near KL…the Officers Mess routine was six meals a day and some of the other Kiwis struggled with this. Many Asian countries work on this more little meal idea and it works really well…goes hand in hand with the concept of eat when hungry…in addition, these meals spaced through the day and into the evening were when the CO interacted with his officers: you had to be there anyway…lots of little…

Eat Healthy-ish

Ish, exactly…no regimented counting points or grams of sugar or mls of water consumed…eat within your own healthy guidelines…and enjoy falling off the wagon every once in a while – you’re allowed a break day, just not every day…for me, these are working:

Reduce or avoid whites…white bread, white flour, white sugar, white salt, etc…white ingredients generally have a the good stuff beaten out of them already…

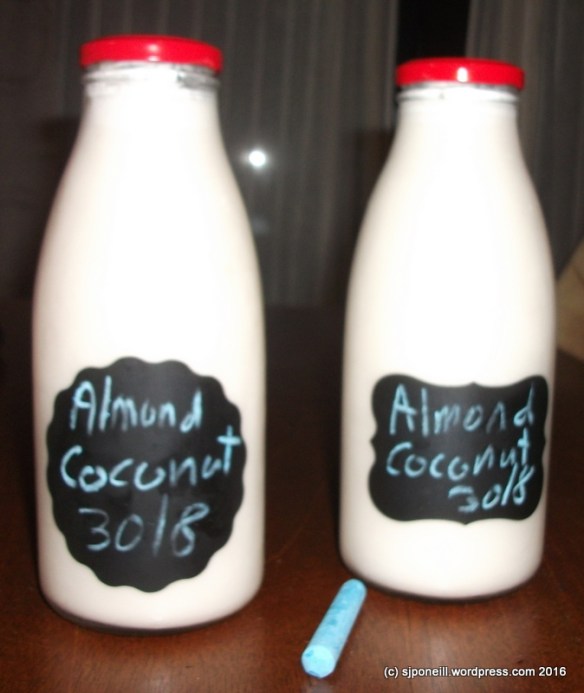
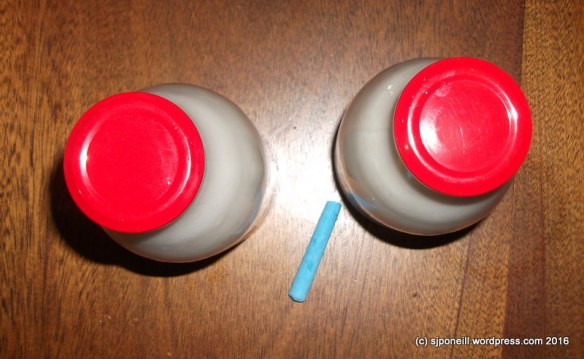
Reduce dairy…even though I can make dairy-free cheese which is good for on toast and pizzas etc, I still love real cheese in my chicken soup and it is still the best complement to cauliflower and broccoli on a chilly winter night…but…the only milk in the house in in small bottle in the freezer for those guests who prefer cow instead of a non-dairy alternative…so far, I have been able to use my homemade almond coconut milk as a successful substitute for dairy milk in baking and brews – it froths up well with a half teaspoon of protein powder added to it…

DSCF0434

Avoid anything in a wrapper labelled ‘healthy’…odds are it isn’t…

DSCF9504.JPG

Dairy-free, vege-led, slice it up and just snack when hungry…