Seeing corn in a new light…

…through a veil of tears…

DSCF9652

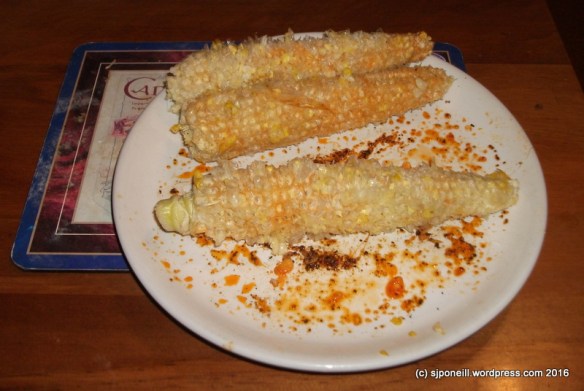
In Happy Endings a few weeks back, I described the origin of my green journey…further into that discussion, I offered a number of obstacles to my starting the journey…among these was “Without butter, how can I have corn on the cob with pepper?” The butter, of course is the enabler for the pepper to stick to the corn – you can’t beat home-cooked pepper corn!!

One of Bubble’s alternatives was drizzling basil oil (I didn’t know what it was either and had to look it up) over the corn in lieu of butter, or possibly even in lieu of the pepper…I’ve tried this and yep, it works however my key insights were that:

We need to load more basil flavour into the oil.

The taste gets stronger with the passage of time.

This tastes too damn good to only make up in 100ml batches…more to follow on this one as I (finally) have a surviving basil crop…

Bubble’s other offering for to-die-for corn on the cob was to use chilli oil, although she used a flash name for it, oilio picannte…I had to hunt for this: it’s not common in rural supermarkets and I had to get some when I was in the big smoke last week.

In my first outing with it, I thought it  quite mild and a tad disappointing…really? Trust Bubble, Bubble is always right is the rule…

Just substitute Bubble for Ivanoa and I think you get the message

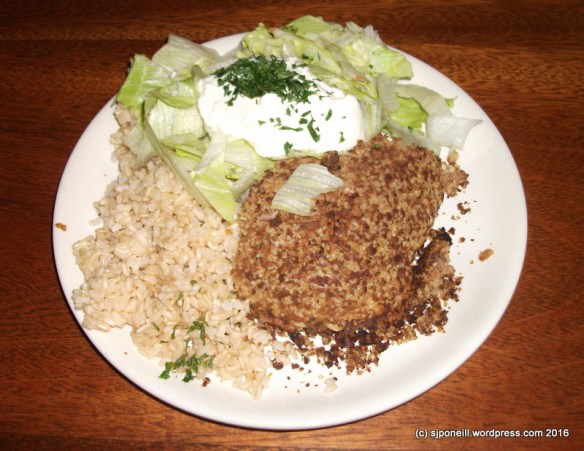
Corn on the cob is cheap as at the moment and I had some for dinner tonight, intending to revert (regress) back to good old butter (it’s not pure poison, surely?) and pepper like I always had. I relented at the last moment and poured a little chilli oil along each corn cob. Feeding my delusion that this was a  weak oil with barely any heat, I peppered them up as well…

Ha…!

I wonder now if the oil is heat-activated..? I sure didn’t need the pepper for warmth…when the chilli kicked in, I took a deep cooling (for about 3 milliseconds) breath, spreading the love through my sinuses and nasal cavities in the same spirit as snorting wasabi…as I used to warn the twins…hot…hot…hot…

Once the tears cleared, I realised…we don’t need no stinking butter…

DSCF9655

Yeah, baby…

A post in four courses – apres

We’re both coffee people so ending dinner with a coffee seemed natural…

But maybe something a little more special than just instant and hot water..? This was a by-product of our research into (yet to be tried) pumpkin spice latte waffles…simply (said if not prepared) coconut pumpkin spice latte…

I opted for this recipe from Half Baked Harvest because it seemed to offer a good blend of healthy themes and flavours…

Ingredients

For the coffee base, you need:

2 cups of coconut water

1/2 cup of freshly ground coffee grounds: yes, I know that sounds like a lot – it  is – but I think that the cold infusion is less effective as traditional coffee making processes plus I suspect that the coconut water is not as effective at absorbing the coffee flavour as water water…

For the pumpkin spice latte:

2 tablespoons pumpkin puree

1/2 teaspoon pumpkin pie spice (I made up a bigger batch substituting tablespoon for teaspoon in this list):

1 teaspoon ground cinnamon

1/4 teaspoon ground nutmeg

1/4 teaspoon ground ginger

1/8 teaspoon ground cloves

pinch of black pepper

2 tablespoons pure maple syrup

1 1/2 cups canned coconut milk

1/2 cup coconut water

2 tablespoons pure vanilla extract (yes, also a lot – this is a very sweet brew..!)

Making the components

Make the base by mixing the coconut water and coffee grounds together and letting sit overnight.

Filter the grounds out.

Combine all the latte ingredients in a small pan over the stove.

Simmer and stir until the mixture is steaming hot.

I made both components the night before but I think this mix would go best made fresh with no delays. My inner coffee lover cringes at reheating the coffee base in the microwave and the latte syrup does not like being frothed some much once it has cooled.

DSCF9638

I  used the steam frother on my coffee machine and that was OK but not ideal…partly because the reservoir is not that big and, by the time it heated, only pumped out enough steam to froth a coffee at a time…

DSCF9639

I got a light froth on an OK coffee…OK in that it was very smooth but not as strong tasting (of coffee) as I like…

DSCF9641

…which tasted OK but lacked texture and heat (I like hot coffee)

Insights

Next time I will make the coffee base in a pan over the stove and use it immediately. This is actually the alternate method in the recipe and I don’t know why they don’t simply do this anyway and avoid the whole reheating thing.

Using coconut water for the coffee base does seem to provide a smoother coffee but I will see how this goes. My gut feeling is that if I can master the syrup, this drink will be just as good with conventionally brewed coffee – note to self, overcome anxiety and master the coffee syphon…

I used the recommended quantity of pumpkin puree but apart from possibly adding to the texture of the latte syrup, did not appear to add much unique to the flavour – although it is up against some pretty intense competition. I think I will double this next time.

The coconut milk and maple syrup tend also to override the flavours of the pumpkin pie spice. It may be – quite likely, I think at the moment – this may become a coconut maple syrup latte if the pumpkin components can’t step up to the plate…

…or maybe dump the maple syrup – I don’t think this needs any MORE sweetening – in favour of the pumpkin flavours…

The blending option – over the whisk/stir strongly or steam approaches – that is mentioned as an alternative in the original recipe is probably the best for frothing a mix like this and that it how we will do it next time…

Like the dairy-free ice cream, this is probably more philosophically healthy than actually healthy…it is very sweet and one probably needs to plan some extra physical owrk to compensate

toy para rocket
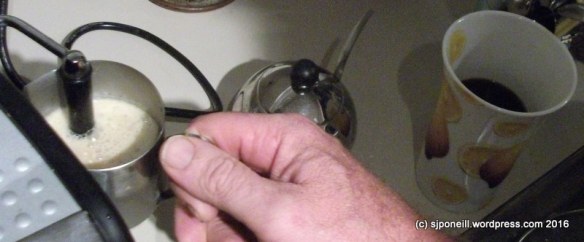
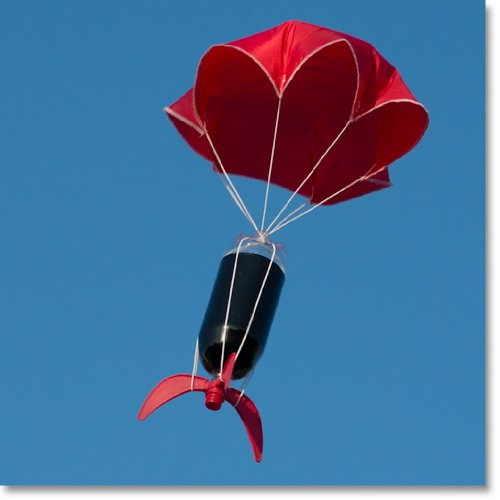
So…don’t get me wrong…this makes a nice coffee…I described its effect to a friend the next day as being like one of those toy rockets with a recovery parachute: the caffeine kicks you up to about a thousand feet then the sweetness kicks in and lowers you gently back down…time it right and you’ll float to the ground just as your head hits the pillow… as I did…slept like a baby…

A post in four courses – dessert

A simple dessert, keeping with the green journey theme…

Dairy-free coconut ice cream in a waffle cone…

This is the first ice cream I made ever and I worried that the dairy-free aspects might add undue complication to what appeared – from the reading – to be a complex process…I needn’t have worried: like so many other things the anticipation was way worse than the actual doing…I was so sure that this would end in total disaster that I didn’t bother taking any photos of the making…if I want to see disasters, I can always rerun Titanic

I made this according to this recipe which I found at The Kitchn There are lots of other ones around but this looked the simplest of those I found in my initial Google and simple is good…

What I used:

2  400ml cans full-fat coconut milk

1/2 cup honey, just ordinary old, common, garden-variety honey, nothing flash.

1/4 teaspoon salt

2 tablespoons corn flour

1 1/2 teaspoons vanilla extract

And this is what you do:

At least 24 hours before you plan to churn the ice cream, put the ice cream machine’s bowl in the freezer to freeze. This was the first time I had used my ice cream maker even though I bought it on the other side of winter…I never realised that the bowl had a liquid filling

Cans of coconut milk separate into a thick, creamy layer and a thin watery layer on the shelf. Before opening them, shake the cans of coconut milk thoroughly to incorporate the layers. If you forget – don’t ask how I know – you’ll need to give the can contents a vigorous stirring.

Measure 1/2 cup and set this aside.

Pour the remaining coconut milk into a saucepan.

Add the honey and salt to the coconut milk..

Warm the coconut milk on the stove over medium-low heat, stirring occasionally, until the sweetener has completely dissolved into the coconut milk.

Measure the cornstarch and add it to the reserved 1/2 cup coconut milk. Whisk thoroughly until the cornstarch is totally dissolved.

Add the cornstarch mixture into the warm coconut milk while whisking gently.

This is your ice cream base. Increase the heat to medium. Stirring occasionally, continue cooking the base until it has thickened enough to coat the back of a spoon, 6 to 8 minutes. Do not allow the base come to a boil.

Remove the base from heat and stir in the vanilla.

Pour the base into a shallow container. Let the base cool slightly on the counter so it’s not hot when you put it in the fridge.

Cover the container and refrigerate for at least 4 hours or for up to 3 days.

Remove the base from the fridge. It should be completely chilled and slightly pudding-like in texture. Pour the base into your ice cream machine and begin churning.

Churn the ice cream until it thickens considerably and is roughly the consistency of soft-serve ice cream.

Transfer to freezer container: Scrape the ice cream into your freezer container. I achieved the same by filling to the very topping and placing the lid on. Freeze for at least four hours to harden the ice cream.

DSCF9564-002

This mix does set quite hard – not icy, just hard. Let it warm a few minutes on the counter before scooping. This is a bit of a balancing act because once it starts to melt is keeps going quickly!! So far it seems to me best to let the ice cream contain sit on the bench for maybe 2-3 minutes and then serving it.

It doesn’t seem to roll quite as well as dairy ice cream and so, especially for cones, I find it is easier to use a dessert spoon to scoop the ice cream out and then pack into into the cone.

DSCF9650

Bottom line

Very nice, especially in a cone…reminiscent of rum and raisins without either actually in the ingredients

Would benefit from some lumpy bits in the mix…nuts, raisins, dried fruit…

Smaller batches would mean greater variety

“Philosophically’ healthy in that it doesn’t use globally unhealthy ingredients but is very sweet so eating this in lieu of ‘normal’ ice cream is unlikely to do anyone’s waist line any favours…

A post in four courses – main

For a healthy main, I selected what I call my Lebanese Lasagne…its real name is Lebanese Kibbeh but I call it a lasagne because it has a similar layered construction and it is easier to say in company without a lot of explanations…I got the  original recipe from this great little book, from the Paper Plus bargain table about ten years ago…

CCI28022016

The first few times I made it direct from the recipe but found it to be a tad dry so took to adding half a can of diced tomatoes over the filling to add some additional moisture. In all fairness, the original looks quite dry too so this is just me adjusting to fit my only preferences…and it has been so long since I have made this, I forgot the tomatoes…

Here’s what I used for this dinner…

For the base and topping

3/4 cup of bulgar wheat. This seems to hide in different parts of the supermarket, even between branches of the same chain so you may have to hunt for it.

 450 grams of quorn…I didn’t know what it was either but found it when I was looking for a vegetarian alternative to meat mince…it was easier to find in the Levin New World than bulgar wheat…it’s not cheap but was worth it for an experiment and I still have a little left over to try in something else…

1 large onion grated.

15 grams butter, melted

salt, pepper to flavour

For the filling

2 tablespoons of chili oil

1 onion finely chopped

1 tomato, finely chopped

250 grams of button mushrooms as an alternative to the mince in the original recipe

1/2 cup of pine nuts

1/2 teaspoon of allspice

For the dressing

200 ml of greek yoghurt

2-3 teaspoons of crushed garlic. I used the store-bought stuff in a jar as it was there and needed to consume it

2 tablespoons of chopped fresh mint. Actually I forgot this as i was too busy chatting to my guest as I was serving up…it’s not like we have a shortage of it here.

Other stuff

1 cup of brown rice. I have oodles of white rice but have been wanting to try brown rice for a while with an eventual intention of switching entirely to it from white rice…just need to find a good (cheap) supplier…

This dish is quick and easy to make, even with the non-meat variations. I made it up the previous day in case prep time on the day was limited due to unforeseen work commitments.

Heat the over to 190 degrees

DSCF9612

I wasn’t sure what I would find on opening the packets of quorn mince. It just looked and felt like cooked mince…a bit of an anti-climax really…here is is mixing in with the bulgar wheat and onion…

DSCF9611

The other main alternative to meat mince was good old button mushrooms…I got the recipe from the Thanks For The Food blog…like the quorn, it was amazingly simple and anticlimatic. As suggested in the recipe, I fried the diced mushroom in chilli oil before following the other steps…

DSCF9615

Once the mushroom was mincified, I added the pine nuts, diced onion and tomato, and the allspice. I added the diced tomato to add to the distinction in flavour and texture between the base and the filling – as above though, it wasn’t enough to offset the natural dryness of the recipe. I also meant to dice and add the remaining peppers from my stuffed pepper experimentation but this was also forgotten in the flow of conversation…

I also added a dash of salt and a goodly amount of ground pepper which gave the filling a nice and occasional tang…

DSCF9616

Add half the base layer to a greased baking dish, before adding the filling evenly over the base. If I had remembered the can of diced tomato, it would have gone over the filling.

DSCF9617

Smooth the remaining base over the filling.

DSCF9618

Baste the melted butter over the top. Next time – if I remember – I’d like to try a final topping of non-dairy herby cheese…

Place in the oven and switch to fan bake for 40-45 minutes, or until the topping is golden brown.

It’s now that I drop the rice into the steamer with a little salt. it takes about 40 minutes too as, perfect world, the lasagne and rice will be ready at the same time.

In the meantime, mix the crushed garlic, sour cream and mint together in a small serving dish. Ideally I think this should be done the night before to give the garlic and mint a better opportunity to battle it out with the sour cream flavour…

Slice up the lettuce.

DSCF9621

A cross-section after our two servings were plated…

DSCF9646

Plated ready to go…

A post in four courses – aperitif

A friend got onto a course north of here at short notice and said she’d drop in for tea and a catch up on her way home…she’s rather careful with her diet which put a line through some other menu options: a great reason though to explore further along the green journey

This ‘summer’, up on the Plateau anyway, we seem to have a three to five day cycle of summer(ish) weather followed by two to three days of not-so summerish weather…Wednesday was right on the cusp of the change: I planned on summery for the menu with a less-summery option in my back pocket…

Summer lasted the whole day so the Plan A aperitif was greenlighted…this was an easy one for my as it is what I have most nights when I get home, with something more substantial later in the evening…

DSCF9623

Smoothie group photo

The makings are all very simple and flexible: my staples are the ginger, flaxseed and coconut water: the natures of the juice, fruit and green may change depending on what is available at the time:

a tablespoon of flaxseed/linseed. This adds a nice texture to the smoothie and is apparently healthy as well. Bought a big bag for not much at Hardy’s in Taupo – keep it in the fridge.

200 mls of juice. I usually use the Keri Premium Spicy Tomato Juice but the pineapple juicy was on special so I bought a bunch of it – I suspect from the lack of floaties that it is more processed than I like so once it’s ALL gone, it’ll be back to spicy tomato juice until winter when bulk carrots are available. On occasion, I buy cheap fruit, juice it and freeze it until needed – just have to remember to take it out a few hours before smoothie time so it can thaw to a slushie-like consistency.

200 mls of coconut water. In the absence of this, just normal filtered water (no additives in our water) and I’ll also use normal water to top the unprocessed ingredients up to the Max line in the smoothie jar.

Half an apple, cored. I’m not actually sure that it achieves anything taking out the core as there doesn’t seem to be any difference to notice when I forget. It’s probably more important to remember to remove the little sticker from the outside…the same weight of pears, pineapple, or other juicy fruit also go well.

Half an orange, or a similar weight of mandarins, or tangelo. I quarter it, and cut off the peel, squeezing any remaining juice into the smoothie jar – a little peel left on never hurt anyone and I never worry about removing pips: it doesn’t hurt the flavour and the surgery wastes too much juice…

A thumb-size piece of fresh ginger. Dice this up into littler bits…I don’t worry about the skin or knobbly bits: they are get combined in the processor…

A bunch of spinach…or silverbeet, or cabbage, or other greens. I chop off the rooty bit and normally halve the length so it  fits better into the jar…

DSCF9626

Almost ready…

DSCF9627

Just about forgot the flaxseed…

DSCF9628 DSCF9629

Ready to go and gone…only needs about 30 seconds of processing…

DSCF9631

Ready to drink…although on this occasion, I decanted it out into a couple of glasses over an ice cube base…

Refreshing on a summer afternoon…

A tale of two peppers (Part one)

New World Taumarunui had bulk bags of capsicum for $4.98 last week – without really thinking about it – such a good deal, normally they are around $2 each – I grabbed a bag, with a vague vision of pizza toppings…that vague vision morphed into a notion of stuffed peppers and from there into dinner via the recipe here

It’s pretty simple – possibly too simple…

DSCF9588

Drop 250 grams of mince  into a pan- the recipe says beef mince and only 25 grams, but I used pork mince because I had some handy and increased it to 250 grams figuring the ’25’ was a typo…

DSCF9590

Cook until the mince in brown, breaking up any lump, and add a jar of bolognaise sauce – I used a jar of pasta sauce that someone had left here – I would make my own normally – and simmer until the liquid has evaporated off leaving a thick sauce…DSCF9587

Cut three peppers on half lengthways leaving the stalks: they don’t do anything useful but look good…

DSCF9595

Spoon the thickened sauce mix into each of the halved peppers and top with cheese – I had grated mozzarella available so used that – I think it would work better and provide an evener topping using slices of cheese…

DSCF9598

Bake at 180 degrees until the cheese is browned – I forgot to take a pic of the peppers as they came out of the oven – these ones have been in the fridge for a day and don’t look as good as when they were fresh baked…

DSCF9596

I served mine up with chunky air-fried kumara and potato wedges…tasted good but the sauce was still quite runny but very strong. I think that it needs more substance to be thicker…my next go-round will be based on this recipe which overcomes these shortcomings and also does it with red wine which cannot be a bad thing…

Happy Endings | The Daily Post

Tell us about something you’ve tried to quit. Did you go cold turkey, or for gradual change? Did it stick?

Source: Happy Endings | The Daily Post

Not so much quit as change for this one…generally I go for gradual change: hard hit cold turkey might give an immediate result but all too often the shock effect boomerangs and undoes the original good. Like gyming and other things, the trick is to make the change a habit, something so natural that you think when you don’t do it…

I’ve always eaten relatively healthily but there’s always room for improvement. Around Christmas, I was messenging with Bubble in the US, just chatting and this is where the seed was sown…

Me
Aaahh…nothing quite like coming down to the wafting aroma of fresh bread…

Bubble
Mmm bread
I caved and had some sprouted grain toast. Amazing

Me
Healthy bread is OK…just not that horrible commercial white stuff…
The more lumpy bits the better…
Fresh bread
Bubble
That looks amazing.

Me
…should have proper fresh yoghurt up and running…am doing it out of a packet now but want to get a proper culture up and running…

Bubble
I wanted to attempt to make my own coconut yoghurt, apparently you can do it by mixing in probiotics with coconut cream and incubating in the oven!

Me
Great minds!! Was coconut yoghurt (from a packet) that I made last night…very nice taste and texture…like coconut in cooking a lot…

Bubble
So is it dairy free the yogurt?
Don’t get me wrong I love dairy but I realised I was having a lot. Have you seen Cowspiracy? Very interesting

Me
Just had a look at the packet…milk power-based so ‘no’ but same here…looking to reduce not eliminate dairy…soy in a cuppa would be heresy!!!
Plus think I have mastered the bannoffee breakfast drink now and must have milk for that!!
Will have a look for Cowspiracy
It’s all about healthy choices in food and exercise plus it’s good to make things at home rather than rely on store-bought the whole time, even if it is some extra work and usually not as cheap…as above, you can’t beat waking up to the smell of fresh bread…

Bubble
Sometimes milk is needed (e.g. nice cafe latte) other times vanilla almond milk is great (smoothies, cereal and instant coffee!)

Working on the principle that a change is as good as a holiday, I picked up a litre of almond milk on my next foray into the supermarket. My first impressions were not confidence-inspiring it made the taste of everything way too nutty, even just a dollop in a coffee. Perseverance is the secret of success though and I bought some more on my next resupply – that first one must have just been a dodgy batch because that too-nutty taste didn’t recur…

More on Cowspiracy in a follow-on post but I should say that I’m not a member of the culinary tinfoil hat brigade…the attraction of this change for me was more the culinary challenges that come from reducing, maybe even removing, a major food group, dairy in this case from my diet…Great Goudas, Batman! How will I get by without cheese, ice cream and yoghurt…?

So six weeks into the experiment, I haven’t bought any milk since but needed a (small) bottle of cream for my Pour Some Sugar On Me post and have had a milkshake with lunch at Pihanga twice…so far so good…oh, yes, and I mozzarella’d up an otherwise healthy pizza too…

DSCF9504

To be continued….