‘No Cheese’ Cheese Cake #1

p61130-221053

Our brigade is a foodie brigade. A couple of weeks ago one of our firefighters returned from her (successful) recruit firefighter course.  Dessert was my contribution to her welcome back .

I’m more savoury that sweet and while I like traditional cheesecake, only in small amounts: the overall cream cheese effect is too heavy and cloying for my taste…I also like the idea of a base that is a little closer to the raw materials  than ground up biscuits…that’s just like a bit of a Green Journey principle…

Googling provide a range of opportunities for a less cheesy cheesecake but nothing quite what I was after in a single recipe so this is a combination from two sources: the base is the coconut macaroon crust from Two Peas and Their Pod, and the filling is from A Baking Girl.

The base

  • 2/3 cup sweetened condensed milk
  • 1 large egg white
  • 1 1/2 teaspoons vanilla
  • 1/8 teaspoon salt
  • 3 1/2 cups sweetened coconut

Preheat the oven to 170 degrees C.

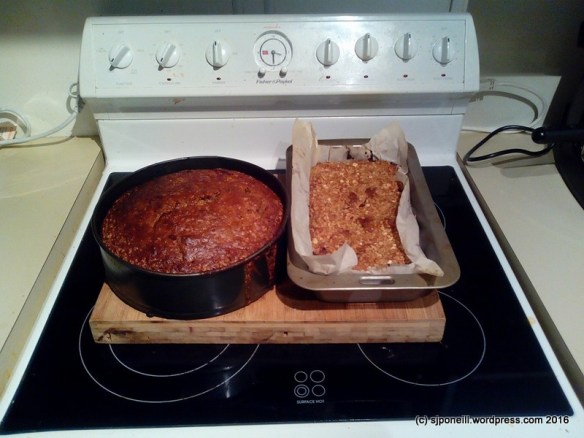
Spray a 10 inch springform pan with non-stick cooking spray. I heavily greased the tray, especially the base and still the base stuck quite a bit. Next I will line it with oven paper.

Stir together the sweetened condensed milk, egg white, vanilla extract, and salt until combined.

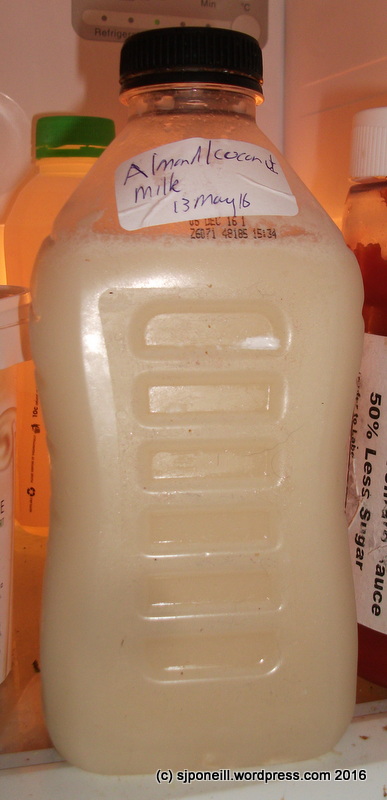
Add in the coconut and mix well. I bought a single bag of desiccated coconut – don’t normally have this in the pantry as I tend towards threaded and chunked coconut – but didn’t quite get the maths right and had to top this up with the meal leftover from my almond coconut milk.

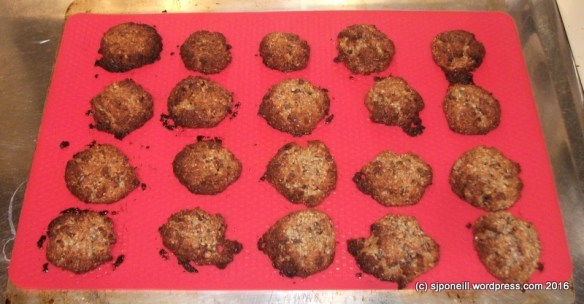
Press coconut mixture into prepared pie pan. I was aiming for about a 5mm thickness and this left about a cup of base mix leftover – I knocked this into the sink and that was the end of that but next time I would press any leftover base into cookies and bake alongside the cheesecake.

One of the recipes I looked at during my research phase recommended prebaking the base for 5 minutes before adding the filling so I did this.

The filling

  • 2 cups fat free plain Greek yogurt
  • 1/2 cup sugar (I used ‘bad’ white sugar to eat into the remaining stock in the pantry)
  • pinch of salt
  • 2 eggs
  • 1 vanilla bean (seeds scraped out) or 2 tsp vanilla extract
  • 1 tablespoon of cornstarch

Combine the eggs, sugar, yogurt and vanilla in a food processor. I think that this is where the leftover yolk from the base went as well.

Blend until smooth, then add the cornstarch and salt and blend again.

Pour the filling over the base and bake for 35 minutes.

When the cheesecake is done, it will still be jiggly in the centre but will have a “done” look to it. The edges of the cake will start to pull away from the sides of the pan. Make sure you don’t over-bake.

Let it cool then chill for 2-3 hours in the fridge before releasing the springform.

The topping

  • 1/2 cup of cream, beaten
  • 1 tablespoon of vanilla sugar (this worked to edge the edge off the cream taste but next time I would probably double it and/or add half a vanilla bean to add more of a flavour counterpoint to the filling and the base.

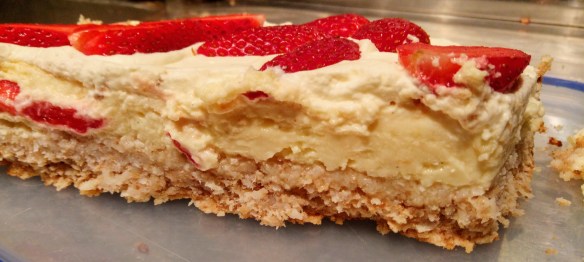
The filling set to a degree that the sliced strawberry topping would not stick to it. The sole purpose of the cream was to provide a layer for the strawberries to sink into slightly.

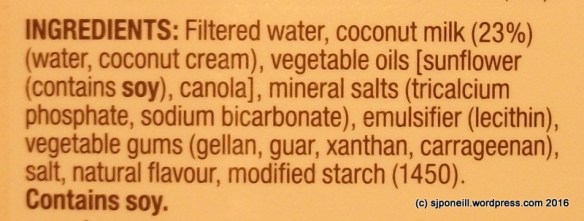
I’m keen to try this again with non-dairy yogurt to further de-dairy-ise it; it is wheat-free for those who have a genuine gluten issue; and, of course, to use an alternate sugar source once the last of the white is gone…

Pour encourager les autres

Baking cakes is not yet one of my fortes…I can do a mean beetroot chocolate cake but I’m not really a chocolatey type – note to self: try it without the chocolate or significantly reducing it – and so what’s the point…The banana peel cake was OK but fairly bland and had enough sugar in it to excite a kindergarten of pre-schoolers…

DSCF0225

Toasted

I’m getting right into coconut as a core ingredient and bought some coconut flour from Hardy’s in Taupo to try it out as an alternative to wheat flour and because I like trying new things our.

I searched for cool things to do with coconut flour and found this recipe for a coconut cake + coconut icing that was dairy- and processed sugar-free. I also liked that it was a Kiwi website as well so there was no need to translate any ingredients.

Ingredients

  • 1/3 cup coconut flour
  • 1/2 tsp baking soda
  • Pinch of salt
  • 1/2 cup virgin coconut oil
  • 1/3 cup liquid honey
  • 4 large free range eggs
  • 1 tsp vanilla
  • 1 Tbsp lemon juice
  • 1/2 cup desiccated coconut

Directions

  • Preheat oven 170C. Line and grease a 25cm springform cake tin.
  • In a small saucepan gently melt the coconut oil until liquid. Remove from the heat and whisk in the honey. Add the eggs one at a time whisking well between additions, then add the vanilla and lemon juice.
  • Combine the coconut flour, baking soda, salt and desiccated coconut in a large bowl. Pour over the egg mixture and whisk thoroughly to combine. The mixture will be quite wet but the coconut flour will absorb a lot of moisture as it bakes.
  • Pour into the tin and bake for 30-­35 minutes. Check with a skewer.
  • Remove from the tin and cool completely on a cake rack.

The cake itself was quite easy to make but came out a bit dry but I’ll take responsibility for that – got distracted with someone else and left it in the oven an extra five minutes or so. I also didn’t read into the comment about the coconut flour soaking up a lot of the liquid in the mix. I dallied before pouring it into the baking dish: it started to set in the bowl and didn’t lie smoothly in the dish.

It was the icing that destined this cake to be recycled. Because the top was so uneven, I caked the icing on thicker than was good, so thick that the taste and smooth texture of the icing overwhelmed the cake buried beneath. I should have delayed using this icing recipe until I had some more natural coconut i.e. other than the supermarket coconut that the recipe warned might be too dry and/or defatted. I couldn’t get it to breakdown into butter so I added more coconut oil which kinda worked – if it hadn’t been so thick.

I did try toasting the top of the iced cake to see if that lightened it up at all. It was a slight improvement and would have worked had the icing not been so damn thick.

DSCF0226

Ready to recycle

The cake and the icing are both largely coconut so, deeming this particular attempt sub-optimal, I recycled it through the blender into my growing stash of almond/coconut meal from my increasingly more frequent production of almond coconut milk. On the upside, I shared half the initial production with the taste team at the Ohakune I-Site, and catching up with them today – with some oatmeal pumpkin muffins, they were surprised that I’d thought this mix a failure.

That sub-optimal performance was largely down to me, and mainly in the icing. I bought some coconut chips today from the natural bulk shop in Taumarunui and will give this another go soon…

DSCF0241

Efficient use of energy: drying almond coconut meal (mixed with blended failed coconut cake) on top of the woodburner


Pure | The Daily Post

DSCF9555For this week’s challenge, share a photo of something pure — it can be a person, an object, or a moment.

Source: Pure | The Daily Post

Pure…strawberries…no additives…just naturally pure…sweet and tasty…

Thinking about pure got me on the thought path of purify and a chance to review when I am on my green journey. ‘They’ say that you need do something for six weeks before it becomes habit…I’m now six months in to the journey, taking its start from when I purged – in a most unhealthy manner – all the junk foods from the house. It’s now been six months since I had crisps/chips where I used to knock off a big bag at a time; and maybe three months since I last had a chocolate bar: those Whitaker’s L&P slabs are still just too good to walk away from entirely: who would ever have thought that anyone could successfully combine a chocolate bar and a fizzy drink to mindlessly well..?

The journey is pretty stable now: I’ve settled on the core elements and binned some the trial components. I never much liked the rice milk and so that’s gone and I don’t miss the coconut water even though there’s still a bottle in the pantry I need to polish off: for the most part, good old-fashioned filtered water does the trick – pure as well as it come straight off the roof. I’ve stocked up on bulk chia seed, black rice and sliced almonds from Happy and Healthy, and bulk coconut milk powder from Naturally Abundant. Fresh fruit and veges depend on what’s in season – with just a few out of season treats – bananas being the core staple for smoothies and sugar for baking.

I am becoming a creature of culinary habit – not necessarily a bad thing – starting with porridge and stewed apple mixed with a little coconut milk: the cocnut milk adds a great and unexpected sweet twist to the texture of the porridge and semi-tart apple. I follow this with a slab of homemade herby wholemeal toast with apple butter – a new addition to the pantry that is so tasty and simple, if time-consuming, to make; depending of my degree of personal organisation in the morning, toast may be consumed in the car on the way to work. My morning cuppa is evolving as well – it used to be simple Earl Grey with a little cow but now I am looking for a black tea that will blend well with the coconut milk that has replaced cow’s milk almost entirely now. I still keep some 250ml bottles of milk in the freezer for just in case visitors who still prefer something a little more conventional.

I think that I have finally mastered the coconut bannofee smoothie: the key was the coconut milk powder. I now dice a single banana (reduced from the original two) into the blender with a heaped teaspoon of Jed’s #5 coffee and a table spoon of coconut milk powder and zoom it all together for 30 seconds. It’s quick, it’s easy, it tastes great with competing hints of banana, coconut and coffee.

Lunch now is a bannofee smoothie and either a vege smoothie with cabbage or spinach, carrot (for its the ‘Kune carrot season), LSA or flaxseed, and water; or Jen’s pineapple, banana and tumeric smoothie mixed with a 50/50 combo of coconut milk (from the powder) and homemade almond coconut milk. Pre-assembling and freezing a couple of dozen smoothie bags – just add LAS and water – was a good move and, as I polish off the last of the first two batches, I run up some more – I just have to remember to take one out to thaw the night before…

If personal organisation in the morning trends towards zero, and I don’t the smoothies done, not too worry: the Pihanga Cafe in the side of the Chateau does a great and very filling kids menu (burger and chips, pasta, pizza or chicken tenders on a potato mash)for $8.00, $6.00 with a Whakapapa Village community card! Occasionally, I might supplement this with one or two apple oatmeal or almond coconut cookies – both very chewy and filling – or a couple of slices of my jalapeno or kumara bread – now that I have them sussed – toasted…

Dinner is where the variables come out – I am still slowly working to consume all the meat stockpiled in the big freezer. Items like chicken pieces that can be fried go into the air fryer with kumara and potato chips – just got given a big bag of spuds left over from teh ‘Kune Carrot Carnival so need to work on consuming these…watch this space for variations of potato soup themes. Other things that be can be diced or otherwise mixed in, go into one of my repertoire of stews and curries, to be eaten with rice – still currently white but switching to brown once the last of the white is finally gone. That’ll just leave a few small roasts to find something creative and healthy to do with…

So back to my ‘purify’ thought…yes, I think that I am slowly purifying my diet, reducing if not entirely eliminating processed foods and working more and more with the raw (literally) materials…I still get the munchies some evenings but an orange generally deals to these. I know there’s ice cream in the fridge and that I can make a dessert in a cup in minutes but I just can’t excite myself about that sort of food. Don’t panic though..!! I haven’t totally gone off either ice cream or dessert but I’m certainly not hanging out for or consuming either in anything like the quantities that I used to…watch this space for my crack at raindrop cake dessert with ice cream and a passion-fruit (or maybe tamarillo, I haven’t quite decided yet) coulis…

Is it actually achieving anything..? Well…yes…most definitely…although it’s getting into winter here and temperatures are dropping, I’m not eating more so my weight is holding around 87kg; I am sleeping less but way better, and I feel good…thanks Bubble...

Let them eat cake…

Impressed with the therapeutic effects of my Wednesday night bake-athon, I lined myself up for another the following night…

I’m much more a savoury (un- some may say…) character than a sweet…so I don’t cook a great amount of sweet items, even less so now that I am withdrawing from the attractions of sugar and processed foods…however, in the interests of science, and interested to see how some of my hoovered recipes might turn out…I dallied with the sweet side of the Force…

darth sugar.jpg

…and that’s where this image came from…googling for a header image took me to I Quit Sugar and then to some very (chocolatey) dark recipes…watch this space…

So anyways…baking cakes…I had two targets in sight…one driven by a preponderance of feijoas in the fridge (’tis the season) and the other by a ‘waste not’ recipe for banana peels that flicked across my radar on Facebook…

I found a good mix of feijoa recipes at the Waikato Times and intended (and still do) to make something from here but the absence of sour cream in the pantry for the chocolate feijoa cake nudged me towards this one from Melanie Khan. It’s pretty simple  and i made it as writ, less using three-quarters of a cup of raw sugar instead of the directed full cup of white processed sugar (white is bad).

It was quite solid when it came out of the oven: cooked but it didn’t rise as well as I think it was meant to…I’m attributing this to the moist mass of feijoa being disproportionate to the quantity of flour…it had a good strong feijoa flavour so next time – if there is one: so many feijoa recipes and only so much time – I might reduce the amount of fruit and/or reduce it before adding it to the mix so that it is least moist…

Baking 2 June 16

Banana peel cake on the left, spicy feijoa on the right

The main appeal of the banana peel cake was its ‘no waste’ theme – we go through a lot of bananas here on the Green Journey and the peels go directly into the compost to nourish future generations of food – and as we make more and more of our own food, an additional benefit is the reduction in waste, especially packaging for things like pre-packaged products like not-milk milks…so in for a penny…

Although punted around on Facebook, the actual recipe lives at Love Food Hate Waste which has some other interesting recipes for food items that may be approaching their final best by date…as we hit the Central Plateau carrot season (through til October), one that has a real appeal up here is the carrot cake cookies.

kune ecalir shop

The ‘Kune Carrot Shop

Fair warning though, even though it is great that people are publishing  recipes that promote using and not dumping food, these recipes are on the Dark side of healthy with a very high sugar component. I’d be looking at reducing some of that using maybe a couple of bananas perhaps..?

You do have to peel bananas for the banana peel cake…and, if necessary, can save peels in the freezer until you have enough…making sure that you allow time for them to thaw before blending them. I forgot and waiting to the peels to go from rigid to gooey is the main reason the spicy feijoa cake hit the oven first – normally I would do the more complex recipe first: just in case it all goes horribly wrong, at least, I already have something cooking…

Again, I made the recipe as writ with no major issues once I was able to get the skins mushed in the blender…one tip for young players would be to not tutu with the tensioning clip on the cake tin once the cake mix is in: very messy trying to refit the base and close the tension clip again…

DSCF0174

The cake rose nicely but I probably left it in a little long as it was a tad dry inside…tasted OK but you’d expect with the amount of sugar in it. I don’t think that the banana peels added anything that could not have been achieved using the normal part of the banana, or even a handful of caraway seeds or something similar…

The creamy substance around the edges is my attempt at a lemon icing and possibly evidence that you can’t believe everything that you read online. My second choice for a feijoa cake recipe was this Lemon Iced Feijoa Cake from the Chelsea site (which sole purpose is the promotion of sugar!) but I had no milk, forgetting that I now have a large bag of coconut milk powder for just this contingency, nudging me towards Door #3…

I did, however, like the sound of the lemon icing as a finishing touch for the banana peel cake, and made this as writ but there is simply too much fluid for the dry content and even after three days, the icing still hadn’t set and most of it drizzled off the sides and soaked into the base – which was not unpleasant…

This chealsea icing versus  not chelsea icing

Comparing the Chelsea recipe on the left with this lemon icing one from All Recipes, you can see that  it has only a quarter the dry content of the other one…an interesting experiment and one that I will file away from when I need a super-sweet lemon effect to soak into a target dessert…

Just for the record though, if I had made the banana peel cake as writ plus the lemon icing recipe on the right, the total sugar content would be 5 1/2 cups of sugar…HOLY MALLOLY!!!! My butterscotch pudding only has a half cup (reduced from a full cup in the original recipe) plus two tablespoons of syrup for the sauce and I thought that was sweet..!!

Not being overly-sweet oriented, I kept the lemonised half of the banana peel cake (all gone now! #sugarcraving ) and gave the other half and the feijoa cake, less a couple of taste-testing slices, to my flue-ey friend to maintain energy levels until a full recovery is in effect…

Almond Coconut Chocolate Chip Cookies

After successfully making my first batch of almond coconut milk,  I was left with about two cups of moist almond and coconut meal…what to do with it? Apparently there are many things that can be done with this by-product of DIY almond milk so I opted for the almond coconut chocolate chip cookies from Minimalist Baker and originally from Sprouted Kitchen’s book The Sprouted Kitchen: A Tastier Take on Whole Foods. I took a quick peek at the online recipe list at Sprouted Kitchen and I think that I will be paying them a few more visits…

So about 10-30 on Saturday night, between movies, I decided to have a crack at these cookies, not so much because I had the munchies – certainly nothing that an apple didn’t take care of – but just to see how they came out…I did modify the recipe around the meal that I had to hand but you can see the original on the link above…

What you need:

Two cups of ground almond coconut meal

A quarter cup of dark chocolate chips

Three tablespoons of coconut oil

One egg

A third of a cup of brown sugar

Half a teaspoon of baking powder

A quarter teaspoon of salt

Half a teaspoon of vanilla extract

I left out the half cup of coconut because I already had this blended in with the almond. One of the attractions of this recipe was that it called for the expenditure of dark chocolate chips: I have some that I bought for a chocolate bread puddings but found I much much preferred this with white chocolate so the Minimalist Baker recipe offered an opportunity to expend an item that had been sitting around the pantry for some time, unused…

What you do:

In a large mixing bowl, stir together almond meal, dark chocolate chips, baking powder, salt and sugar.

In a separate bowl, beat egg until uniform in colour and doubled in volume.

Whisk in the coconut oil and vanilla, then add to dry ingredients and mix until just combined.

Chill in the fridge for at least 30 minutes or even overnight.

Preheat oven to 190 C.

Shape dough into 1-inch balls, place on baking sheet with 1-1/2 inch space in between each. Press down slightly to flatten a bit.

DSCF0101

Ready to bake…

Bake until edges begin to brown, 7-10 minutes.

Remove from oven and let cool before serving.

Insights

Less some scorching around the edges where excess oil leaked from the cookies and didn’t like direct exposure to the heat of the oven, these first time cookies came out really well. They are firm although soft in the middle and very chewy due to the high content of almonds and coconut, undiluted by flour as in a ‘normal’ cookie.

These would be a great snack for a days walk in the Park.

Next time I will:

Warm the coconut oil so that it will, in its liquid form, blend better with the egg. I don’t think that chunky oil affects the outcome but it looks better and ensures an more even spread across the individual cookies on the tray.

Only use two spoons of coconut oil: the original recipe may be based on an assumption that the meal is dry however mine was still moist from the wringing process. As a result the cookies were quite moist and ‘bleed’ oil on to the baking tray in the oven where it scorched under the heat of the elements.

Reduce the heat by about 20 degrees to reduce any incidence of the coconut oil scorching and also to allow the cookies to bake through.

Plan on baking the cookies longer. The stated baking time in the recipe was only 7-10 minutes: 20-30 minutes was my experience. Aggravating this is the fact that, being of the male persuasion and not advantaged for multi-tasking, when they weren’t ready in the advertised 7-10 minutes, I started doing something else and kinda forgot about them for a while.

Dispense with the chocolate chips: the taste is lost between the flavour of the almonds and coconut. I may use them one time more just to expend them and then that’s it.

Leave the mix overnight in the fridge to gel. I’m not sure that it will make any difference and the recommended minimum 30 minutes worked out OK this time, but it may allow for a firmer cookie.

DSCF0102

Voila, albeit a little crispied around the edges

.

DIY Almond Coconut Milk

DSCF0098

As I’ve progressed along my green journey, I have started to become more discerning about my healthy alternatives.

One of the themes in Damon Gameau’s That Sugar Story/Movie (depending on whether you are reading the book or watching the movie) is that much of what is pitched at us as ‘healthy’ isn’t really. There are the obvious villains like sugars concealed in health bars and even in meats as I found with my little adventures with the pre-crumbed chicken cutlets from New World.

One learns to become quite discerning even amongst the apparently acceptable healthy alternatives. I’ve been quite happy with my change from dairy milk to almond or coconut milk (from the supermarket) but when I looked at the label recently (see above), it has just a few too many big words on the ingredients label for my liking…an alternative milk is not naturally the same colour or texture (something I know a lot about because optimum consistency for airbrush paints is that close to milk!) as real milk: that it is when poured from the carton is a marketing decision, not a natural process.

Something I like about opting for a more healthy lifestyle, apart from the obvious benefits, is that most alternatives are quite easy to prepare…yes, making your own almond milk will never attain the same level of convenience as dropping a few containers of milk into the shopping trolley and, yes, you do need to be just a little more organised in terms of ingredients and preparation…but neither the decision, its sustainment or the work are that difficult…

Locating a suitable recipe for DIY almond coconut milk – I’ve always been a sucker for coconut – Google is your friend and, after sifting through a dozen or so variations of the theme, I came back to this one from Ethical Foods. My driver for this journey is one of health more than philosophy and when I look at a recipe, I consider it more from a practical perspective. However, I did like that the author lists some pretty good reasons for having a crack at making your own alternate milk, especially the one about the packaging.

There’s not much waste here from the foil-lined cardboard containers that these products come in from the supermarket: the plastic cap gets cut out and goes into the rubbish and the container gets sliced up and goes into the landfill on the back lawn (just filling holes). Even the foil lining breaks down and any plastic liner that might survives works its way to the surface for collection and disposal (there’s not much of it). But why deal with the waste products at all if you don’t have to…?

I’m not so sure about the ‘advantage’ of DIY almond milk being “…beautifully creamy white…” because almond milk is not naturally white: look at the inside of an almond: at best, it’s an off-white…

This is so simple to make:

Place a cup of almonds and a cup of shredded coconut in the blender and run it up to the maximum speed for a couple of minutes.

Empty the ground product into a bowl and add a litre of water.

Cover the bowl and let it sit overnight.

The next day, pour the content of the bowl in some double layered cheesecloth and wring the heck out of it into a clean bowl, ideally one with a pouring lip.

Once you have wrung all the liquid from the meal, pour it into a sealable bottle and store it in the fridge for  use.

DSCF0100

Easy!

The jury seems to still be out on the shelf life for this ‘milk’ so just keep an eye on it…anything over a week is probably pushing it…

The only down side to DIYing your own almond milk is that it does cost more: probably about twice as much compared to the store-bought stuff in the cardboard cartons.A cup of almonds is about 200 grams (@around $4 per 100 grams at the supermarket) plus about $1.50 for the coconut. The water here is free, coming directly off the roof, through a filter system and then being filtered again in the kitchen: this last step is probably unnecessary but the filter is right there so why not use it?

Buying almonds, especially sliced almonds, in bulk will close the cost gap and I will also experiment with using less almonds: some recipes only call for 100 grams but I’m not sure how strong they would be. I am also going to try blending the almond and coconut with the water to see if that strengthens the flavour…

The finished product has both an aroma and a flavour that blend the almond and coconut together so taste-wise this is a winner…give it a go…

Edit 24 May 2016

I’m not so sure about the ‘advantage’ of DIY almond milk being “…beautifully creamy white…” because almond milk is not naturally white: look at the inside of an almond: at best, it’s an off-white…

I got this wrong because I didn’t read the instructions properly. On my second go round making my own almond coconut milk, I blended the almonds and coconut with the water before letting it sit for the day.

DSCF0133 DSCF0134

Not only did I get a fraction more milk, maybe another 100 mls but what I did get had a very (cow) milk-like texture and colour.Like the commercial variety it also separates in the fridge but reconstitutes with a quick shake. My version version deposited a lot of sediment at the bottom of the bottle and needed vigorous shaking to mix in and didn’t separates into layers like this. teh flavours are also a lot stronger on this second attempt.

So the secret to good homemade almond coconut milk is to blend the solids with the water…I’ve identified a good source of less expensive almonds so will be making this every few nights from now on. Savings in the kitchen budget to offset the cost of DIYing will come drop dropping rice milk and reducing coconut water to an occasional.

My Green Journey – one quarter in…

DSCF9811

A much healthier-looking top shelf

In Happy Endings, really a post about beginning than ending, I described the conversation that was the origin of my green journey. The theme of that particular WordPress challenge was “Tell us about something you’ve tried to quit. Did you go cold turkey, or for gradual change? Did it stick?

I was giving up an unhealthier way of eating and I am pleased to report at the end of the journey’s first quarter, it is working. It may well be working because many of the changes that I have made have been small in nature but large in effect.

Reduced caffeine

I used to churn through a half dozen or more cups of coffee a day. I’m now down to one coffee a day. True, it is the bannofee described here that fills a 700ml smoothie mug I only have one a day, the coffee component is just one normal cup of coffee, the remainder being two bananas and a cup of almond milk, usually unsweetened. So I’m saving in coffee consumption and I am sleeping way better – not as long now but the sleep I get is sooooo much better.

The only time when I will have a coffee that’s not from home is when I am with someone socially – that is really no change from pre-Journey – but I am more likely to consider, if the option is available, a non-diary option…or I might just say “Starbucks, do your worst…” the nearest Starbucks is at least two hours driving from here so it’s not a big risk…

Reduced dairy

I’ve dropped my milk intake right back. It would be down to zero but I had a few litres, quite a few litres, of milk stored in the freezer that I am disposing of the traditional way. Once that is gone, the only cow milk, I’ll have here will be frozen in small bottles, about 250ml each, for cooking and any other circumstance where an alternate milk type won’t cut it. Those bottles will be the smoothie bottles above: they were reduced to $1.99 and, even full, were cheaper than any empty bottle the same size that I could find. I could have done the same with cream bottles but disposing of the original contents may have been defeating the purpose.

I’ve also got a few kilograms of cheese in the freezer and am slower disposing of that in the traditional manner. I am keeping a small quantity of mozzarella and parmesan around as I have yet to identify a suitably tasty non-dairy substitute for these specialist cheeses.One of my original objections in Happy Endings was that there was no life without cheese but I did find and make with relative ease a non-dairy cheese recipe that not only met the requirement but which is easier and less messy to make than dairy cheese (note to self: write up and share notes from non-dairy cheese experiment).

Cream remains a necessary staple for desserts although my sugar not-quite-craving has reduced substantially and so thus has the numbers of desserts prepared.  Beyond an occasional (less than once a week) non-dairy ice cream in a cone, I hardly ever have dessert now unless I am entertaining (well, I am always entertaining: what I mean is when we have guests for dinner). But you cannot have butterscotch pudding or brandy cream on waffles without real cream from a real cow.

DSCF9528

I didn’t notice any real change when I swapped almond milk for cow milk but I definitely felt slower and heavier as soon as I went back to cow milk and dairy cheese. I don’t need much more incentive than that to stay my healthy course so far as dairy is concerned.I used to have an off-the-shelf iced coffee with my emergency breakfast i.e. those mornings when coordination and organisation are sub-optimal,  from the garage in National Park but it made me feel the same way so I’ve dropped that as well.

I mainly use almond milk in cups of tea and coffee and in my pretty-much-daily bannofees; and rice milk for bulk applications like on my breakfast muesli. The rice milk is cheaper than the almond milk and useful when the main purpose of the ‘milk’ is to soak. Drinks taste slightly different with almond milk, not better or worse, just different, and I notice that the original taste of the drink remains more distinct than with cow milk. After an awesome coconut coffee at Eat in Ohakune a couple of weeks ago, I am going to try using coconut milk for those (now) rare occasions, mainly when we have guests, that I have a normal coffee, like, with no bananas. After my pretty-much successful pumpkin spice latte, I am confident that I can froth up coconut milk much the same way as normal milk…

DSCF9641

I had more to say on this than I thought…to be continued…

Waffling away…

At the end of this quest, my question really was “What is a waffle?

This is not, apparently, as simple as it seems…this started as a simple chat about breakfasts…this recipe was one that I found at Minimalist Baker; it sounded pretty delish…how complex could waffles be…? Really..?

It turns out that waffles live in a complex world indeed, with many versions and variations. It amazes me, that for all my time working in Brussels, I never once tried a waffle from even one of the dozens of waffle vendors I would walk by every day…

If waffles are meant to be light and crispy, this recipe doesn’t deliver that: these waffles are heavy and chewy but not unpleasant, more so when they are primarily a delivery vehicle for the toppings…

Like I care but this is a vegan recipe (less the cream at the end) I’m interested to see how these alternate recipes work especially replacements for staples like eggs.

Ingredients

  • 1 flax egg (http://minimalistbaker.com/how-to-make-a-flax-egg/ )
  • 1/4 cup pumpkin puree
  • 1/4 cup brown sugar
  • 1 Tbsp melted coconut oil
  • 1 tsp baking powder
  • 1 tsp pumpkin pie spice:
    • 1 teaspoon ground cinnamon
    • 1/4 teaspoon ground nutmeg
    • 1/4 teaspoon ground ginger
    • 1/8 teaspoon ground cloves
    • Directions
    • In a small bowl, mix together cinnamon, nutmeg, ginger and cloves. Store in an airtight container.
  • 1/2 cup unsweetened almond milk
  • 1/3 cup very strong brewed coffee
  • 1 1/4 cups spelt or whole wheat pastry flour (I just used normal flour – this alternate stuff only goes so far)

Instructions

  • Make a strong coffee mix – I used a teaspoon of Jed’s #5 in a 1/3 of a cup of water.
  • Prepare the flax egg by combining water and flaxseed in a large bowl and letting it rest for 5 minutes.
DSCF9726

Flax ‘egg’ and and strong coffee mix

  • Add the pumpkin puree, coconut oil, brown sugar, baking powder, and pumpkin pie spice and whisk together.
  • Add the almond milk and coffee and stir once more.

DSCF9741

  • Lastly add flour and stir until just combined. Let the batter rest for 5 minutes while preheating your waffle iron.
  • Once preheated, spoon about 1/2 cup of the batter onto the centre of the iron and cook according to your machine’s instructions.

DSCF9733

  • Once done, remove and place on cooling rack to let steam roll off and crisp up a bit.

I keep the toppings simple:

  • Original maple syrup – the real stuff not the maple-flavoured stuff you waste on the kids.
  • Brandy cream – about 100ml of cream with a nip of brandy, beaten til it’s stiff.
  • Four berry coulis – three large strawberries, and a small handful or blueberries, blackberries and raspberries, blended to a cream.

DSCF9735

Insights

I need to review my waffling technique – my waffles kept splitting when i opened the lid – I don’t think the ;light on the waffle iron really doesn’t anything useful – it just cycles randomly between red and green.

One nip of brandy for 100mls of cream isn’t enough – I could taste the brandy but it was beaten up by the maple syrup and berry flavours.

I’m not sure if the pumpkin puree actually does anything other than add weight. I am getting a bit dubious about this pumpkin puree thing because it didn’t add much to the pumpkin spice latte we had with dinner a couple of weeks ago

On the other hand, even a teaspoon of pumpkin pie spice adds a delightful hint of spice the weaves itself in and around the more domineering toppings.

The coffee adds a real kick!! These are definitely waffles for breakfast as they hit you right in the motivator!!

The bitter-sweet of the berry coulis worked really well with the cream, despite the weak brandy flavour, but a tad of sugar in the cream would not have gone astray…

The flax egg seems to have done the business in lieu of a conventional egg – the only way I can really tell is to remake the recipe using a real egg…which I may do…one day…


How I got muffins for the next few days…

DSCF9678
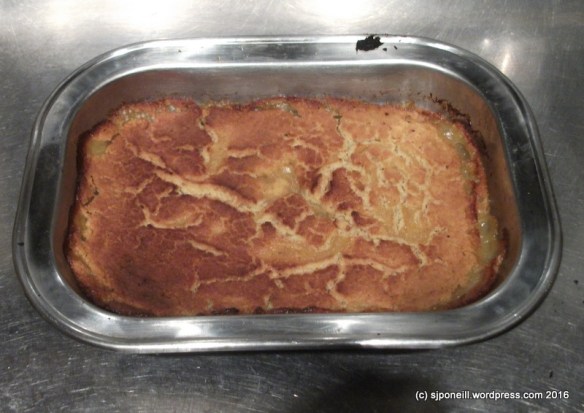
Having people around for afternoon tea means two things: tidy the house and sort afternoon tea…here, it’s not quite so simple as just popping down to the eclair shop for some ‘clairs and lamingtons; more so when the message comes through “…on our way, just leaving Whakapapa now…” and I’ve got nothing ready but an idea…

Speed cooking is, for me, analogous to speed dating: just not something I do…I like a more deliberate planned kitchen experience…but not today…it normally takes me about 15 minutes to drive from home to Whakapapa so time was the one ingredient I was short off…I had selected a good Kiwi recipe the night before and dug the muffin tray out of the back pantry but that was it in terms of preparation…

I am quite chuffed that I managed to get it all together and into the oven before my guests arrived:

What I used:

  • 125g Melted Butter
  • 1 Cup of Sugar
  • 1 Egg
  • 1 t Baking Soda
  • 3 T warm milk
  • 2 Mashed Bananas
  • 1 1/2 Cups of Flour
  • 1 1/2 t Baking Powder
  • 1 – 2 Cups of Blueberries

How I used it:

Heat the oven to 180 degrees.

Mix the butter and sugar together.

Next time remember to add the egg – just realised that I forgot to add this: not quite so chuffed then…

Dissolve the baking soda into the milk and mix in to the rest.

Add the bananas. I used frozen bananas that I had remembered to take out of the freezer earlier to thaw out. Today’s lesson is that you can squeeze the banana – in toothpaste fashion – from the skin by cutting the stalk off and squeezing…way less messy…I mashed them as I blended them into the mix but this would have been better if I had mashed them, THEN added them – didn’t seem to make a lot of difference to the final product though…

Blend in the flour and baking powder.

Mix in the blueberries – I used about a cup and a half – using frozen ones means you don’t have to be so gentle with them plus I am saving our fresh ones for breakfast each morning…

I used a folded up paper towel to swab out the container that I had melted the butter in and quickly greased up the muffin tray. The tray seats sixteen but my mix only lasted for a dozen…

Place the tray in the oven and hit the fan bake.

Keep them cooking until a skewer comes out cleanly…

Now the bit I really mussed up: let them sit in the tray after you take it out of the oven until they have cooled down and ‘set’…I tried to remove them while they were still warm and it was just disintogram time…

DSCF9675
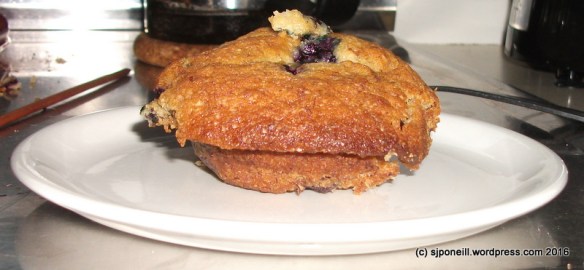
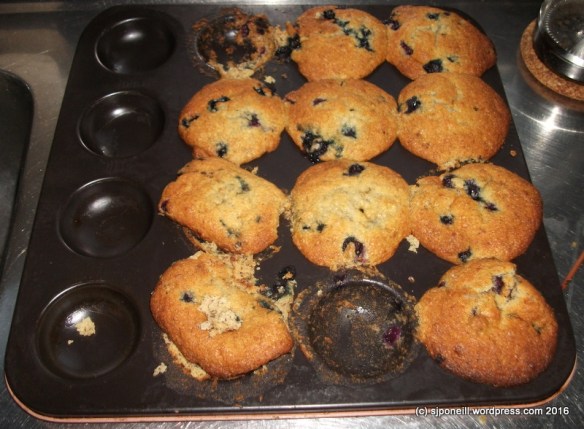
I meant to come back to them once them had cooled but once we’d had a bit of a show round the property and an abortive attempt to walk down to the stream, and got into conversating, I forgot about them til latter…so muffins for the next few days…

My plan was to serve them simply with just butter – yes, “…pure poison…”, I know…but am keen to suss out some other ideas…DSCF9679

Insights

Remember to add the egg next time – although they seem to have come out OK regardless…

Let the muffins cool before trying to remove them from the tray.

Get a new muffin tray: this one came with the house and has seen better and more non-stick days, even when greased…time for retirement and replacement…

‘Toothpasting’ thawed bananas works well.

Frozen blueberries are easier to mix in…

The amount of sugar could be reduced and I’m wondering if the milk could be replaced by an alternative non-cow milk..?

They taste good with a crunchy crust that most likely comes from the sugar…I was worried that I would over-mix the ingredients and end up with a rubbery texture – all the muffin recipes seem to warn about this –  but nope, all good…

Definitely a keeper recipe and one I will try again just as soon as all the current muffins are consumed and I have a new muffin tray…


A post in four courses – dessert

A simple dessert, keeping with the green journey theme…

Dairy-free coconut ice cream in a waffle cone…

This is the first ice cream I made ever and I worried that the dairy-free aspects might add undue complication to what appeared – from the reading – to be a complex process…I needn’t have worried: like so many other things the anticipation was way worse than the actual doing…I was so sure that this would end in total disaster that I didn’t bother taking any photos of the making…if I want to see disasters, I can always rerun Titanic

I made this according to this recipe which I found at The Kitchn There are lots of other ones around but this looked the simplest of those I found in my initial Google and simple is good…

What I used:

2  400ml cans full-fat coconut milk

1/2 cup honey, just ordinary old, common, garden-variety honey, nothing flash.

1/4 teaspoon salt

2 tablespoons corn flour

1 1/2 teaspoons vanilla extract

And this is what you do:

At least 24 hours before you plan to churn the ice cream, put the ice cream machine’s bowl in the freezer to freeze. This was the first time I had used my ice cream maker even though I bought it on the other side of winter…I never realised that the bowl had a liquid filling

Cans of coconut milk separate into a thick, creamy layer and a thin watery layer on the shelf. Before opening them, shake the cans of coconut milk thoroughly to incorporate the layers. If you forget – don’t ask how I know – you’ll need to give the can contents a vigorous stirring.

Measure 1/2 cup and set this aside.

Pour the remaining coconut milk into a saucepan.

Add the honey and salt to the coconut milk..

Warm the coconut milk on the stove over medium-low heat, stirring occasionally, until the sweetener has completely dissolved into the coconut milk.

Measure the cornstarch and add it to the reserved 1/2 cup coconut milk. Whisk thoroughly until the cornstarch is totally dissolved.

Add the cornstarch mixture into the warm coconut milk while whisking gently.

This is your ice cream base. Increase the heat to medium. Stirring occasionally, continue cooking the base until it has thickened enough to coat the back of a spoon, 6 to 8 minutes. Do not allow the base come to a boil.

Remove the base from heat and stir in the vanilla.

Pour the base into a shallow container. Let the base cool slightly on the counter so it’s not hot when you put it in the fridge.

Cover the container and refrigerate for at least 4 hours or for up to 3 days.

Remove the base from the fridge. It should be completely chilled and slightly pudding-like in texture. Pour the base into your ice cream machine and begin churning.

Churn the ice cream until it thickens considerably and is roughly the consistency of soft-serve ice cream.

Transfer to freezer container: Scrape the ice cream into your freezer container. I achieved the same by filling to the very topping and placing the lid on. Freeze for at least four hours to harden the ice cream.

DSCF9564-002

This mix does set quite hard – not icy, just hard. Let it warm a few minutes on the counter before scooping. This is a bit of a balancing act because once it starts to melt is keeps going quickly!! So far it seems to me best to let the ice cream contain sit on the bench for maybe 2-3 minutes and then serving it.

It doesn’t seem to roll quite as well as dairy ice cream and so, especially for cones, I find it is easier to use a dessert spoon to scoop the ice cream out and then pack into into the cone.

DSCF9650

Bottom line

Very nice, especially in a cone…reminiscent of rum and raisins without either actually in the ingredients

Would benefit from some lumpy bits in the mix…nuts, raisins, dried fruit…

Smaller batches would mean greater variety

“Philosophically’ healthy in that it doesn’t use globally unhealthy ingredients but is very sweet so eating this in lieu of ‘normal’ ice cream is unlikely to do anyone’s waist line any favours…